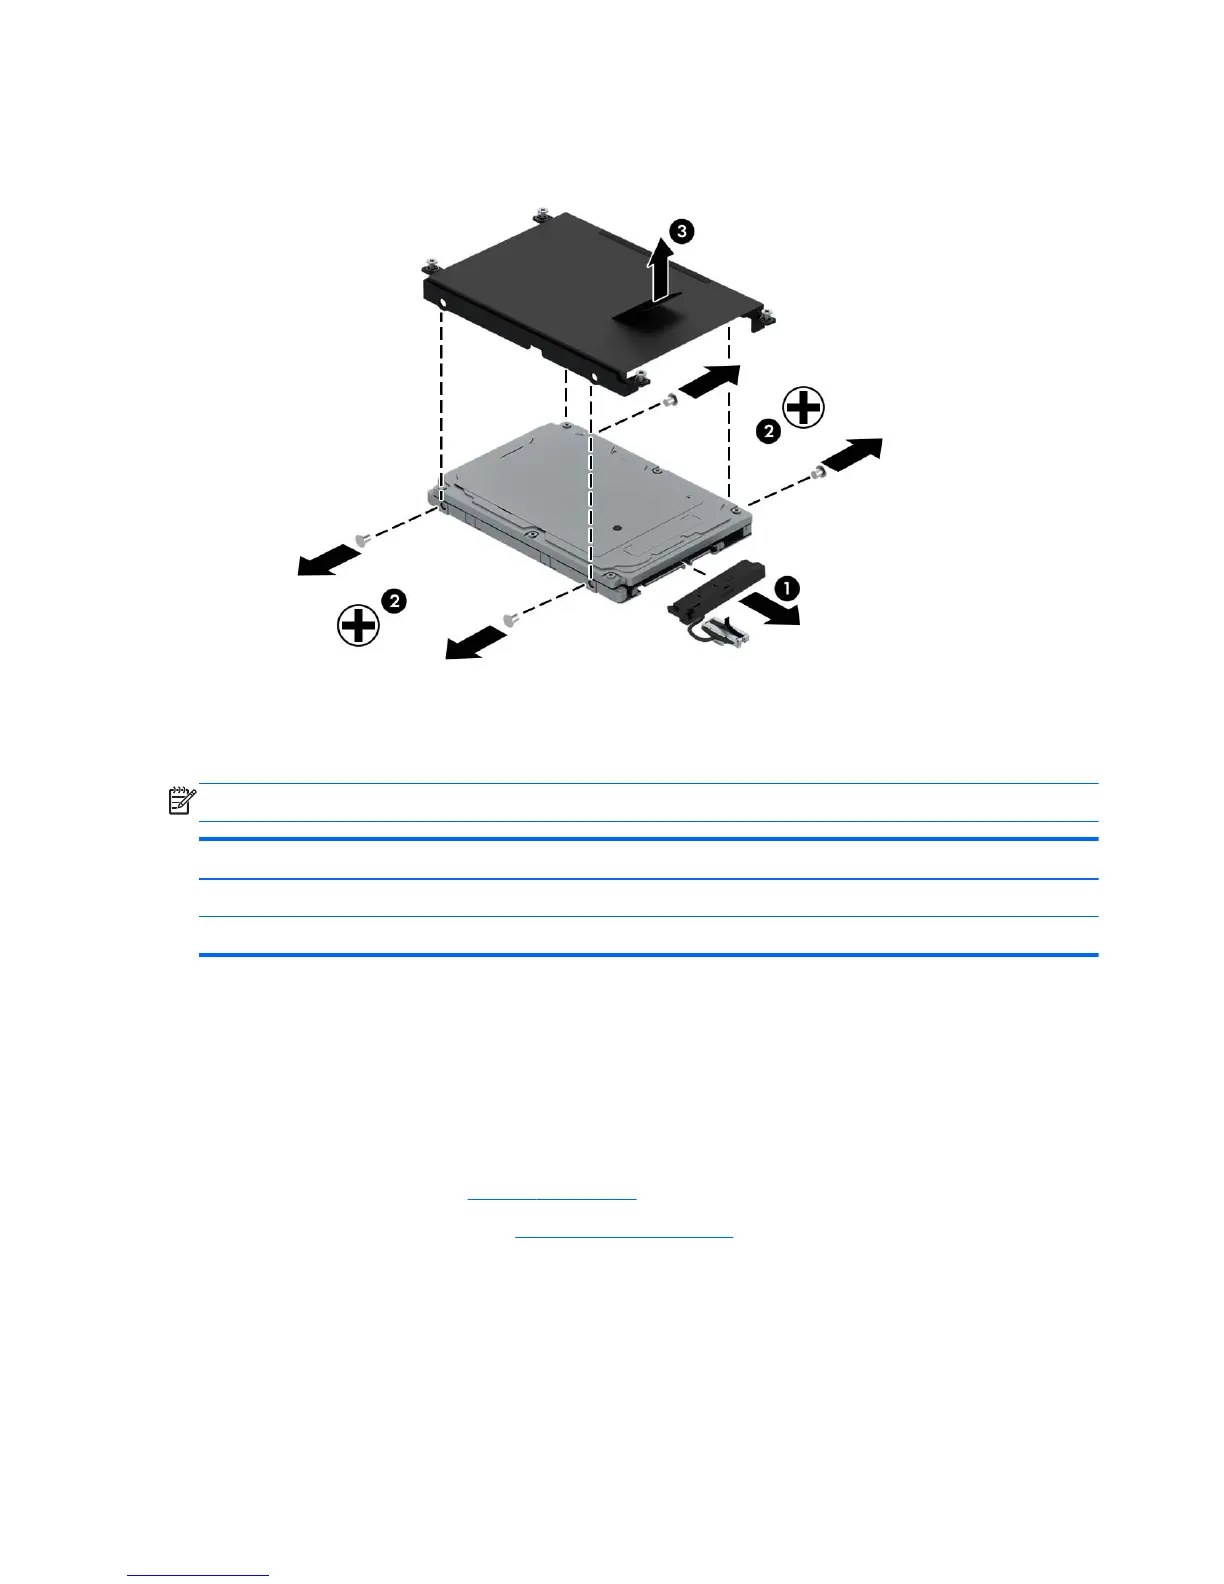
c. Remove the bracket (3) from the hard drive.
Reverse this procedure to install the hard drive.
Optical drive
NOTE: The optical drive spare part kit includes a bezel and bracket.
Description Spare part number
DVD-ROM drive (includes bezel bracket and screw) 744821-001
Optical drive weight saver (included with Plastics Kit, spare part number 738402-001)
Before removing the optical drive, follow these steps:
1. Turn off the computer. If you are unsure whether the computer is off or in Hibernation, turn the
computer on, and then shut it down through the operating system.
2. Disconnect the power from the computer by unplugging the power cord from the computer.
3. Disconnect all external devices from the computer.
4. Remove the battery (see
Battery on page 32).
5. Remove the service door (see
Service door on page 33).
Remove the optical drive:
1. Position the computer upside down with the left side toward you.
2. Loosen the captive screw (1) that secures the optical drive to the computer.
3. Insert a thin tool into the optical drive tab access (2) and press the tab to the left to release the
optical drive or weight saver from the computer.
36 Chapter 5 Removal and replacement procedures for Customer Self-Repair parts