Hardware Setup
Getting Started 1–7
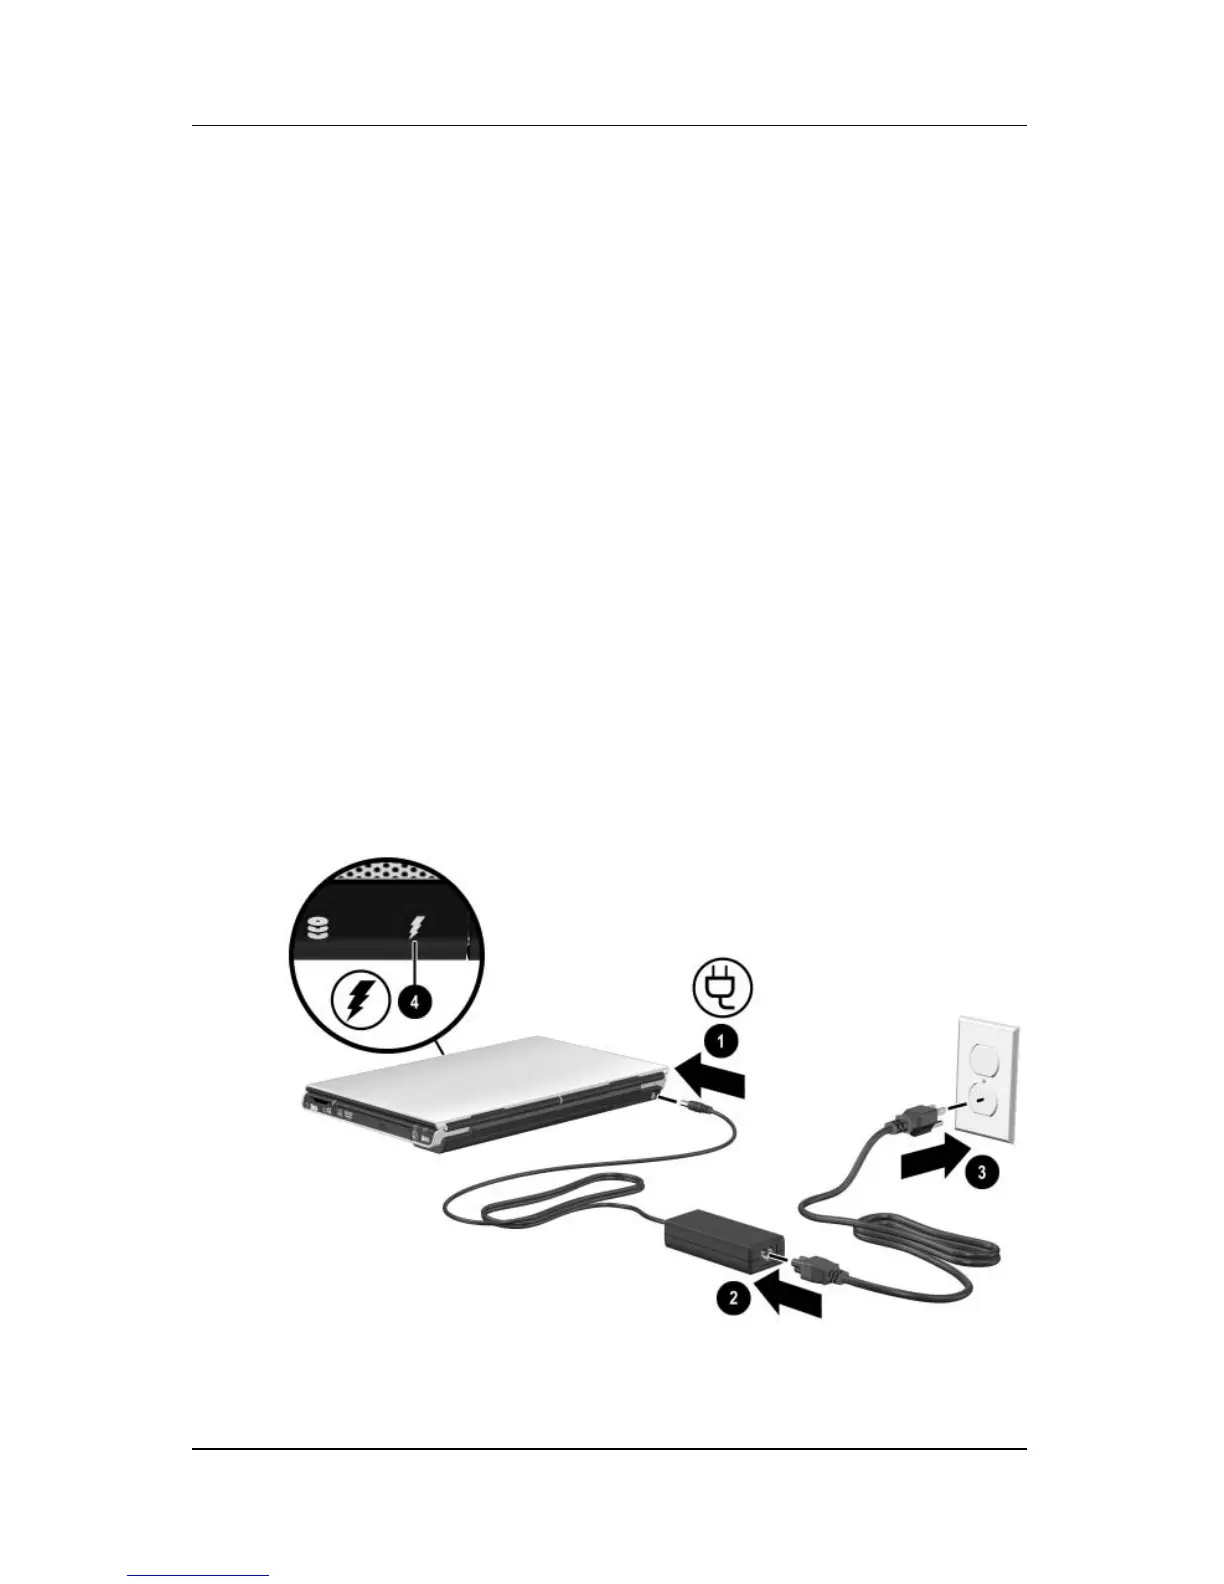
Step 4: Connect the Notebook to
External Power
To connect the notebook to external AC power:
1. Plug the AC adapter cable into the power connector 1.
(The
power connector is on the rear of the notebook.)
2. Plug the power cord into the AC adapter 2, and then into
an
AC outlet 3.
When the notebook receives AC power, the battery pack begins
to
charge and the battery light 4 (on the front of the notebook)
is
turned on. When the battery pack is fully charged, the battery
light is turned off.
It is recommended that you leave the notebook connected to
external power until the battery pack is fully charged and the
battery light is turned off. (A partially charged new battery pack
can run the notebook after software setup is complete, but battery
charge displays will not be accurate until the new battery pack has
been fully charged.)
(Power cords and electrical outlets vary in appearance by region
and country.)
 Loading...