EasyManuals Logo

HP ProBook 4525s - Notebook PC Reference Guide

HP ProBook 4525s - Notebook PC
95 pages
To Next Page IconTo Next Page
To Previous Page IconTo Previous Page
Page #60 background imageLoading...
Page #60 background image
3. Gently slide the disc into the slot load optical drive.
Removing an optical disc
Tray load
There are 2 ways to remove a disc, depending on whether the disc tray opens normally or not.
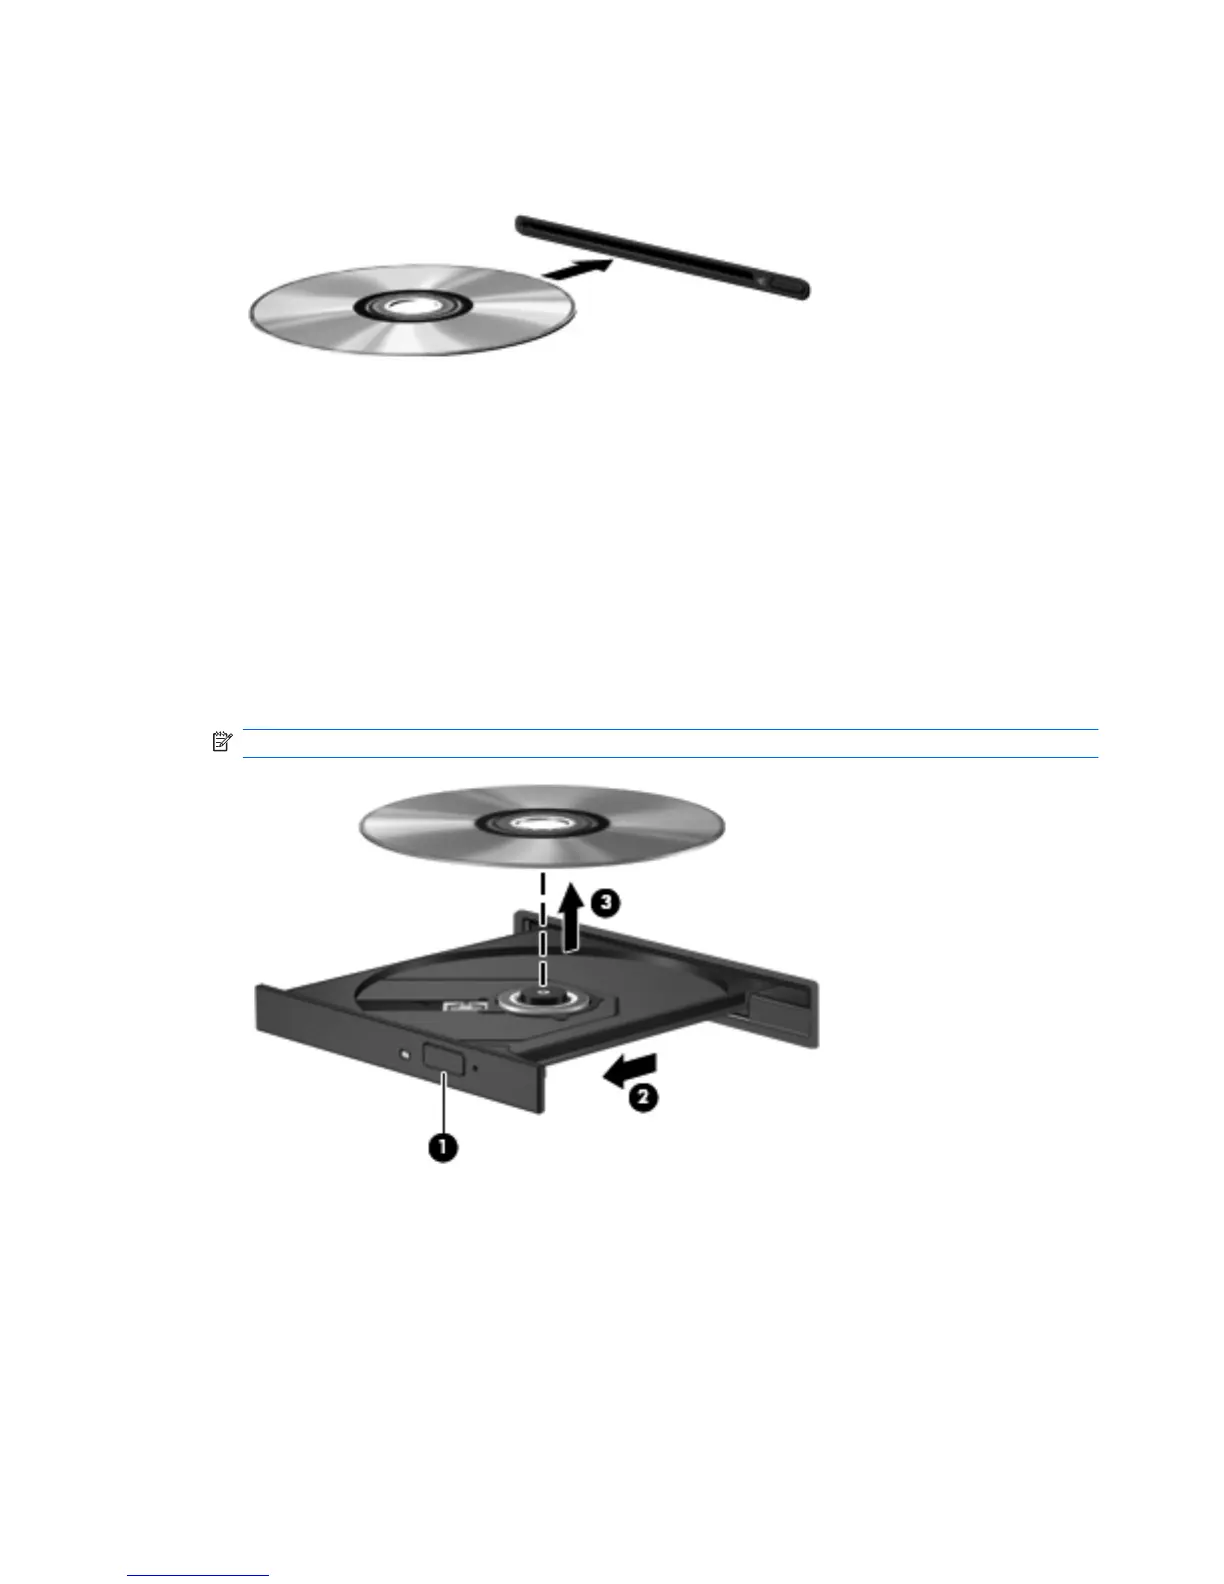
When the disc tray opens normally
1. Press the release button (1) on the drive bezel to release the disc tray, and then gently pull out the
tray (2) until it stops.
2. Remove the disc (3) from the tray by gently pressing down on the spindle while lifting the outer
edges of the disc. Hold the disc by the edges and avoid touching the flat surfaces.
NOTE: If the tray is not fully accessible, tilt the disc carefully as you remove it.
3. Close the disc tray and place the disc in a protective case.
When the disc tray fails to open normally
1. Insert the end of a paper clip (1) into the release access in the front bezel of the drive.
2. Press in gently on the paper clip until the tray is released, and then pull out the tray (2) until it stops.
50 Chapter 6 Drives

Table of Contents

Other manuals for HP ProBook 4525s - Notebook PC

Questions and Answers:

Question and Answer IconNeed help?

Do you have a question about the HP ProBook 4525s - Notebook PC and is the answer not in the manual?

HP ProBook 4525s - Notebook PC Specifications

General IconGeneral
ChipsetAMD M880G
MemoryUp to 8 GB DDR3
GraphicsATI Mobility Radeon HD 4250
Operating SystemWindows 7 Professional
Wireless802.11b/g/n
Webcam2 MP webcam
ProcessorAMD Turion II Dual-Core Mobile Processor, AMD Athlon II Dual-Core Processor
Display15.6-inch diagonal LED-backlit HD anti-glare
Storage320 GB
Optical DriveDVD+/-RW SuperMulti DL LightScribe
Battery6-cell Lithium-Ion
BluetoothYes
AudioIntegrated stereo speakers
Ports3 USB 2.0

Related product manuals