2. Hit the expansion bolt with a rubber mallet until the expansion tube completely enters the
hole.
3. Tighten an expansion bolt slightly and place it vertically into each hole.
4. Remove the M10x65 bolt, spring washer, plastic tube, and flat washer from each expansion
bolt assembly in sequence.
NOTE
After completely removing an expansion bolt, store the plastic tube properly.
5. Hammer the bolt into the wall.
CAUTION
Do not hammer the expansion bolt entirely into the wall. Instead, leave 20 mm (0.79 in.)
to 30 mm (1.18 in.) of the expansion bolt outside the wall.
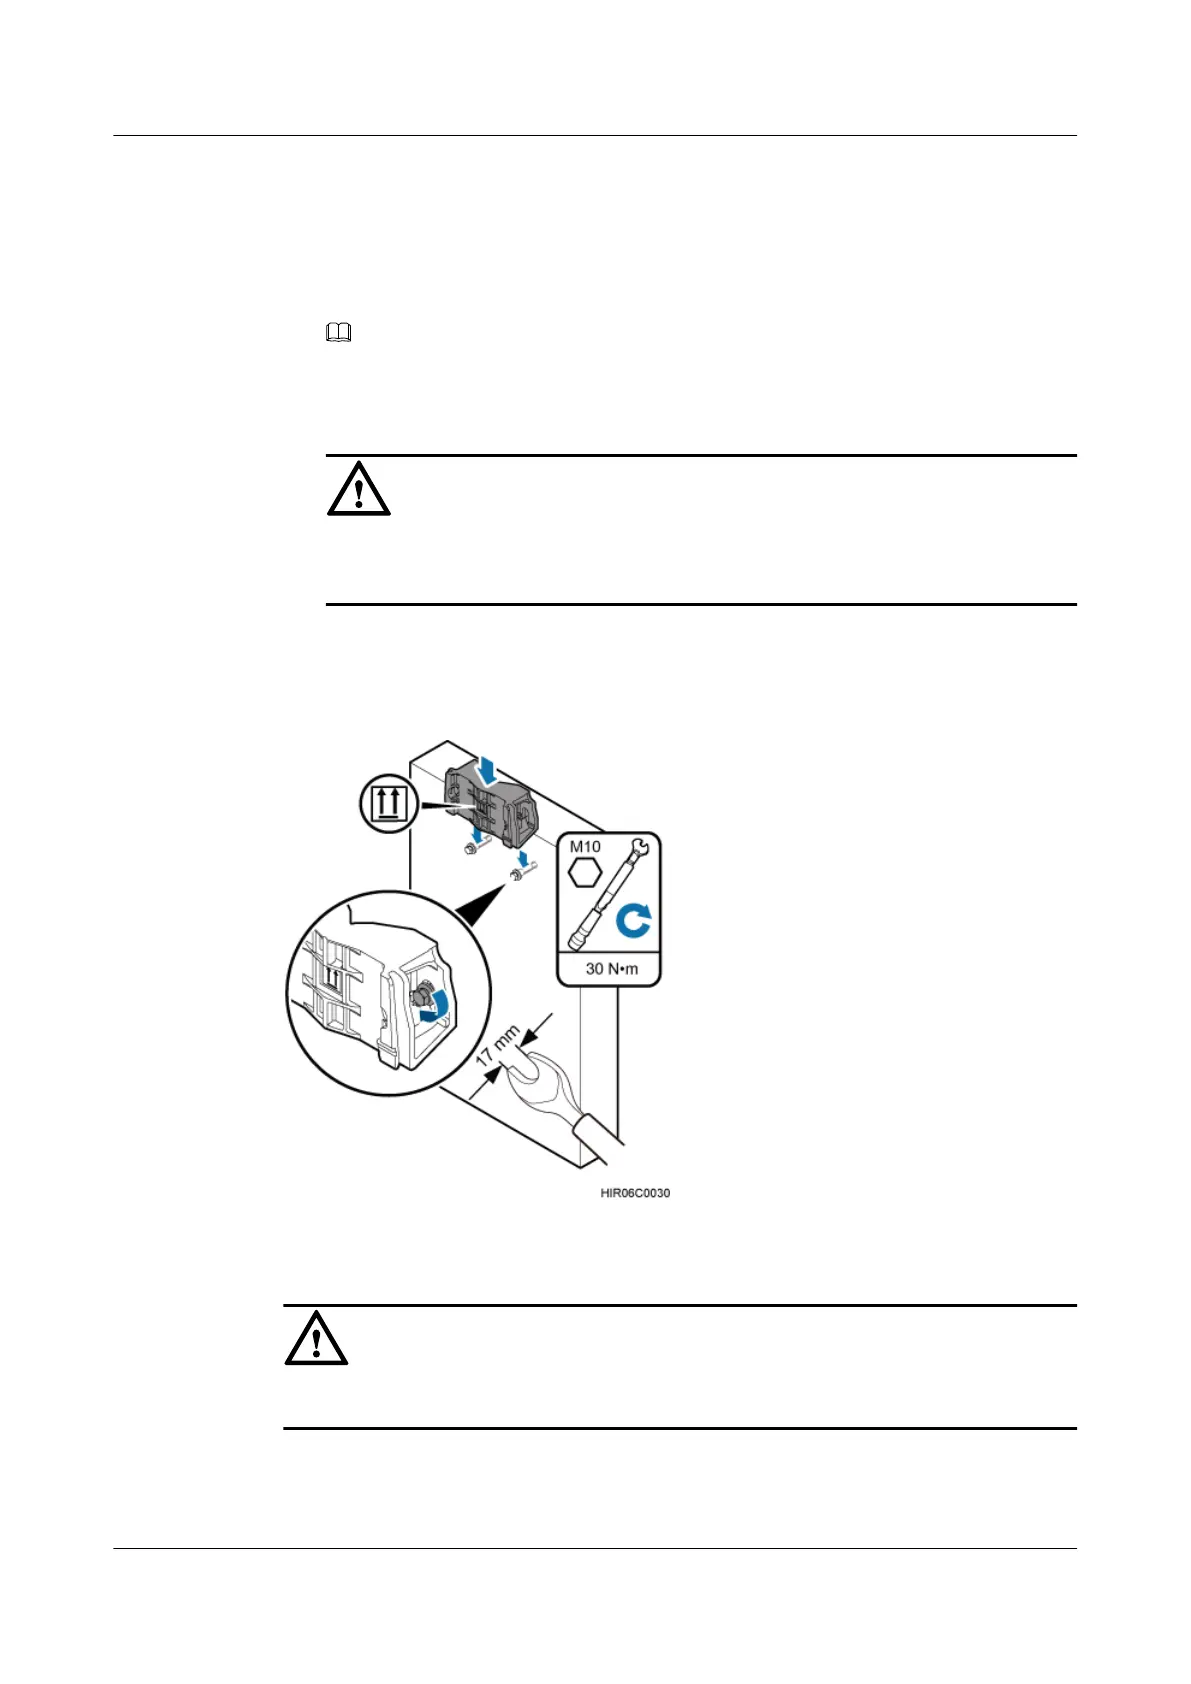
Step 3 Fit the auxiliary mounting bracket on the expansion bolt, and then use a torque wrench (17 mm
[0.67 in.]) to tighten the expansion bolt to 30 N·m (265.52 lbf·in.), as shown in Figure 6-36.
Figure 6-36 Fitting the auxiliary mounting bracket on expansion bolts
CAUTION
Verify that the arrow on the auxiliary mounting bracket is pointing up.
Step 4 Loosen the screws on the main mounting bracket and store them properly.
Step 5 Install the main mounting bracket, as shown in Figure 6-37.
RRU3232
Installation Guide 6 Installing the RRU
Issue 05 (2011-10-20) Huawei Proprietary and Confidential
Copyright © Huawei Technologies Co., Ltd.
50