10Trolling Motor Mount
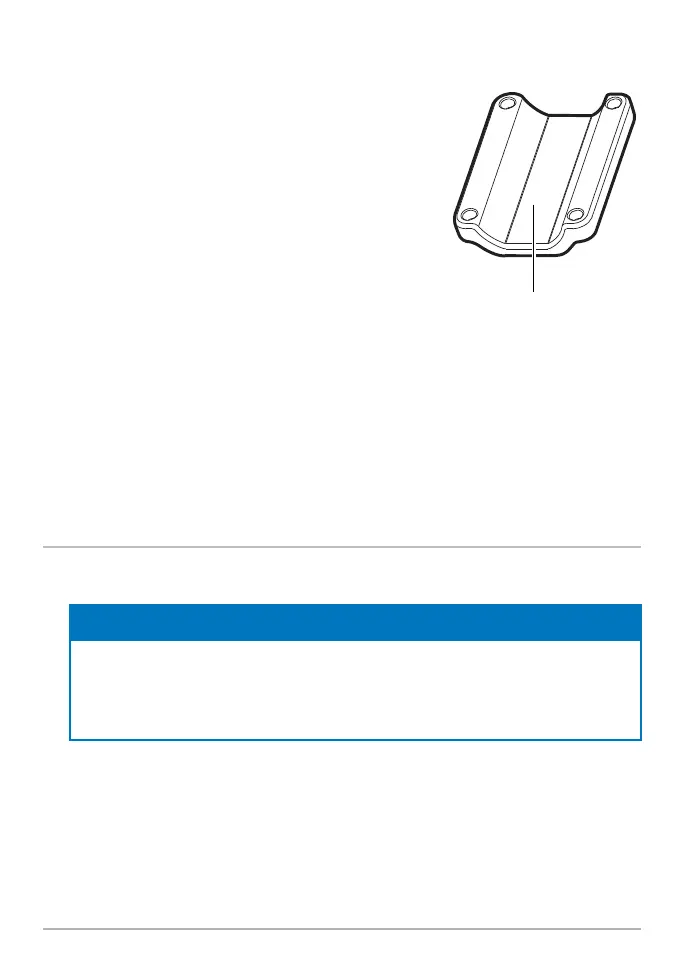
4. For installation on an Ultrex or Fortrex trolling
motor, secure the included large rubber pad to
the inside of the shaft clamp as shown in the
illustration Shaft Clamp Rubber Pad Placement.
Remove the backing from the pad and press the
adhesive side firmly into place against the shaft
clamp.
For installation on an Ultrex QUEST trolling
motor, the rubber pad is not needed. Proceed to
Step 5.
5. With the trolling motor stowed, align the shaft
mount and shaft clamp around the base of the
trolling motor shaft.
Optional: The transducer can be installed farther up the trolling motor shaft if
desired.
6. Secure the shaft clamp to the shaft mount by installing the (4) #10-32 screws
into the threaded holes on the clamp using the provided 5/32” Allen wrench.
Do not fully tighten.
4. Install the MEGA Live 2 Transducer
1. Rotate the Landscape Mode mount until the single release button faces the
bottom of the trolling motor.
NOTE
Your transducer will fl ip up for landscape mode when installed in the Recommended
Confi guration. If you prefer to fl ip your transducer down for landscape mode (see the
illustration MEGA Live Views in Section 6. Route the Cable and Connect Power), use
the Optional Confi guration.
2. The Landscape Mode mount should be open for this step of the installation.
Unlock the mount by pressing down on the single release button, and pull the
mount open. It will relock automatically once fully opened.
3. Recommended Confi guration: With the Landscape Mode mount open, mount
the transducer with the cables closest to the trolling motor shaft (see the illustration
Positioning the Landscape Mode Mount: Recommended Confi guration).
Center the pad here.
Shaft Clamp
Rubber Pad Placement