INSTALLATION
19
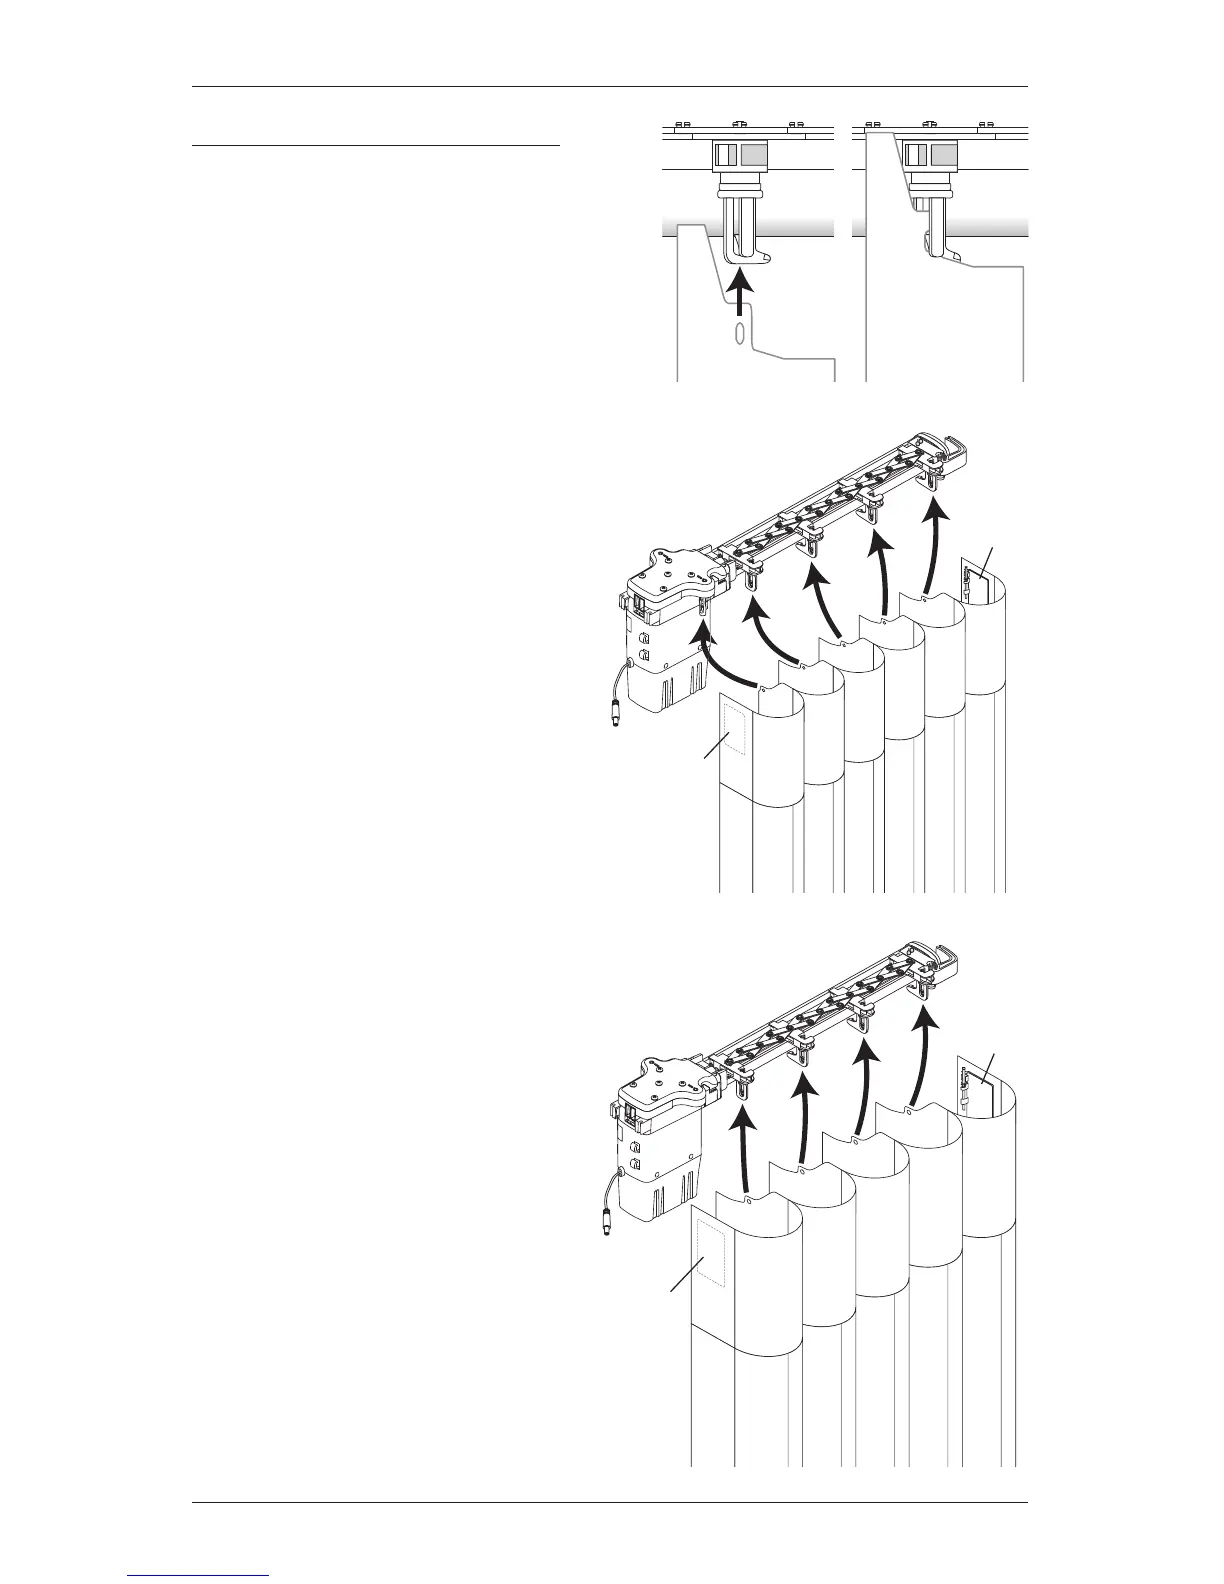
Attach the Vanes to the Pinion Clips
Vanes attach to pinion clips. To attach a vane,
insert the vane attachment hole into the clip
until it snaps securely in place.
3
1
/
2
" Classic Vane
■ Unroll the fabric to gain enough slack to
attach the first vane to the pinion clip on
the motor drive assembly.
■ Unroll the fabric as you clip the rest
of the vanes into the pinion clips in
sequence. Be careful not to skip any
pinion clips orvanes.
➤ The end treatments on both ends
attach with swivel plates.
Quintette
®
4
3
/
4
" Vane
■ Unroll the fabric to gain enough slack
to attach the first vane to the first pinion
clip.
■ Unroll the fabric as you clip the rest
of the vanes into the pinion clips in
sequence. Be careful not to skip any
pinion clips or vanes.
➤ The end treatments on both ends
attach with swivel plates.
Pinion
Clip
Installed
Vane
STD R
3
1
/
2
" Classic Vane
 Loading...