GETTING STARTED
1
Thank you for purchasing Hunter Douglas Vignette
®
Modern Roman Shades. With proper
installation, operation, and care, your new shades will provide years of beauty and performance.
Please thoroughly review this instruction booklet before beginning the installation.
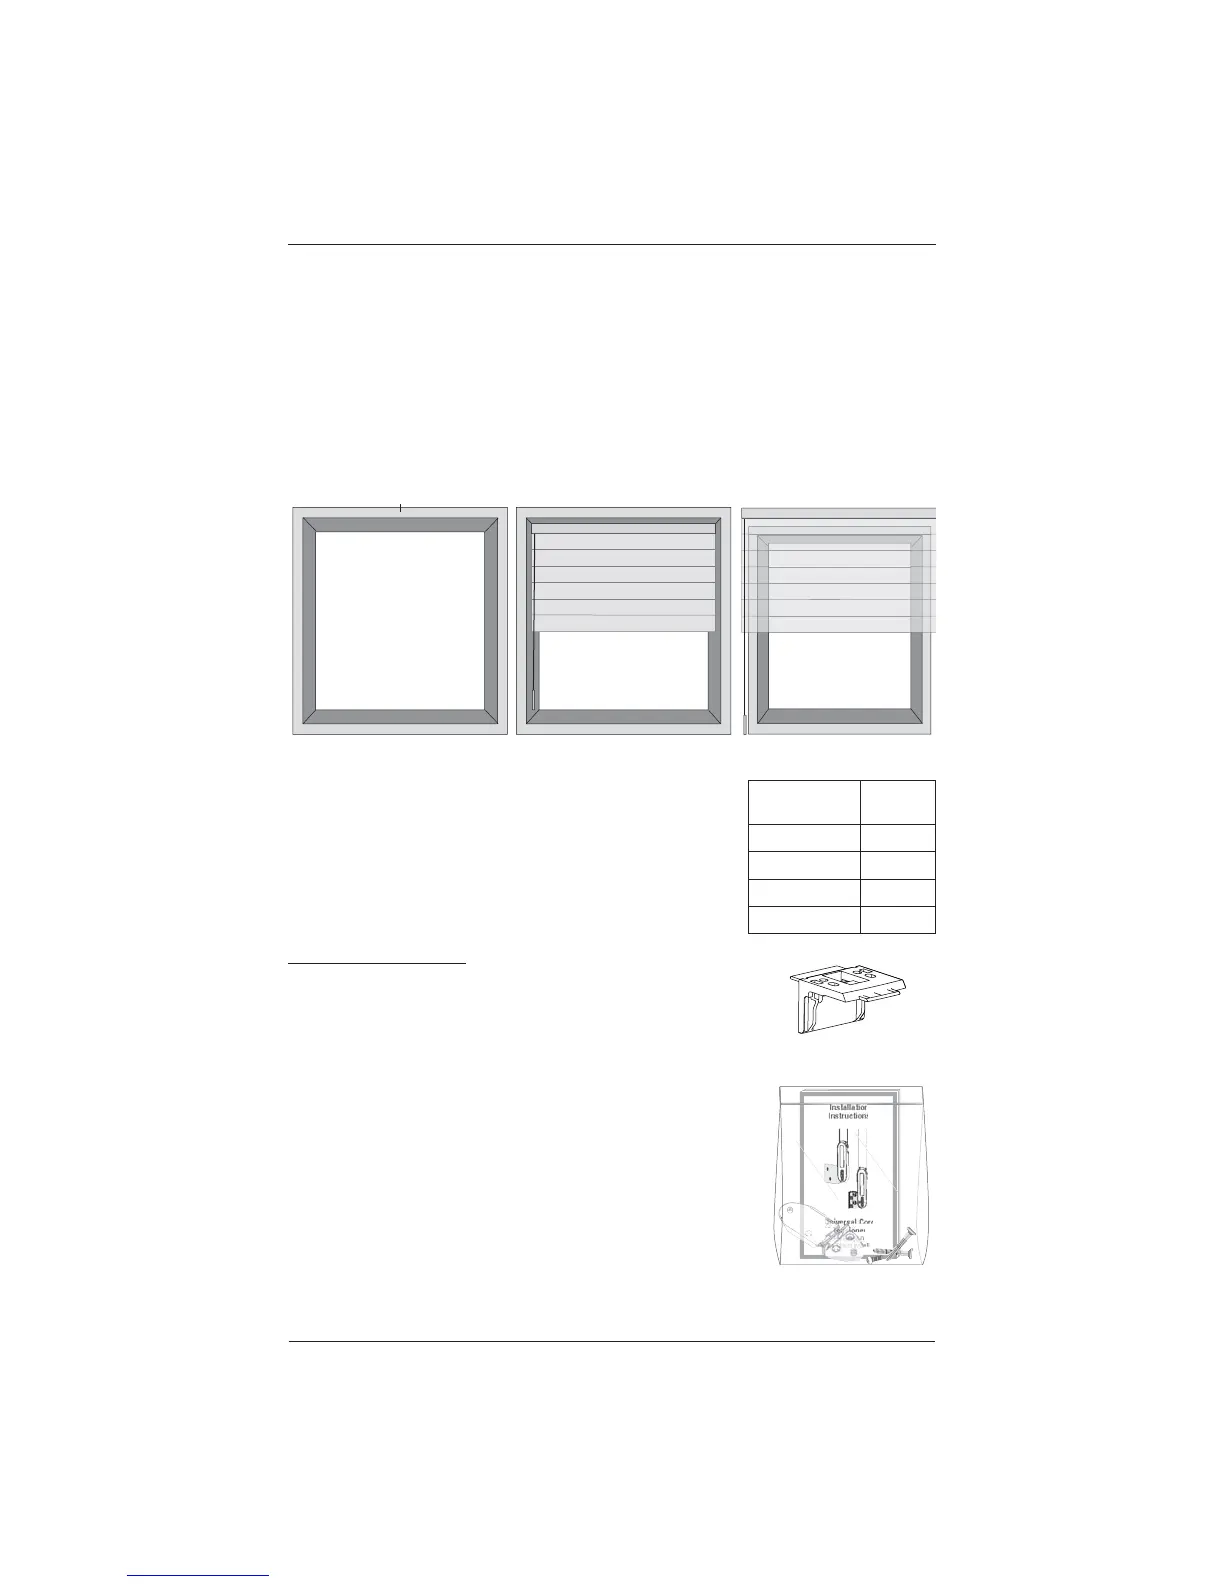
Mounting Types And Window Terminology
If the installation brackets are mounted correctly, the rest of the installation process will follow
easily. To prepare for this important fi rst step, review the mounting types and basic window
terminology illustrated below.
Installation Components Needed
Check the packaging to be sure you have all the components
needed to install your shade. Keep the packaging until the
shades perform to your satisfaction. If your shade has a
protective plastic cover on the fabric covered headrail, keep
the plastic in place until the shade is installed.
Required Components
Installation Brackets. ■ The number of installation brackets
required varies with shade width, as shown in the table.
■ Universal Cord Tensioner (UCT) Installation Kit. The UCT
functions as a safety device that makes the cords less accessible
to children and pets. The cord control will only function
properly if the UCT is installed correctly.
Outside Mount
Shade mounts outside
window opening.
Inside Mount
Shade fits within
window opening.
Collectively, the sills and
jambs are called the
“window casement.”
Molding
Top Sill
Bottom Sill
Jamb Jamb
Shade
Width
Brackets
Required
12" - 36" 2
36
1
/8" - 72" 3
72
1
/8" - 108" 4
108
1
/8" - 140" 5
Installation
Bracket
i
n