INSTALLATION
6
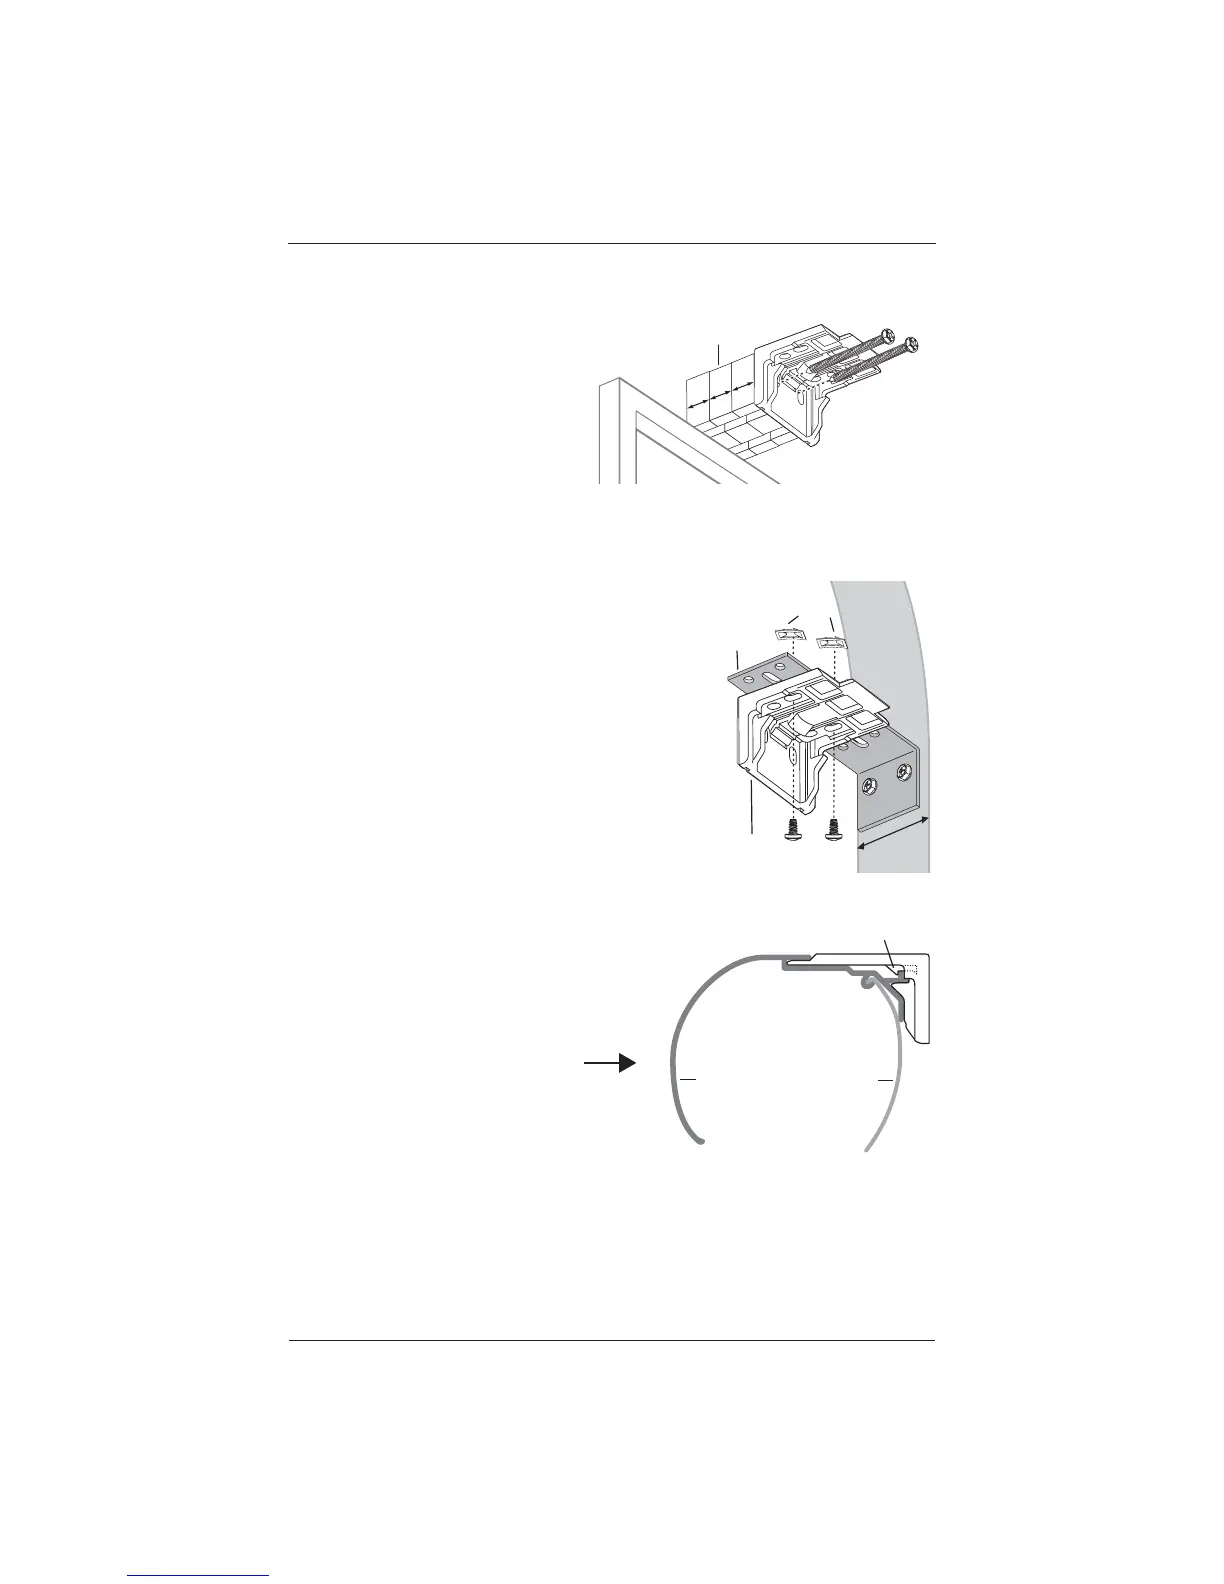
Fasten installation brackets to the mounting surface using the hex head screws provided. ■
➤ If using spacer blocks, attach a
maximum of three spacer block(s)
and installation bracket to a fl at
vertical mounting surface with a
#6 screw long enough for a secure
installation (screws not provided).
Mount The Installation Brackets — End Mount
End mount the headrail when conventional mounting
techniques will not work, for example, in an
arched window.
Mount the extension brackets on a surface at least ■
1½" wide.
Attach the installation brackets to the extension ■
brackets using the provided screws and speed nuts.
Install The Shade
Hold the headrail so the front ■
(curved side) faces you.
Push the top edge of the headrail ■
into the installation brackets until
it snaps into place. You will hear a
click when the shade is securely
installed.
Gently pull on the front of the ■
headrail to ensure that the shade
is locked into the brackets.
Remove the plastic covering on the ■
front of the headrail.
1
/
2
"
1
/
2
"
Spacer Blocks
1
/
2
"
1
1
/2"
Minimum
Extension
Bracket
Installation
Bracket
Speed
Nuts
Locking Tab
Headrail
Push until
headrail
clicks into
place.
Fabric
Guard