INSTALLATION
5
Mount The Installation Brackets — Outside Mount
Use pliers to break off and discard the tab of each bracket. ■
Determine the bracket locations. ■
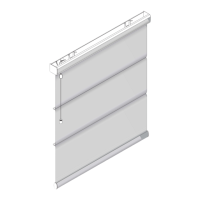
With the shade lowered, center it over the window opening at ➤
the desired height. Use a pencil to lightly mark each end of the
headrail.
Alternatively, measure the width of the headrail to determine its centerpoint. Measure the ➤
width of the window and determine its centerpoint.
Lower the shade and align these centerpoints, then mark each end of the headrail at the ➤
desired height.
■ Measure and mark 3" in from each end of the headrail.
If more than two installation brackets came ➤
with your order, space additional bracket(s)
evenly on studs, between the two end
brackets and mark their location.
Mark the location of the screw holes by ■
centering the brackets on the previously
made marks.
A minimum 1" fl at vertical surface is required to mount ➤
the brackets.
The top of the installation brackets should be at the desired ➤
height. The brackets should be level and aligned.
CAUTION: The rear of the blocks/brackets must be fl ush against a fl at mounting
surface. Do not mount brackets on curved molding.
Using a ■
3
∕
32
" drill bit, drill holes for the screws.
IMPORTANT: If you are fastening the installation brackets to drywall, be sure to use wall
anchors and follow the instructions provided with the anchors. (Anchors not provided.)
Remove
Tab
2"
2"
Space EvenlySpace Evenly
Headrail End Marks
Window Opening
3"
 Loading...
