15
Includes 25 Feet of 20 Gauge Two
Conductor Wire…
Fast and easy mounting out of sight
Hunter supplies wire needed for installation within
25 feet of the controller. Whether you pre-install on a
pole or install at the job, with 25 feet of wire already
attached to the Mini-Clik
®
, installation is fast and
easy. When contractors go out to the job site with the
Mini-Clik, they donʼt have to worry about forgetting
the wire! If longer wire runs are needed for installation,
no problem! Just add an extension.
If the extension needed is:
25-50 feet use: 20 gauge
50-100 feet use: 18 gauge
100 feet or more use: 16 gauge
INSTALLATION
INSTRUCTIONS
In most installations, the Mini-Clik acts as a switch to
break the electrial circuit to the solenoid valves of the
irrigation system when it has rained. This allows the
timer to advance as scheduled, but keeps the valves
from opening the water flow. Once the Mini-Clik has
dried sufficiently, the switch closes again to allow for
normal operation.
For the Model Mini-Clik-C: This rain sensor unit
is the same as the standard model except for the lack
of an aluminum mounting bracket and the addition of
a ½" threaded cap, which allows for the easy use of
electrical conduit to totally enclose the wires. Unless
local code states otherwise, plumbing grade PVC pipe
can be used as well as electrical grade conduit.
For the Model Mini-Clik-HV: This rain sensor unit is
designed to be used with automatic irrigation systems
of two principle designs: 1) single-station electrical
timer (e.g., Intermatic) that switches power to a pump,
either directly or through a relay; or 2) single-station
electrical timer that switches power to a solenoid valve.
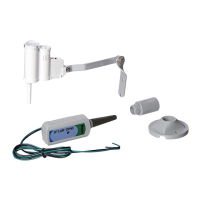
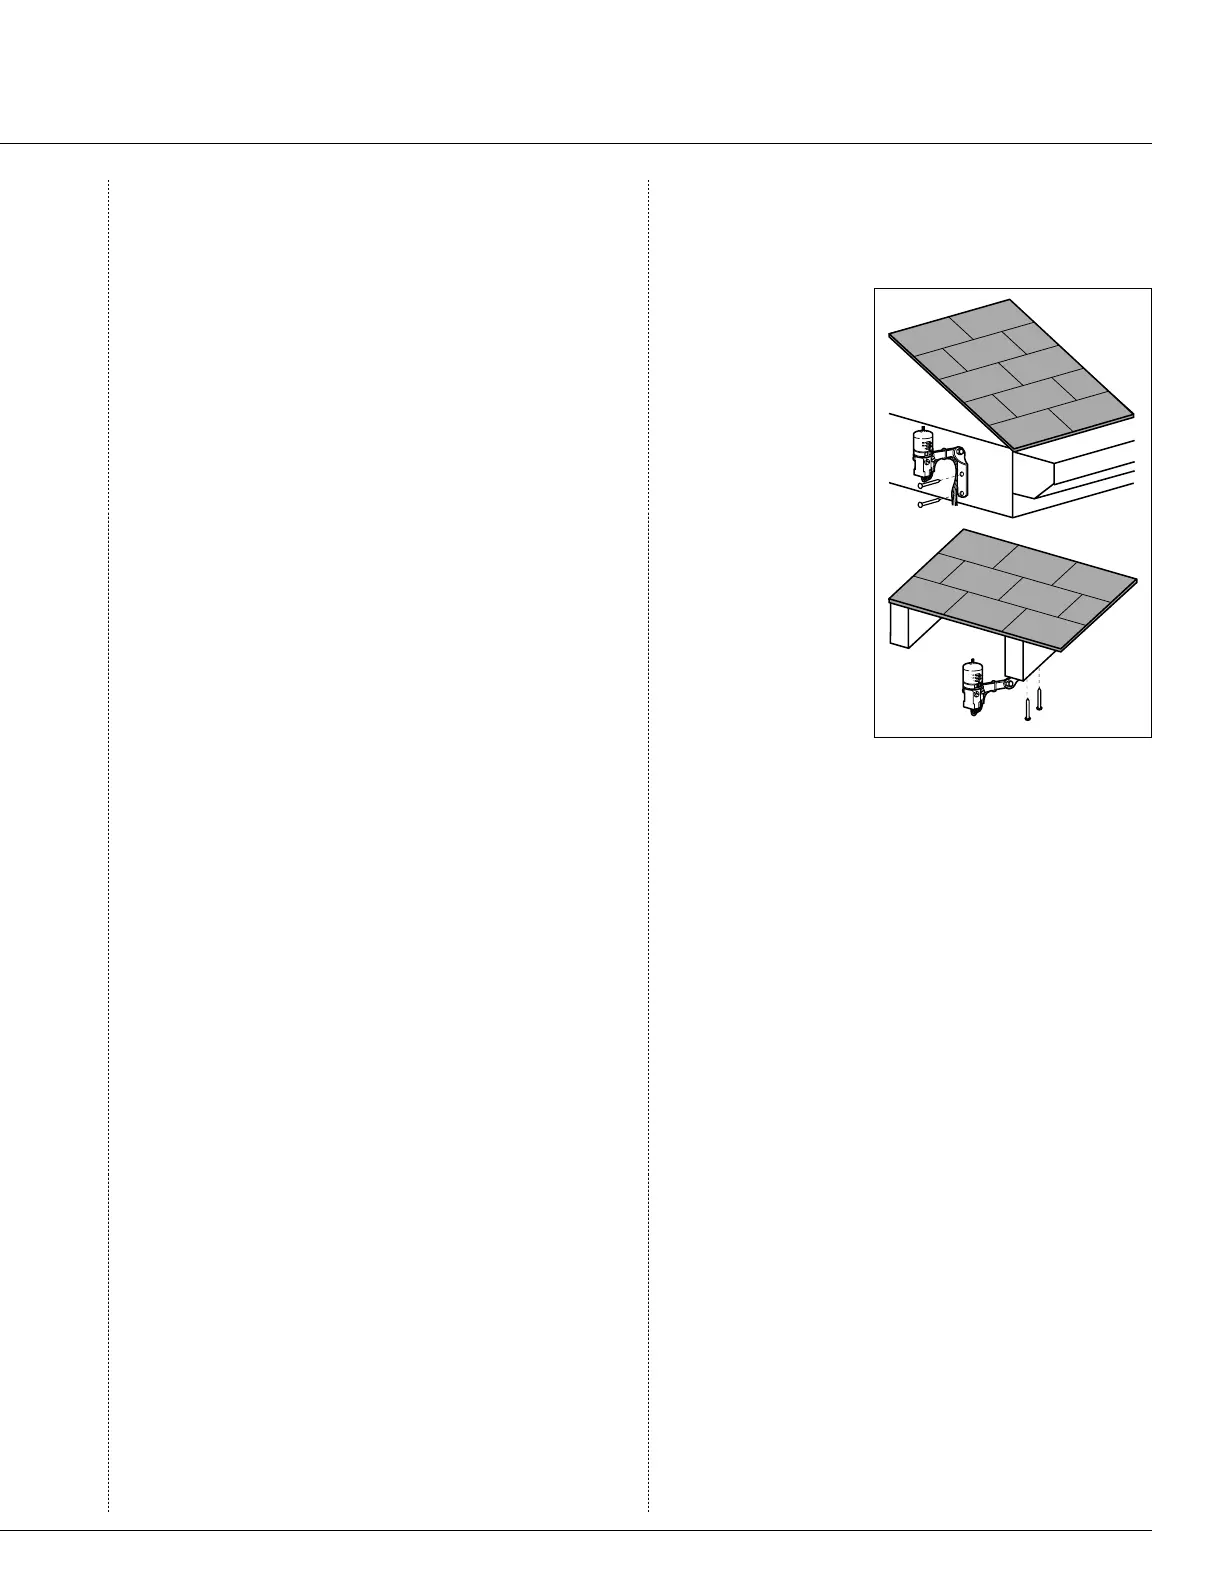
Mounting
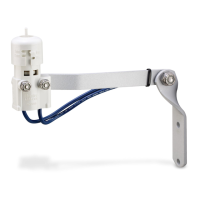
Standard Model: Using the screws provided, mount
the Mini-Clik on any surface where it will be exposed
to unobstructed rainfall, but not in the path of sprinkler
spray. The switch-housing portion must be upright (as
pictured), but the
swivel-bracket can
be moved for mount-
ing on any angled
surface. Loosen the
locknut and screw
before swiveling
bracket, and then re-
tighten.
For the Conduit
Model Mini-Clik-C:
The conduit acts
as the mounting
support for the unit.
Therefore, place and
mount the conduit to
allow for the desired
sensor location as
described in the main instructions for the standard
model. Be sure to support the conduit sufficiently along
its various lengths.
For the High-Voltage Model Mini-Clik-HV: The
mounting of this unit is primarily made by screw-
ing the fitting end into the threaded holes of covers
to rectangular junction boxes (for outdoor use) or the
covers of round junction boxes commonly used for
outdoor spotlights. Locate the junction box so that with
the Mini-Clik attached, unobstructed rainfall will hit
the outermost sensing end of the unit. If a longer reach
is needed, the “Carlon” flexible conduit piece can be
substituted with a slightly longer piece (up to 8" length
with no support or up to 11" with support).
Helpful hints for mounting:
A. When looking for a suitable location such as on the
side of a building or post, the closer the Mini-Clik
is to the controller, the shorter the wire run will be.
This will also minimize the chance for wire breaks.
B. The ideal location for mounting is not always the
most practical location. In the case where a compro-
mise must exist (such as low location on a side wall
rather than the preferred high location), note that the
Mini-Clik will still work as it will always receive
some rainfall – it just will not be as accurate in its
gauging as it could be.
Mini-Clik
®
Sensor
 Loading...