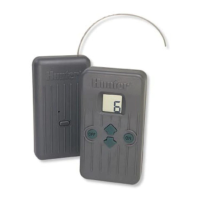
6
1
/
2
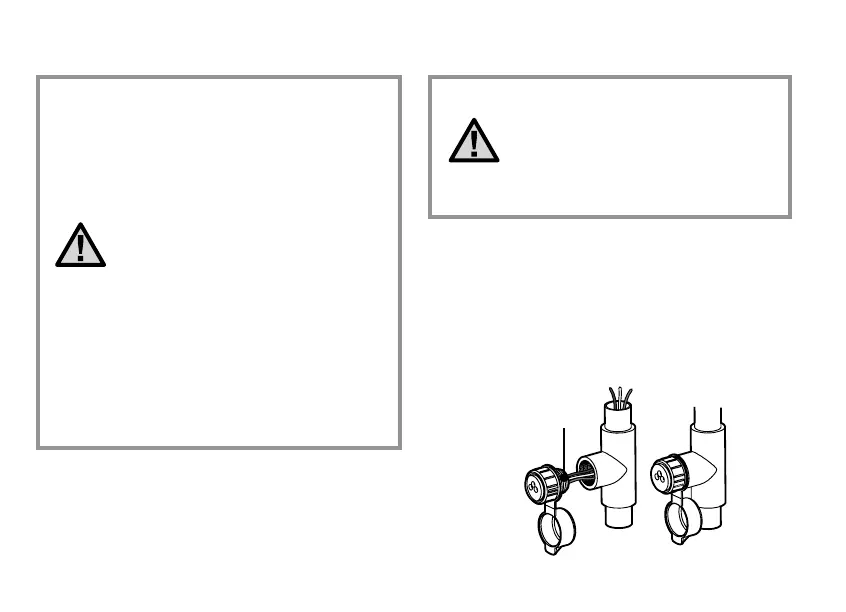
" Thread
To
Controller
Pre-assembled Assembled
Figure 1
NOTE: Any extension of the wires
provided with the standard wiring
harness may result in an error message
on the controller display and possible
malfunction of the remote due to radio
interference. In some situations,
lengthening of the standard harness
may work fine, in others it may not
work at all (it is site specific). In
either case, it is recommended that
installations where the SmartPort
®
outlet will be located more than 5 feet
from the controller that the installation
be done using the shielded cable
wiring harness (SRR-SCWH) to
minimize the possible effects of
electrical noise. See page 7 for
information.
1. Install a ½" female threaded “Tee” in the field
wiring conduit approximately 12" from the SRC,
ICC, and Pro-C controllers.
NOTE: While the SmartPort has a
protective cover to allow for outdoor
installation, the SRR Receiver should
only be used on a temporary basis,
as the Receiver is not designated for
permanent outdoor mounting.
2. Feed the red, white, and blue wires of the
SmartPort through the base of the “Tee” and into
the controller wiring compartment as shown in
Figure 1.
3. Screw the SmartPort housing into the “Tee”
(or other fitting) as shown in Figure 1.
INSTALLING THE SRR REMOTE WIRING HARNESS ..................