14 ELECTRICAL SYSTEM 85
14.7 Changing the headlight bulb
Note
Damage to reflector Reduced luminance.
– Grease on the lamp will evaporate due to the heat and be deposited on the reflector. Clean the lamp and keep it free of grease
before mounting.
Preparatory work
– Switch off all power consumers and switch off the engine.
– Remove the headlight mask with the headlight. ( p. 84)
C00099-10
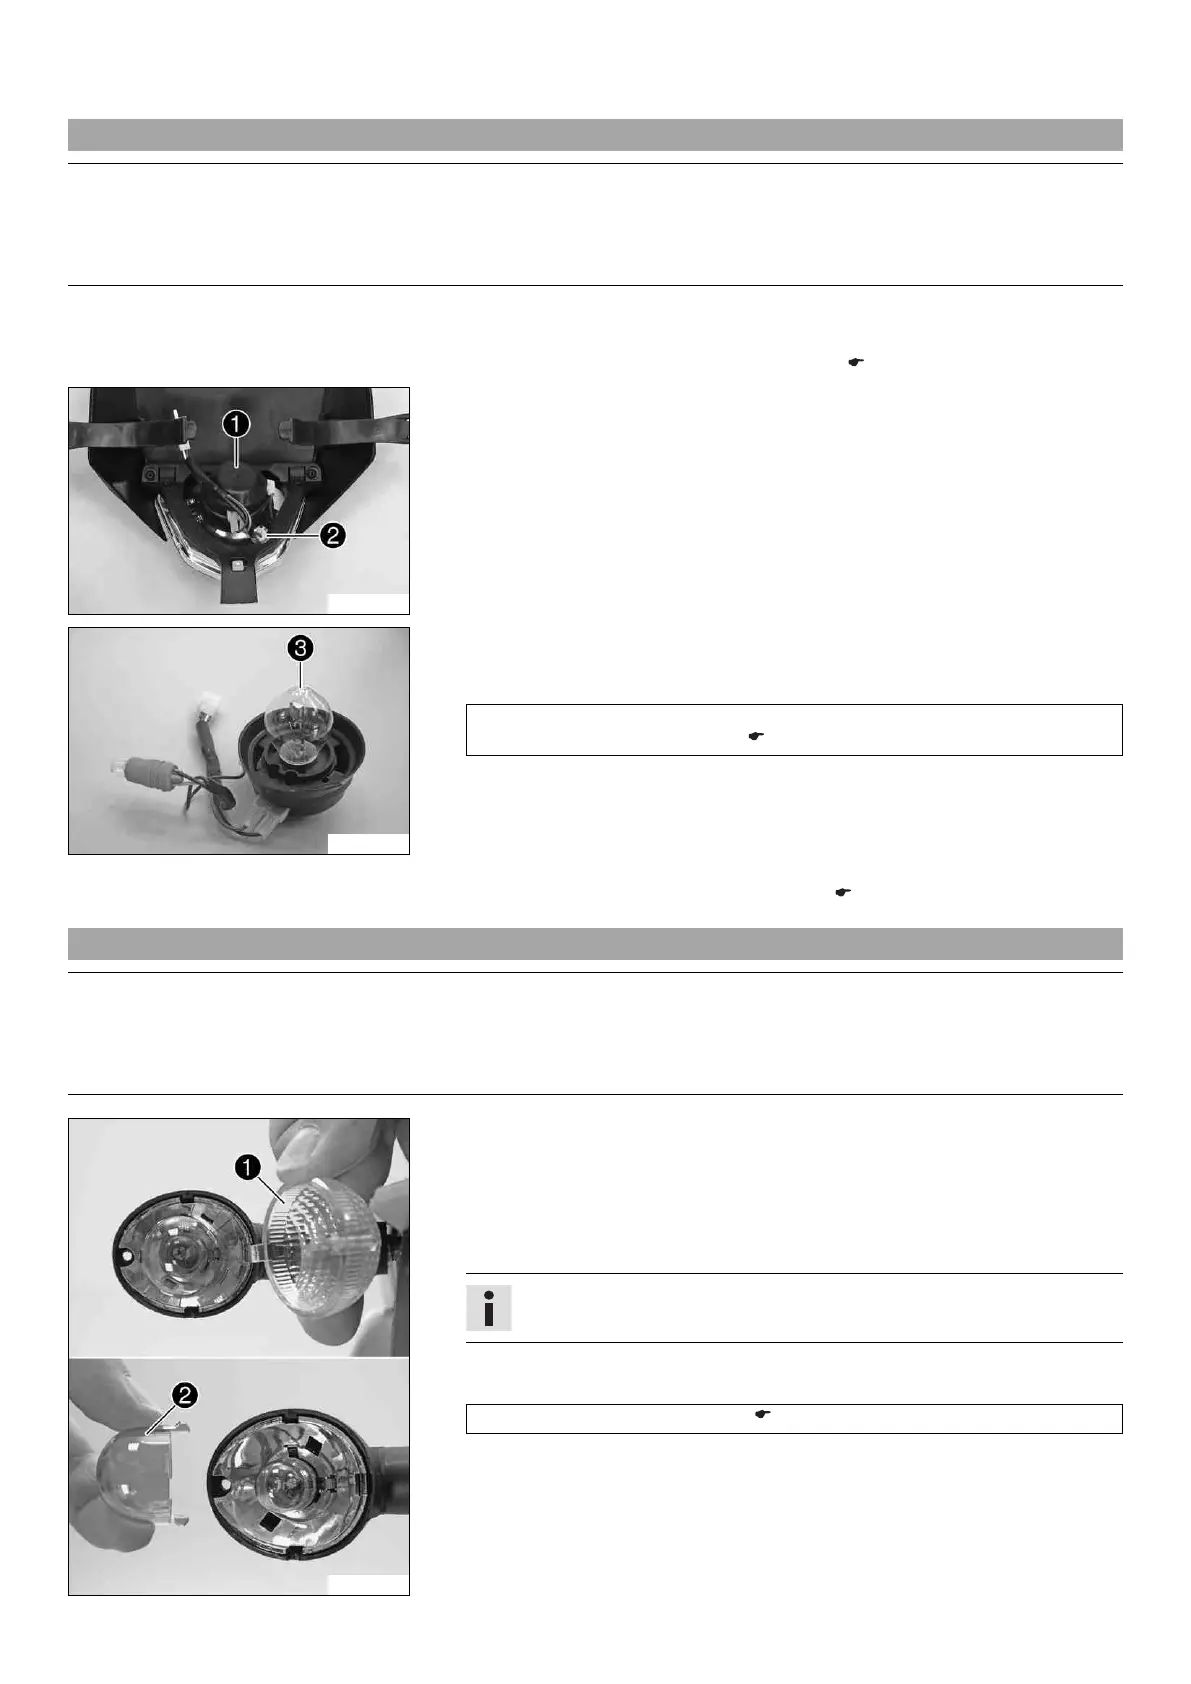
Main work
– Turn protection cap 1 with the bulb socket beneath it all the way counterclockwise
and lift it off.
– Pull bulb socket 2 of the parking light out of the reflector.
100463-10
– Press headlight bulb 3 lightly into the bulb socket, turn it all the way counter-
clockwise, and pull it out.
– Insert the new headlight bulb.
(TE EU/AUS)
Headlight (S2/socket BA20d) ( p. 110)
– Insert the protection cap with the bulb socket into the reflector and turn it all the
way clockwise.
– Insert the bulb socket of the parking light into the reflector.
Finishing work
– Install the headlight mask with the headlight. ( p. 84)
14.8 Changing the turn signal bulb (TE EU/AUS)
Note
Damage to reflector Reduced luminance.
– Grease on the lamp will evaporate due to the heat and be deposited on the reflector. Clean the lamp and keep it free of grease
before mounting.
101722-10
Main work
– Remove the screw on the rear of the turn signal housing.
– Carefully remove turn signal glass 1.
– Lightly squeeze orange cap 2 in the area of the holding lugs and take it off.
– Press the turn signal bulb lightly into the socket, turn it counterclockwise by about
30°, and take it out of the socket.
Info
Do not touch the reflector with your fingers, and keep it free from grease.
– Press the new turn signal bulb carefully into the socket and turn it clockwise until
it stops.
Turn signal (R10W/socket BA15s) ( p. 110)
– Mount the orange cap.
– Position the turn signal glass.
– Insert the screw and first turn it counterclockwise until it engages in the thread
with a slight jerk. Tighten the screw slightly.
 Loading...