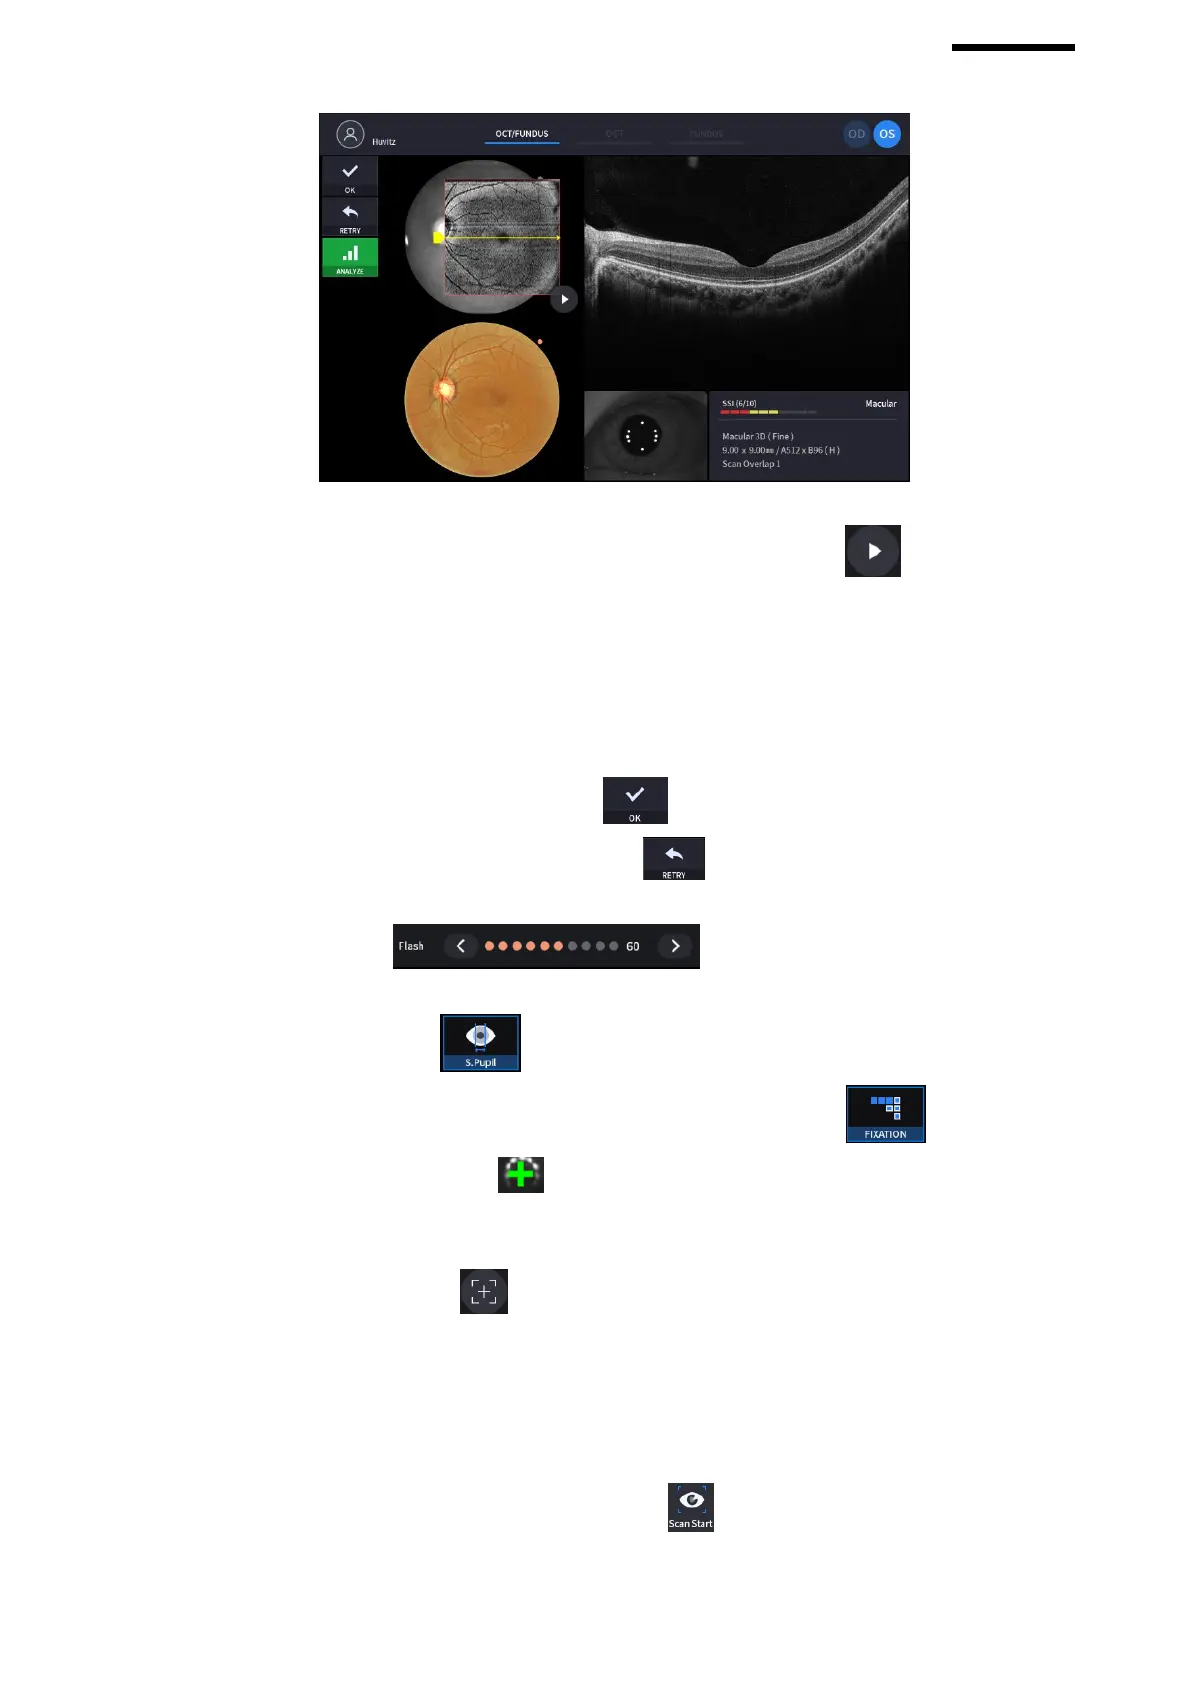
① Check previous/next OCT image by move scan position handle.
② Check continuous OCT image continuously by pressing play image icon ( ).
③ Check SSI for image quality.
SSI (Scan Signal Index) indicates level of image quality. SSI means signal to background ratio and
displayed on a scale of 10 with a bar graph. SSI larger than 8 means ‘Good’, 5~8 means ‘Normal’,
less than 5 means ‘Poor’ in general.
We recommend capture normal or good status in general. When image looks satisfactory though the
SSI is low, you can ignore SSI and save the result.
④ If the image is satisfactory, press OK icon ( ) to save image.
⑤ If the image is not satisfactory, press retry icon ( ) and retry image capturing.
A. If fundus image result too bright or too dark because of lighting, regulate the flash intensity using
flash icon ( ) in observation mode.
B. If fundus image is too dark because of small pupil size of patient, try small pupil mode by using
small pupil icon ( ) in observation mode.
C. Try moving internal fixation target position by pressing fixation icon ( ) and changing
position of green cross ( ) if needed.
When green cross position changes, the position of internal fixation target is also changed.
D. Try to change scan position by dragging scan range while scan range icon turned on. If reset
scan position icon ( ) is pressed, scan position moves to the default center position.
10. Capture image and check image quality (in OCT mode).
(1) When alignment and focus is done, press scan start icon ( ) to start OCT scan.
If alignment and focus is in good condition, scan start function is accomplished automatically, and scan start


 To Next Page