5000 SRM 969 Twist Locks Repair for Model 558
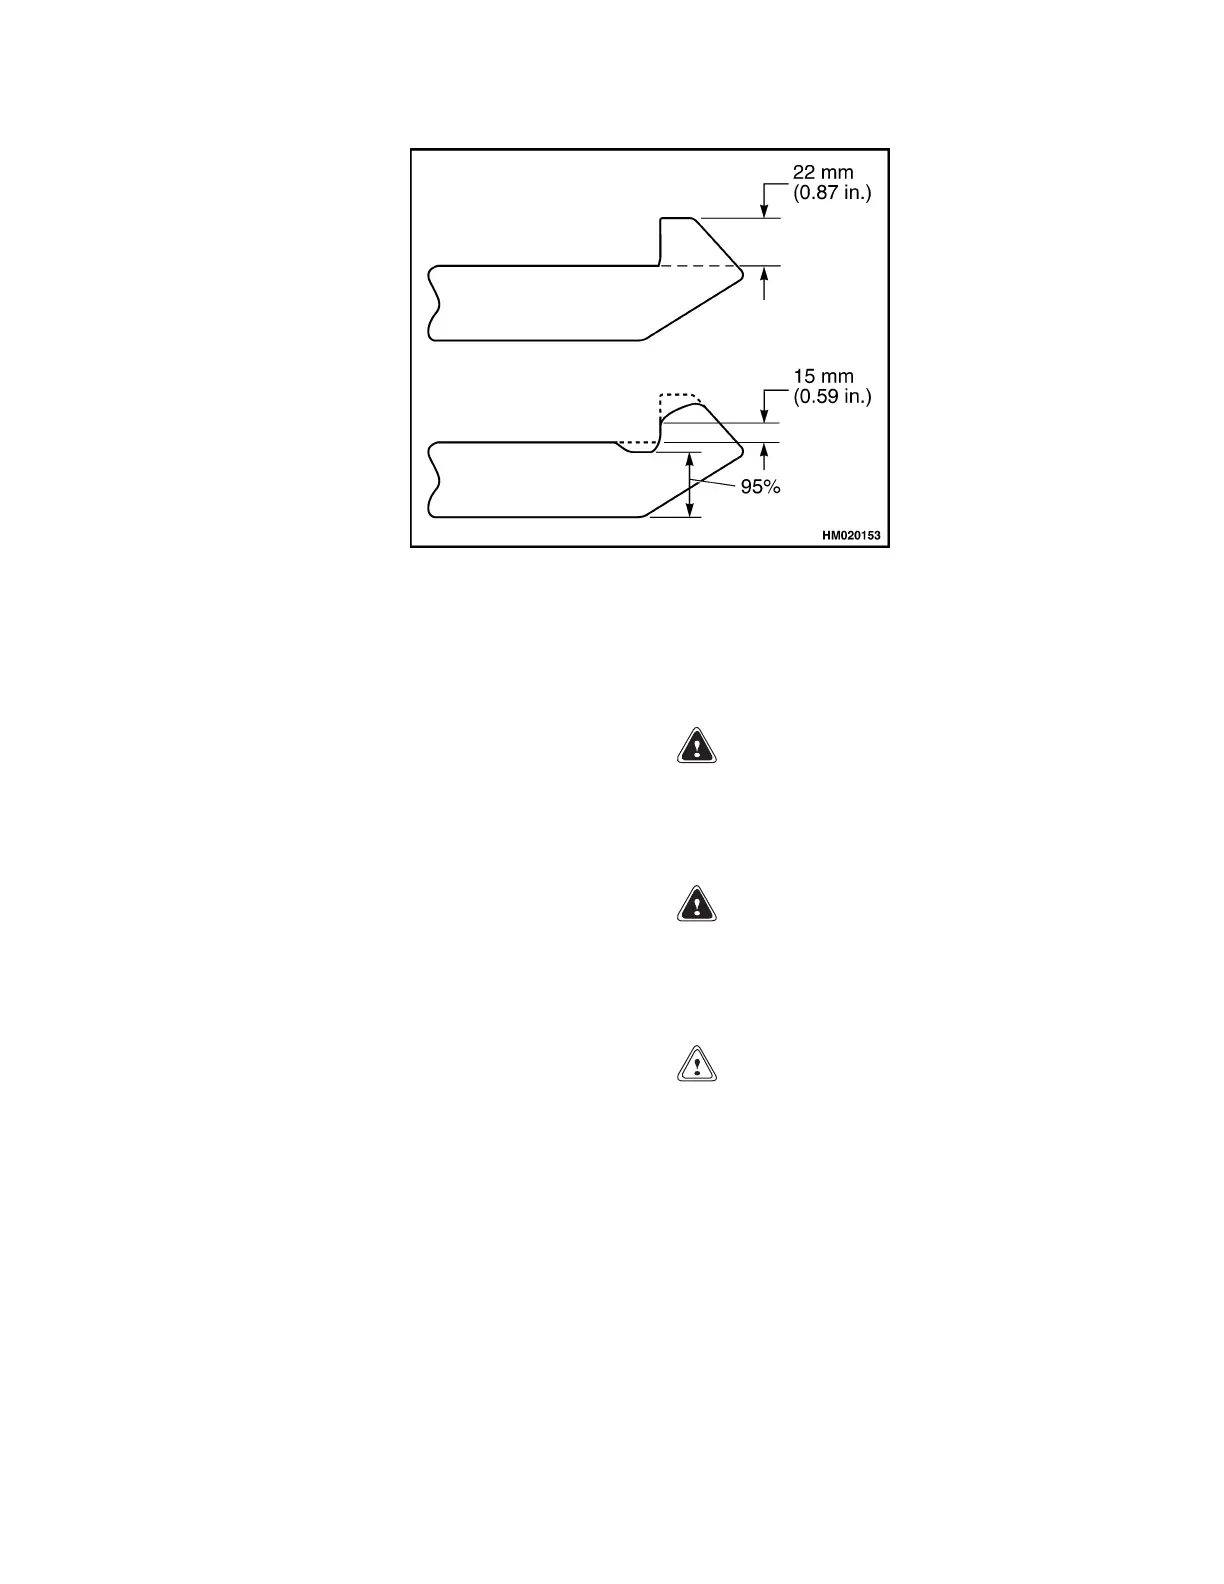
Figure 10. Hook Wear
Twist Locks Repair for Model 558
DISASSEMBLE
1. Remove cover (43). See Figure 4.
2. Remove wiring to sensors and identify location.
3. Remove socket head screw (49), washer, and
nut (38). Remove rod (10).
4. Remove ring pin (2), socket head screw (3), and
lockwasher (4). Remove pin (14).
5. Remove four bolts (15) from the twist lock
crank (31).
6. Install two bolts from Step 5 into two threaded
holes in crank and tighten alternately until
crank is lifted off twist lock shaft.
7. Key (42) used to locate crank is held in place with
a roll pin. Remove roll pin and key from twist
lock (20).
NOTE: During performance of Step 8, support twist
lock from below to prevent it from dropping out of end
beam.
8. Pry collets (16) out of recess in twist lock. Re-
move twist lock from end beam. The sleeve (35)
and lower bearing (18) set may come out with
twist lock. This is normal.
CLEAN AND INSPECT
WARNING
Cleaning solvents can be flammable and toxic
and can cause skin irritation. When using
cleaning solvents, always follow solvent man-
ufacturer’s recommended safety precautions.
WARNING
Do not use compressed air at more than
206 kPa (30 psi). Airborne debris can cause
injury to personnel. Use approved safety
equipment.
CAUTION
Use extra care when inspecting collets and re-
cess areas of twist locks. These are the load
bearing areas when a container is lifted.
1. Clean all parts of twist lock assembly with sol-
vent. Dry parts with compressed air. Inspect
all parts of twist lock assembly for damage and
wear. See Figure 11. If twist lock is worn more
than 25 mm (0.98 in.), replace twist lock. Inspect
twist lock recesses and replace if damaged.
17