c. Rotate the expansion unit open; then, lift the expansion unit from the blade
server.
6. If you are instructed to return the expansion unit, remove from it any options
that you have installed; then, follow all packaging instructions, and use any
packaging materials for shipping that are supplied to you.
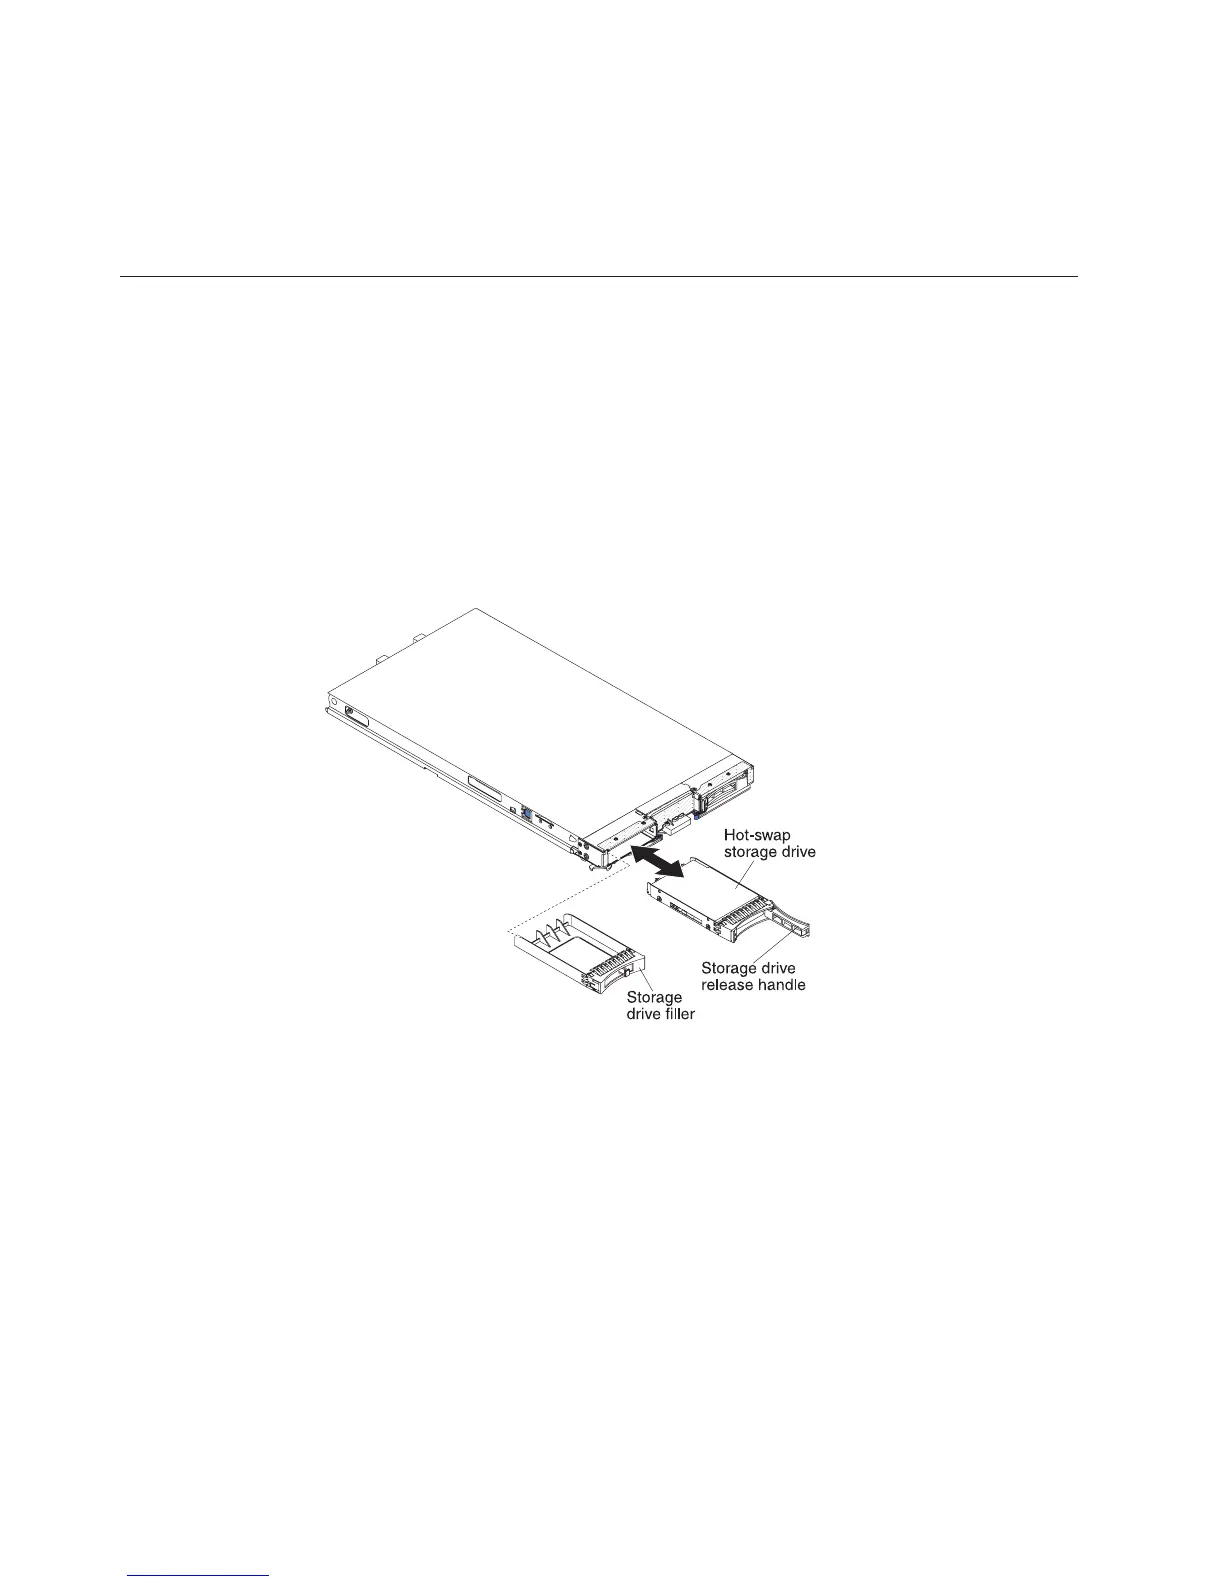
Installing a hot-swap storage drive
Use these instructions to install a hot-swap storage drive into the blade server.
The blade server has two storage bays for installing hot-swap storage drives. One
storage drive might already be installed in the blade server in storage bay 0. If the
blade server is equipped with one storage drive, you can install an additional drive
in storage bay 1. The blade server supports using RAID 0 or RAID 1 when two
storage drives of the same interface type are installed. See “Configuring a RAID
array” on page 56 for information about SAS RAID configuration.
To install a hot-swap storage drive or drive filler, complete the following steps.
1. Before you begin, read “Safety” on page v and “Installation guidelines” on
page 17.
2. Identify the storage bay (storage bay 0 or storage bay 1) in which the hot-swap
storage drive will be installed (see “Blade server connectors” on page 15).
3. If a storage-bay filler is installed, remove it from the blade server by pulling the
release lever and sliding the filler away from the blade server (see “Removing a
hot-swap storage drive” on page 25).
4. Touch the static-protective package that contains the hot-swap storage drive to
any unpainted metal surface on the BladeCenter unit or any unpainted metal
surface on any other grounded rack component; then, remove the hard disk
drive from the package.
5. Open the release lever on the hot-swap storage drive and slide the drive into
the storage bay until it is firmly seated in the connector.
6. Lock the hot-swap storage drive into place by closing the release lever.
If you have other devices to install or remove, do so now; otherwise, go to
“Completing the installation” on page 42.
24 BladeCenter HS23 Types 7875 and 1929: Installation and User's Guide
 Loading...


