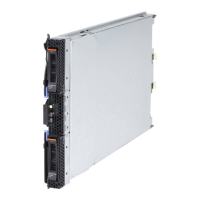
Removing a hot-swap storage drive
Use this information to remove a hot-swap storage drive.
The blade server has two hot-swap storage bays for installing or removing
hot-swap storage devices. To remove a hot-swap hard disk drive or drive filler,
complete the following steps.
1. Before you begin, read “Safety” on page v and “Installation guidelines” on
page 17.
2. If possible, save the data on your drive, especially if it is part of a RAID array,
before you remove it from the blade server.
3. Press the release latch (orange) on the storage drive to release the drive handle.
4. Pull the release handle to remove the drive from the storage bay.
Installing a memory module
Use these instructions to install memory modules in the blade server.
The blade server has a total of sixteen direct inline memory module (DIMM) slots.
The blade server supports very low profile (VLP) DDR3 DIMMs with error code
correction (ECC) in 4 GB, 8 GB, and 16 GB capacities. For a current list of
supported DIMMs for the blade server, see http://www.ibm.com/systems/info/
x86servers/serverproven/compat/us/ .
After you install or remove a DIMM, you must change and save the new
configuration information by using the Setup utility. When you turn on the blade
server, a message indicates that the memory configuration has changed. Start the
Setup utility and select Save Settings (see “Setup utility menu” on page 48 for
more information) to save changes.
The memory is accessed internally through the system using four channels per
microprocessor. Each channel contains two DIMM connectors. The following table
lists each channel and which DIMM connectors belong to the channel.
Chapter 3. Installing options 25

 Loading...


