Note: If a RAID controller or adapter is installed, you might have to reconfigure the
disk arrays after you install or remove hard disk drives. See the documentation that
comes with the adapter for more information.
Removing a simple-swap Serial ATA hard disk drive
Attention: Simple-swap hard disk drives are not hot-swappable. Disconnect all
power from the server before you remove or install a simple-swap hard disk drive.
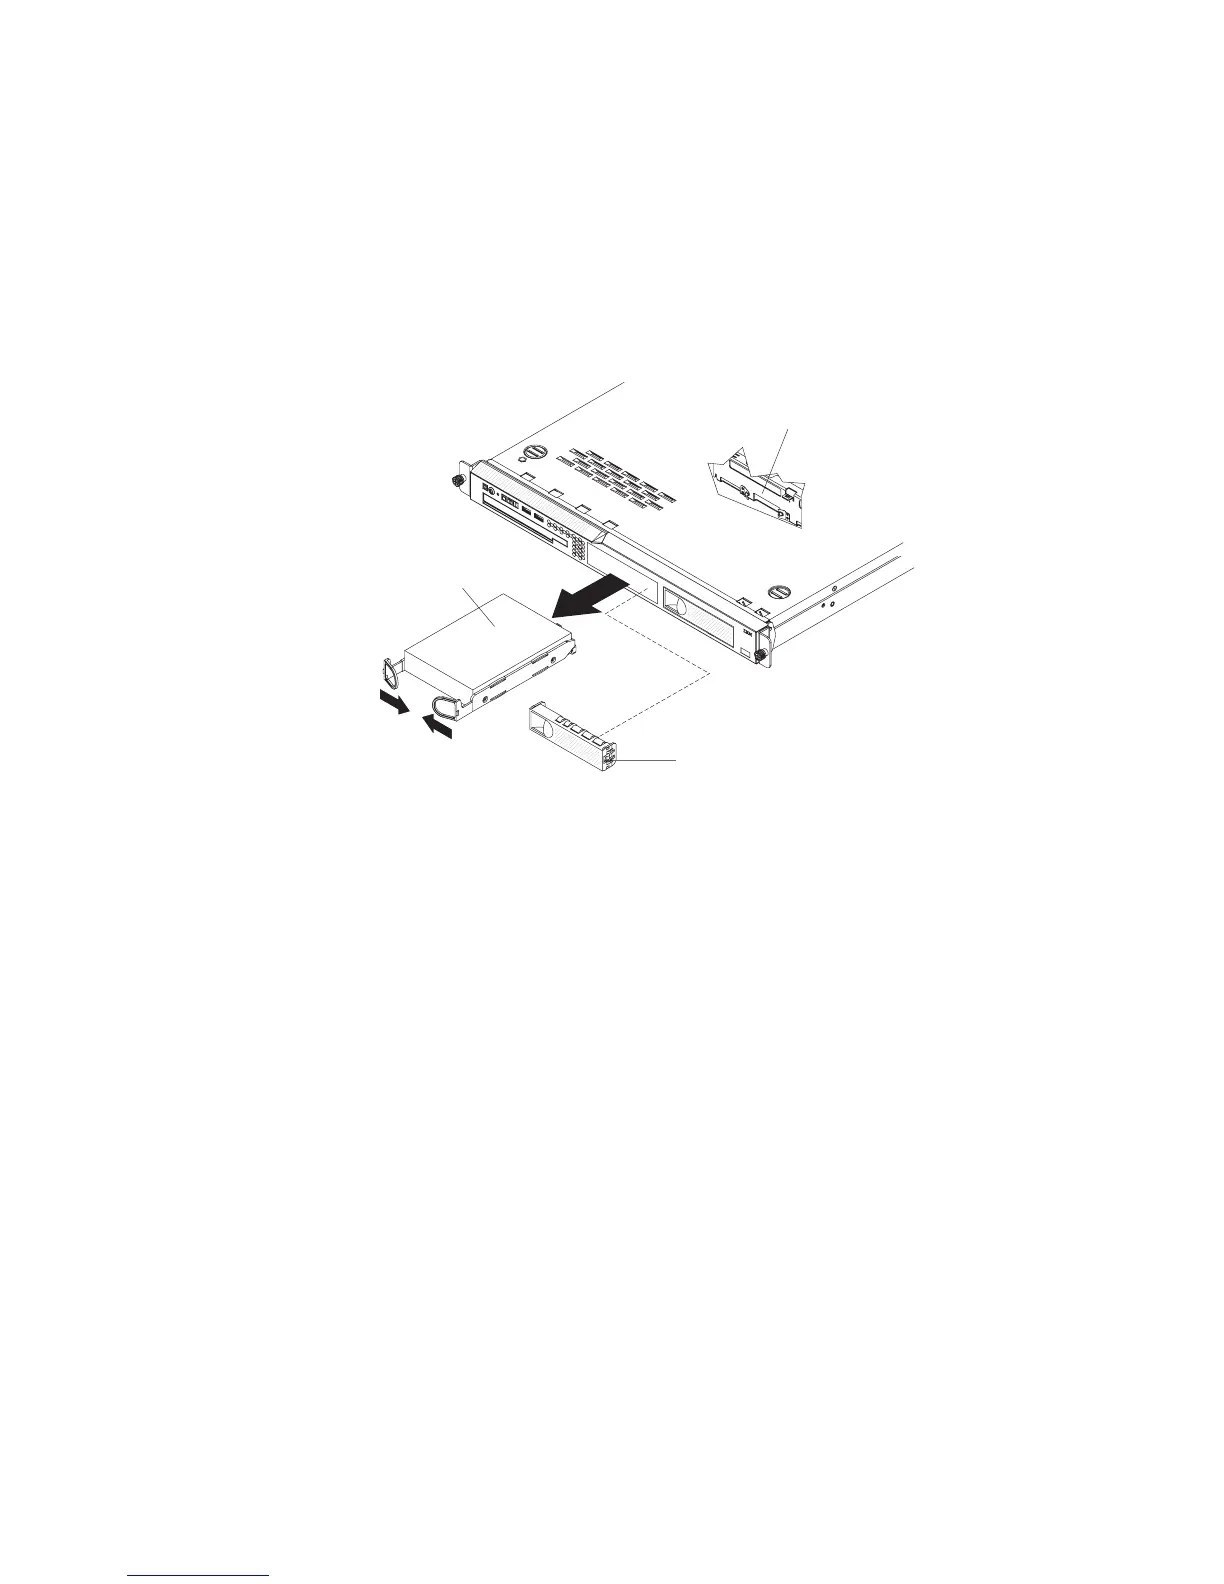
To remove a simple-swap SATA drive from the bay, complete the following steps.
Filler panel
Hard disk
drive assembly
SATA hard disk
drive back plate
1. Read the safety information that begins on page vii and “Installation guidelines”
on page 25.
2. Make sure that the server cover is in place and fully closed.
3. Turn off the server and peripheral devices, and disconnect the power cord and
all external cables.
4. Remove the filler panel from the bay.
5. Pull the loops of the drive tray toward each other and pull the tray out of the
bay.
Installing a simple-swap Serial ATA hard disk drive
Attention: Simple-swap hard disk drives are not hot-swappable. Disconnect all
power from the server before you remove or install a simple-swap hard disk drive.
To install a simple-swap Serial ATA hard disk drive, complete the following steps.
Chapter 4. Removing and replacing server components 35

 Loading...


