I Installation Instructions Combination Units I
Fire and/or explosion hazard.
Gas connector MUST be properly installed and can NOT be
used inside the furnace.
Failure to do so can result in property damage, bodily inju-
ry or death.
Leak Check
1. Gas pressure MUST NOT exceed 1/2 PSIG (3450 Pa).
Checking gas piping above 1/2 PSIG (3450 Pa) requires
the gas valve and manual shutoff valve to be disconnected
during testing.
2. When checking gas piping to furnace, shut OFF manual
shutoff valve to furnace.
3. Test all pipes for leaks.
3. Use pipe joint compound on external (male) threads ONLY.
Joint compound MUST be resistant to any chemical action
of LP gases (FIGURE 12).
4. Use ground joint unions and install a drip leg no less than 3
inches (76 mm) long to trap dirt and moisture before it can
enter gas valve.
5. Use a flat jawed wrench on gas valve when making con-
nections to prevent gas valve from turning. Do NOT use a
pipe wrench on the gas valve body.
CAUTION
Overtightening assembly may cause damage to the gas
valve and/or wiring and may misalign the burners.
6. Provide a 1/8 inch (3mm) National Pipe Thread (NPT) plug
for test gauge connection immediately upstream of the gas
supply connection to the furnace.
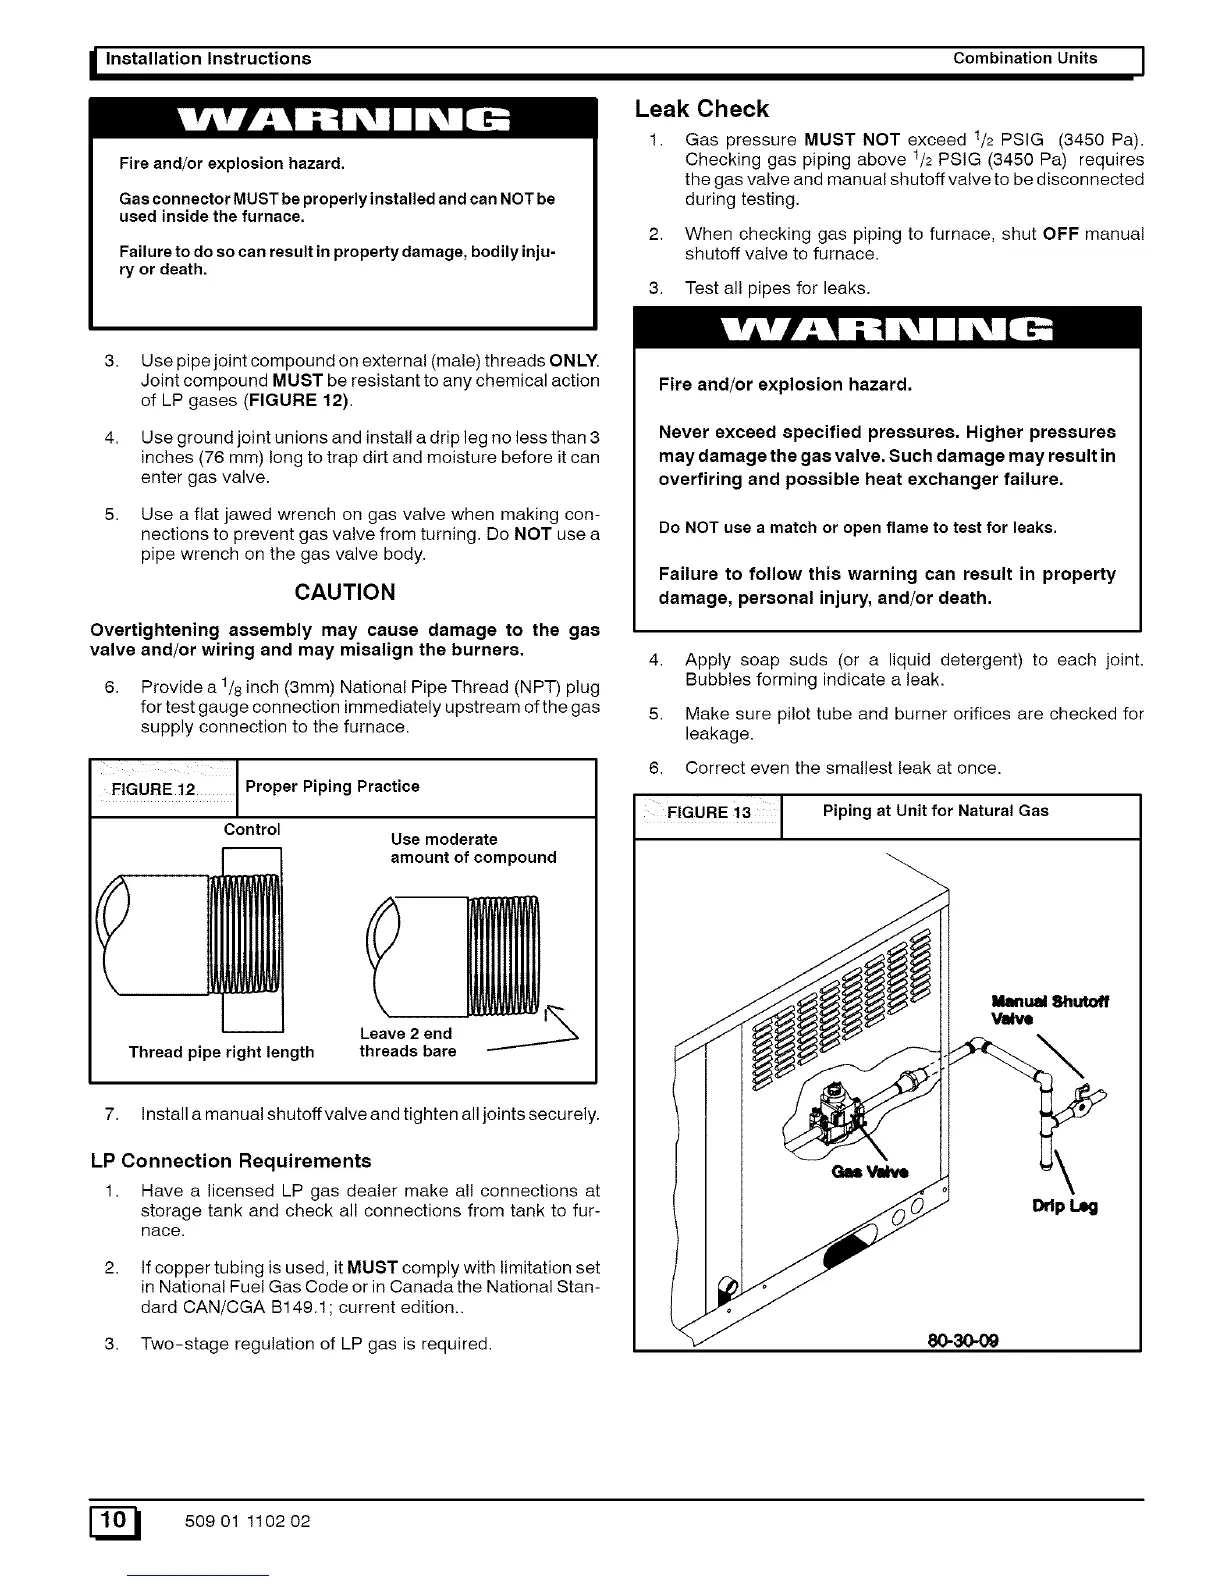
FIGURE i2 J Proper Piping Practice
Control
Use moderate
amount of compound
Thread pipe right length
Leave 2 end
threads bare
7. Install a manual shutoffvalve and tighten all joints securely.
LP Connection Requirements
1. Have a licensed LP gas dealer make all connections at
storage tank and check all connections from tank to fur-
nace.
If copper tubing is used, it MUST comply with limitation set
in National Fuel Gas Code or in Canada the National Stan-
dard CAN/CGA B149.1; current edition..
3. Two-stage regulation of LP gas is required.
Fire and/or explosion hazard.
Never exceed specified pressures. Higher pressures
may damage the gas valve. Such damage may result in
overfiring and possible heat exchanger failure.
Do NOT use a match or open flame to test for leaks.
Failure to follow this warning can result in property
damage, personal injury, and/or death.
4.
5.
6.
Apply soap suds (or a liquid detergent) to each joint.
Bubbles forming indicate a leak.
Make sure pilot tube and burner orifices are checked for
leakage.
Correct even the smallest leak at once.
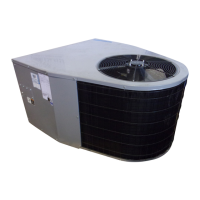
FIGURE !3 1 Piping at Unit for Natural Gas
E_ 50901 110202