prox.pad Plus IR Access System Installer Guide
Performing a Glass Mounted Installation
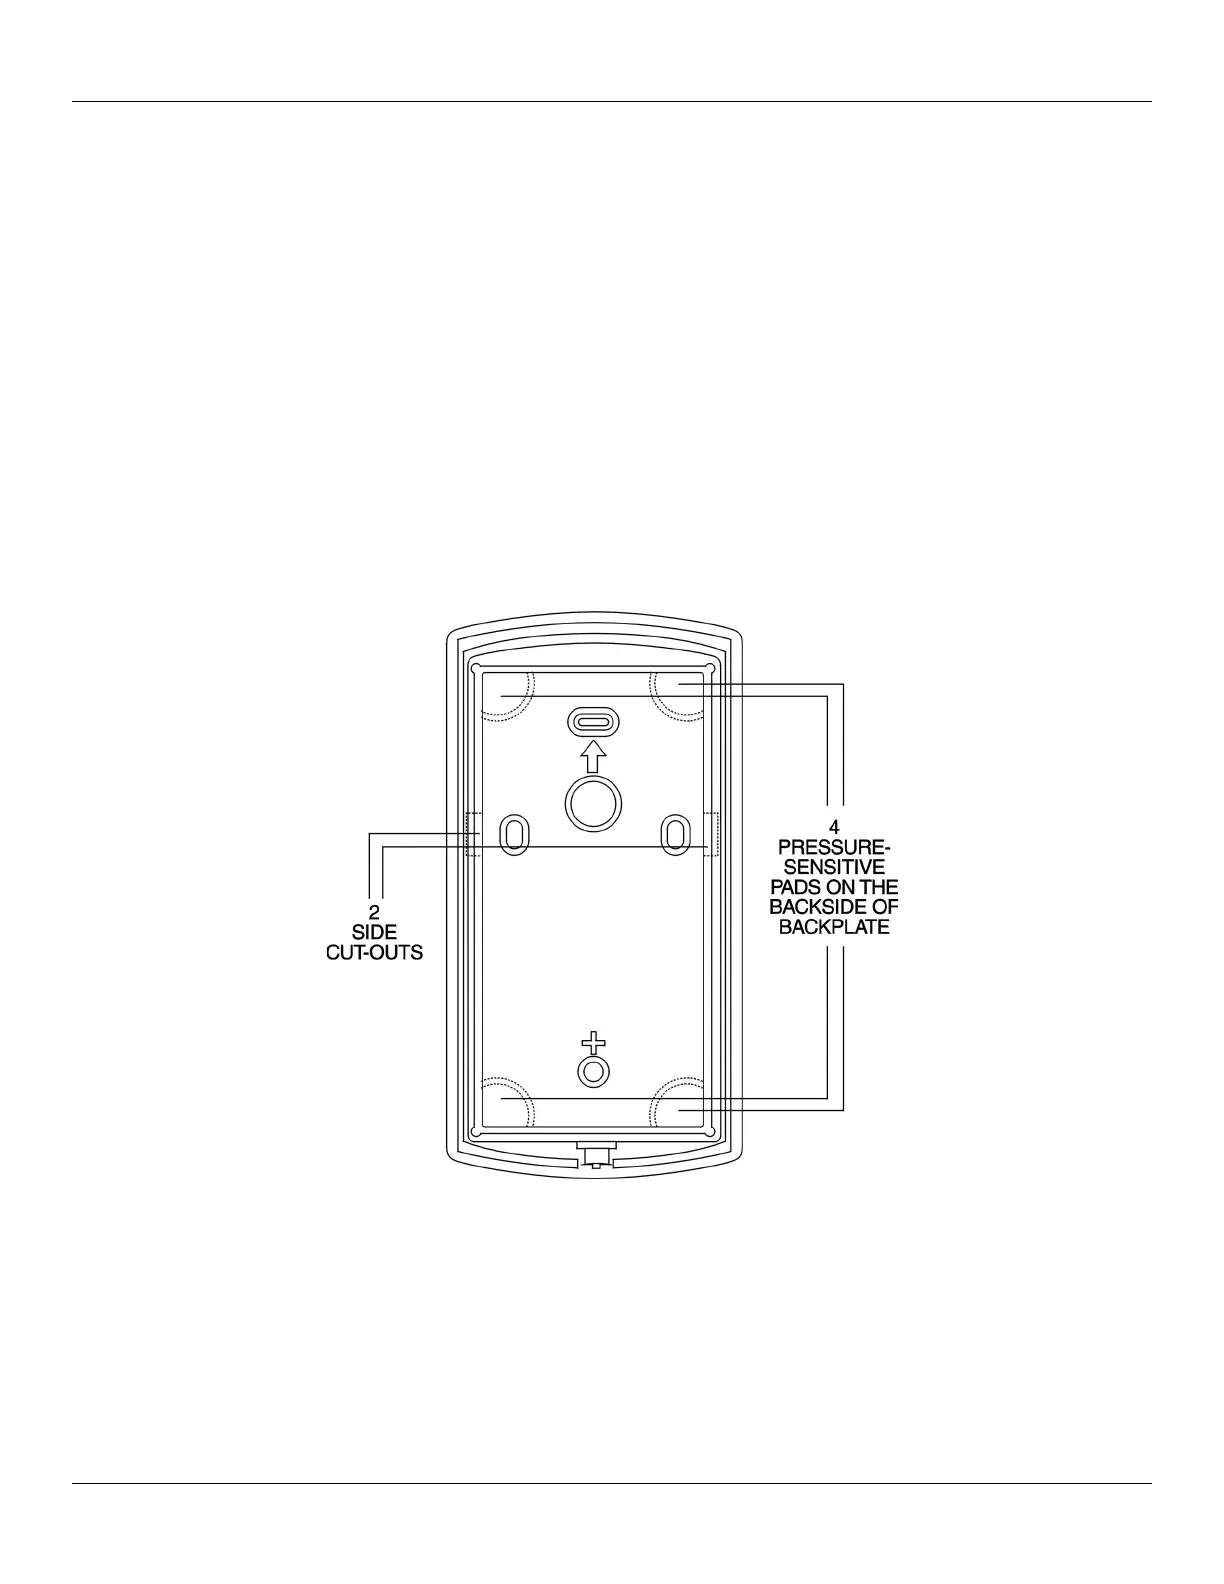
Figure 5 below shows the four IEI-supplied pressure-sensitive adhesive pads and the two side cut-outs used for this installation. In this
configuration, the prox.pad Plus IR unit is affixed with the four self-adhesive pads to the glass or the glass window adjacent to the
door being accessed, on the interior side of the glass. One of the two side cut-outs is used to bring the wires out of the side of the
prox.pad Plus IR case.
A typical glass mounted installation proceeds as follows:
1. Disconnect the back housing from the front keypad/ controller. Remove the tape from the four self-adhesive pads on the back
housing and apply the pads to the four corners of the backplate.
2. Affix the back housing to the glass door or the glass window adjacent to the door being accessed, on the interior side of the
glass.
3. Determine which of the two side cut-outs on the back housing to use for the wiring and remove that cut-out using the
appropriate cutting tool.
4. Pull the wiring through the selected side cut-out as required.
5. Connect the front keypad/controller to the back housing.
6. Install the tamper screw into the hole at the bottom front of the enclosure using a #6 spanner bit (not included, but available
from IEI).
Page 14 of 32 Document # 6105681, Rev 1.1, D2a
Figure 6: Performing a Glass Mounted Installation