8
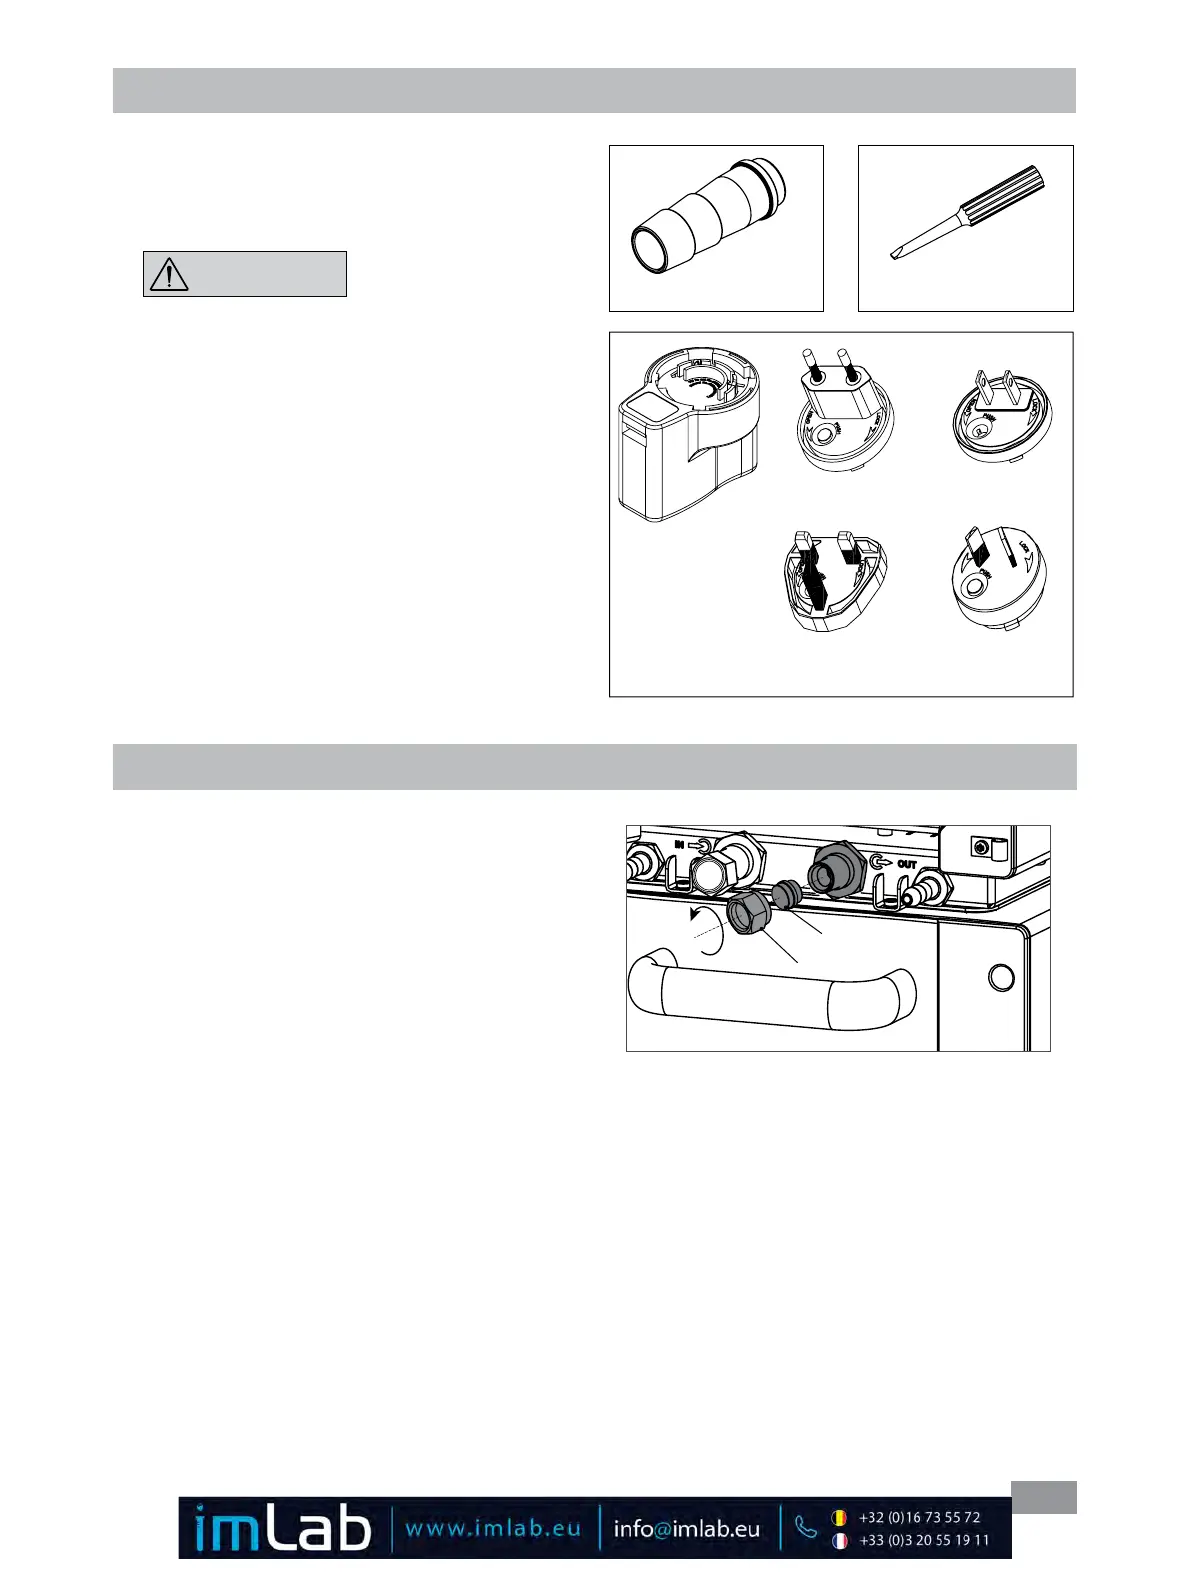
Adapter
England
Adapter
Australia
Adapter
Europe, Switzerland
Fig. 7
Preparations
• Setting up:
- Place the device on an even, stable, clean, nonslip, dry
and fireproof surface�
- Keep at least 20 cm of open space at the front and rear
side�
- When a plastic bath is used, please ensure that the heater
does not contact the bath�
- The place for installation should be large enough and
provide sucient air ventilation to ensure the room
does not warm up excessively because of the heat
from device radiates to the environment�
- Do not set up the device in the immediate vicinity of
heat sources and do not expose to sun light�
• Connecting the tubings:
- Unscrew the union nuts and stoppers using a wrench
from the pump connection IN (7) and OUT (8).
- Connect the hoses for circulating the external system to
the pump connectors M 16 x 1 for IN and OUT directly
or with the olives�
- Screw the hose olive to the pump connection IN
and
OUT with union nuts� Slide the hoses (NW 12) onto the
olives� The hoses must be secured with suitable clamps�
Unpacking
• Unpacking:
- Please unpack the device carefully
- In the case of any damage a detailed report must be
sent immediately (post, rail or forwarder)�
Transport safety
Remove the transport pro-
tection under the buoyage
(4)� For HBC device, you need to open the lid (15) and
remove the protection�
• Delivery scope:
IC control, HBC control, HBC 10 control:
- IC control or HBC 5 control or HBC 10 control with
the Wireless Controller (WiCo) according to the order
- Mains cables
-
Hose olive NW 12 (2 pieces)
see Fig. 5
- Screwdriver (use for safety circuit) see Fig. 6
- OS 1.0 power supply
(for WiCo)
see Fig. 7
- USB 2�0 cable Micro A – Micro B
- USB 2�0 cabel A – Micro B
- User guide
- A warranty card�
Fig. 6Fig. 5
Adapter
USA, China
Stopper
Union nut
Fig. 8
NOTICE