MAINTENANCE
Ilmor High-Performance Marine, LLC
© 7/2013, Version 1.0
7-7
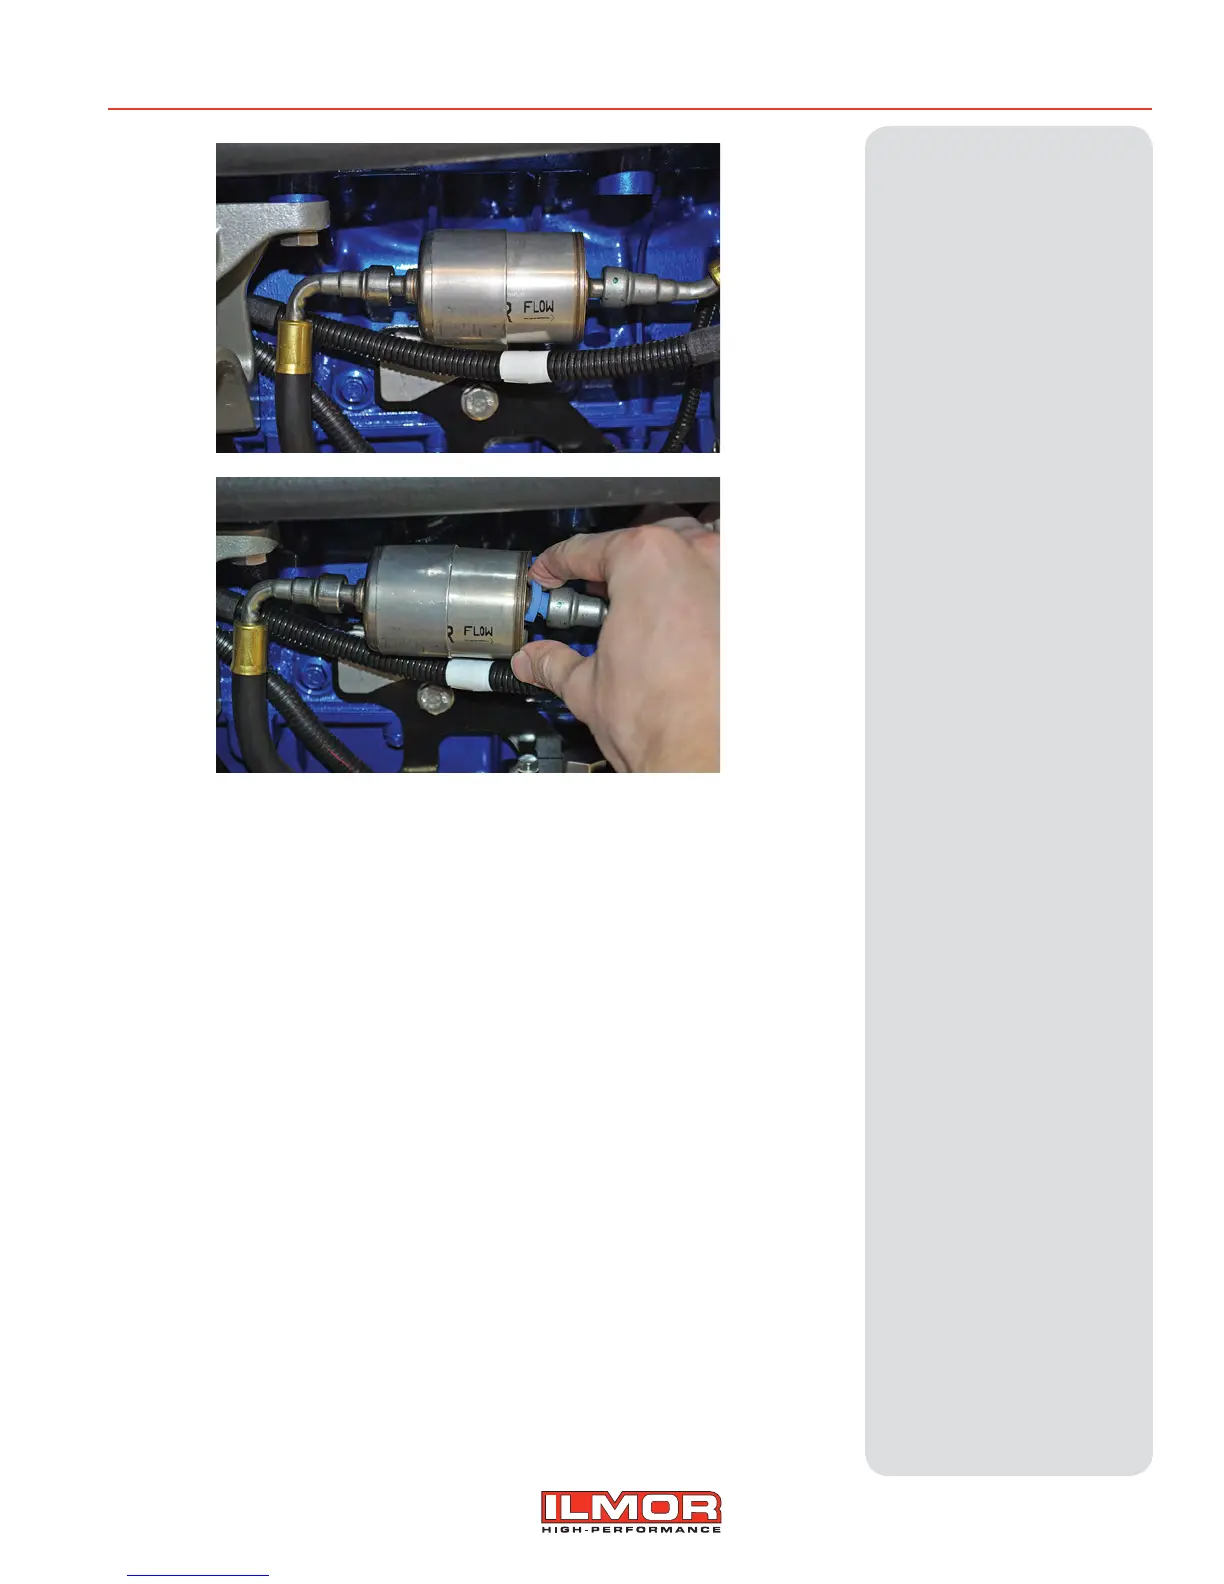
4. Using a 3/8" automotive-style, quick-disconnect fuel line tool (must be
plastic version), carefully remove one fuel line. e tool may need to
be split in half for easier removal. If possible, let lter drain into a small
pan or bucket before removing the second fuel line.
5. Remove the second fuel line and properly dispose of lter and excess
drained fuel.
6. Visually inspect fuel line ends to make sure internal o-rings are still
in place, retaining clips are not bent, and no visual obstructions are
present. If any components appear to be worn or damaged, contact
your authorized Ilmor service center for additional assistance.
7. Install new high-pressure fuel lter, in the previously noted ow
direction, inside the mounting clip on the engine.
8. Install both fuel lines onto the new lter. e lines will click when fully
engaged.
9. Once system is fully reassembled, with the bilge blowers running, cycle
ignition (letting the fuel pump run a full cycle) 3–5 times to prime fuel
system and check for leaks. ere is no need to start the engine as 3–5
ignition cycles will prime the fuel system.
10. Once you have veried the system is leak-free, start the engine and
let it run for approximately 1 minute. en, turn the engine o and
perform a nal check of the bilge for any uid leaks.