TRADUCTION OF THE ORIGINAL INSTRUCTIONS FOR USE
BS 400/60 AFI-Eing ED.2011 rev.00 29/60
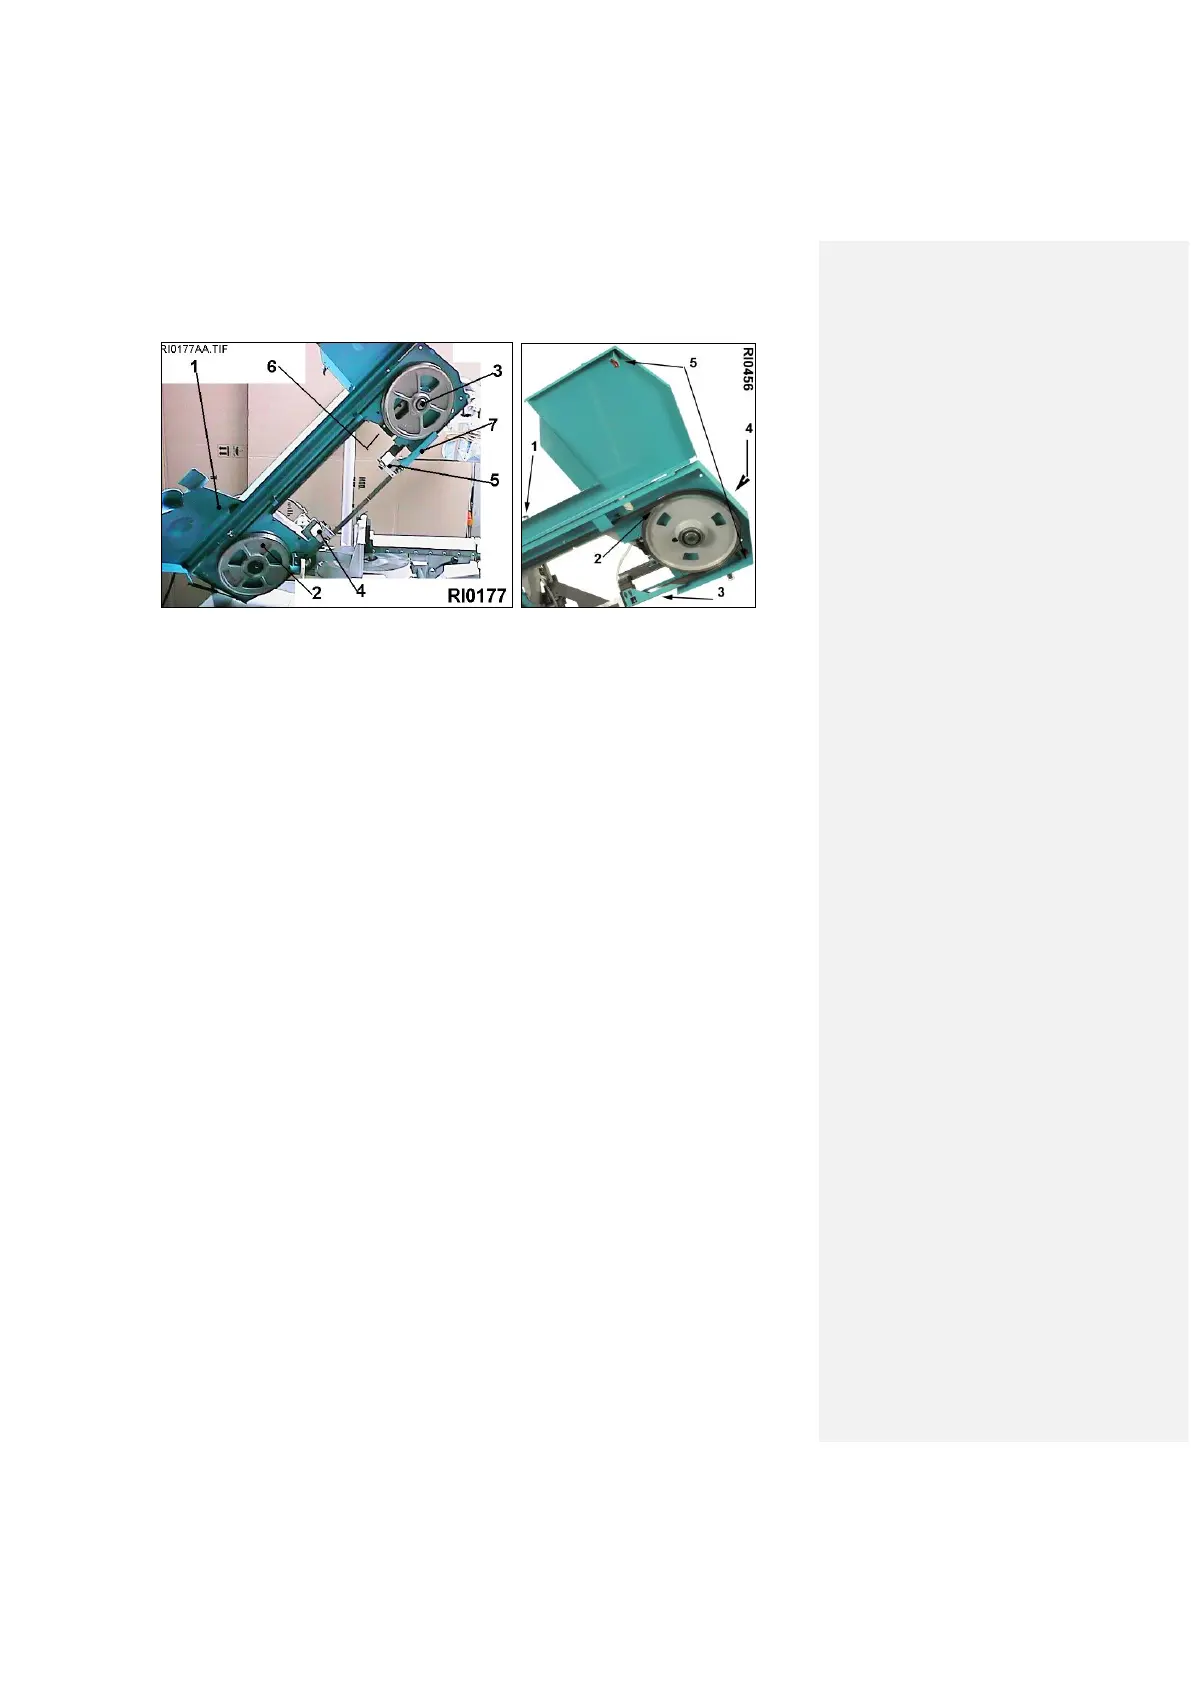
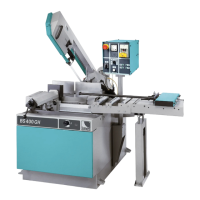
Make sure that there are no chips or dirt on the pulleys, and following the cutting direction, shown also by an arrow,
put the new blade in the guides without removing the plastic protection, and then on the pulleys. The upper
supports prevent the blade from falling. Tighten the tension-adjusting screw and make sure the blade is correctly
placed on the pulleys. Remove the plastic protection, then assemble the blade guard and the front mobile
protections.
Press the main switch and look at what appears on the display: a small BLACK point means that the blade has not
been tensioned enough: tighten the frontal screw until the small circle appears; then tighten 1/4 of a round
more in order to prevent future loosening.
18 – BLADE RUN-IN
To grant an efficient performance and a longer blade life, a good run-in of the blade is crucial each time you
use a new blade.
During the first cuts of a blade, we recommend to reduce the penetration speed up to half the normal value - about
40 cm²/min - and keep a constant blade speed. Only after cutting 250/350 cm² of material the penetration speed
can be increased till reaching the normal value.
The working conditions can also be evaluated by observing the chips produced during the cutting; you can find 3
kinds of chips:
THIN OR POWDERED CHIPS indicate poor advancing pressure and/or low speed; teeth too little.
BIG CHIPS (MAYBE BLUE / BROWN) indicate overload on the blade, poor lubricating.
SPIRAL AND RIGHT DEVELOPED CHIPS indicate the ideal cutting conditions.
For a correct use, see the paragraph BLADE CHOICE
19 - MACHINE RUN-IN
The maintenance required by this machine is essential to guarantee the continuous correct working over the course
of time and keep the saw in an efficient condition. When you start to use the machine you must do some extra
operations to allow all parts of the machine to settle down to the working conditions.
Please check frequently the working of the machine and avoid to force it to make too many cuts. For a time of
80/100 working hours check the oil level in the gearbox by the proper oil window, with the sawframe all the way
down, .
After this time, unload the oil completely by removing the lower plug, shown by a sticker. Put in the plug again and
introduce gasoil for internal cleaning. Run the motor a few seconds, unload the cleaning liquid and then pour in new
oil – about 3 liters – to restore the normal level.
Check also the oil level in the hydraulic unit tank, which must be about 3 cm below the plug edge.
Note: The presence of bronze and/or iron particles in the oil is normal. The heating of the mechanical parts (and of
the hydraulic parts on semiautomatic and automatic machines) is normal during the usual work and anyway it does
not exceed the conventional thermic limits.
Please see the OIL AND LUBRICANTS TABLE in order to choose the most suitable one and to compare the
different types
TABLE in order to choose the most suitable one and to compare the different types (see drawing RI0108).