NanoPhotometer
®
P-Class User Manual
Version 2.1 Page 57 / 70
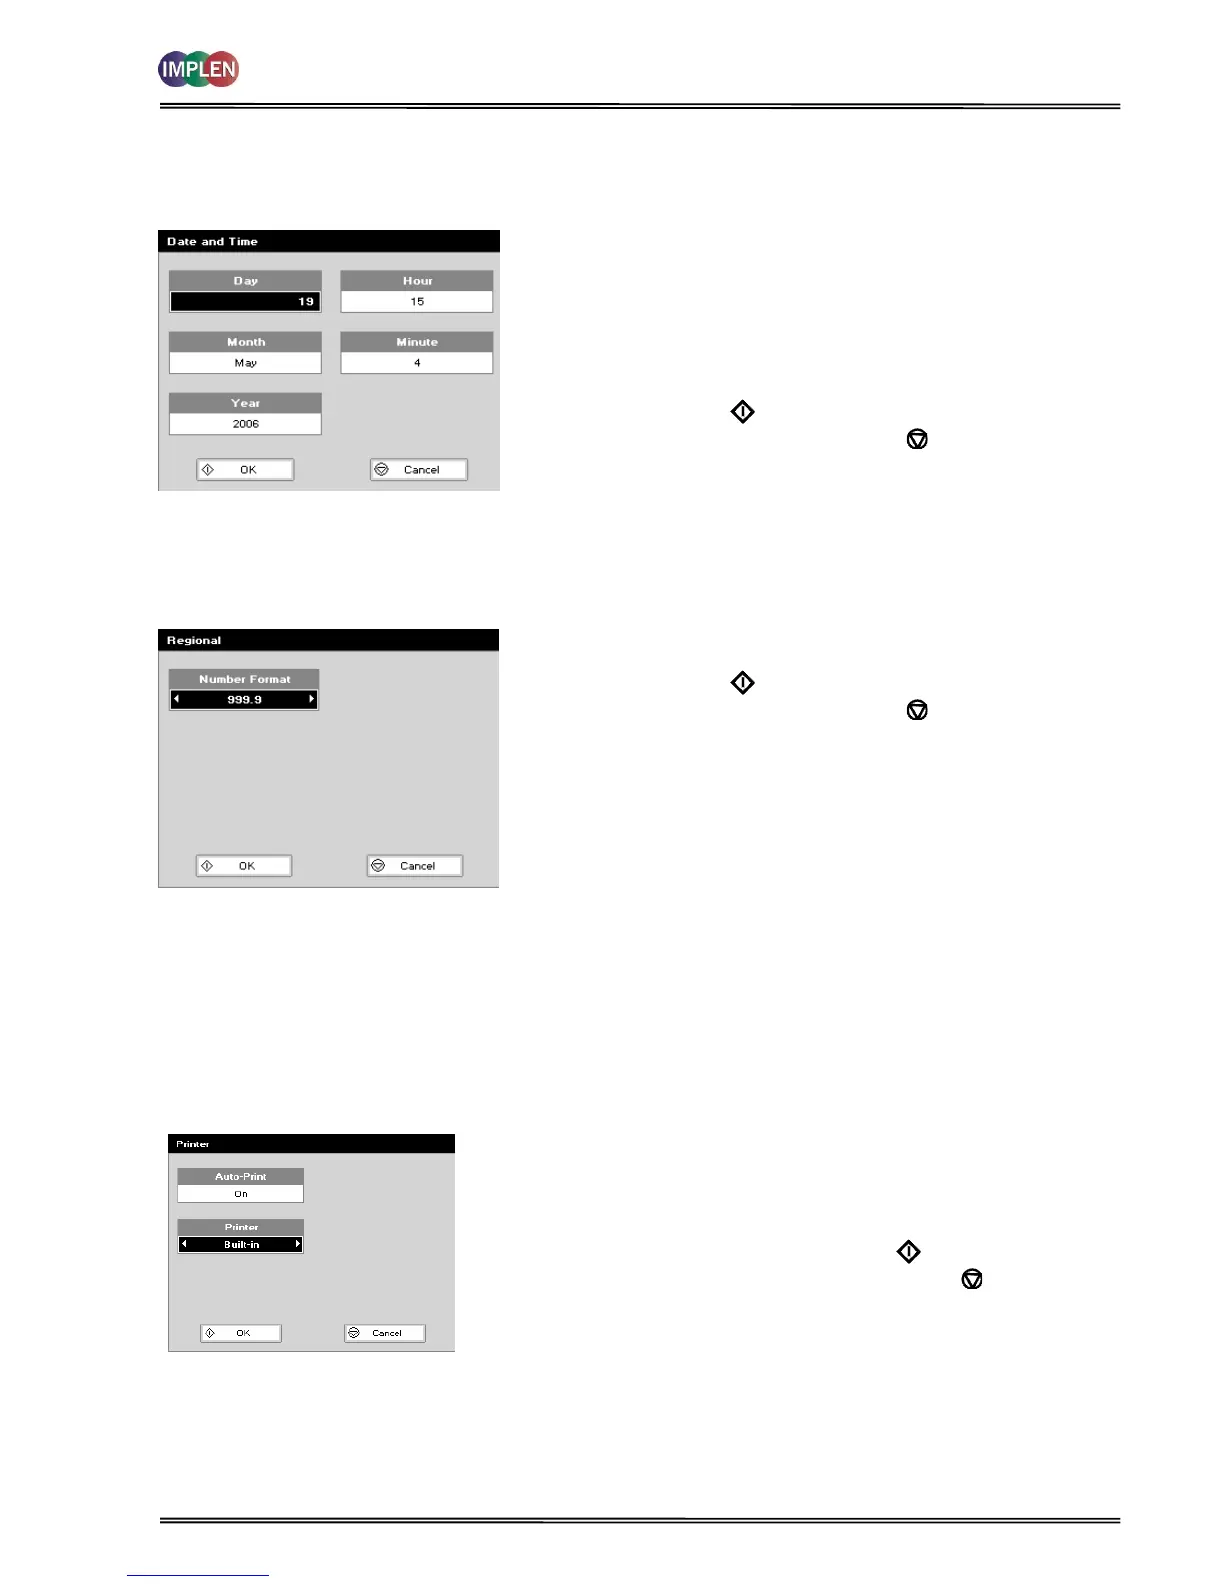
7.1 Date and Time
The procedure is as follows:
Step 1 Enter the Day using the keypad numbers or left and right
arrows.
Step 2 Enter the Month as above.
Step 3 Enter the Year.
Step 4 Enter the Hour.
Step 5 Enter the Minute. Seconds are zeroed when OK is
pressed.
Step 6 Press OK to store the settings and return to the
Utilities folder OR press Cancel to return to the Utilities
folder without storing the time.
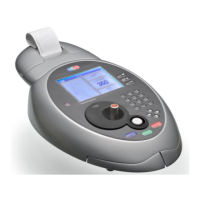
7.2 Regional
Sets Number Format.
The procedure is as follows:
Step 1 Set the Number Format (decimal point style). Options are
“,” or “.”.
Step 2 Press OK to store the settings and return to the
Utilities folder OR press Cancel to return to the Utilities
folder without storing the settings.
7.3 Output Options / Printer
7.3.1 NanoPhotometer
®
P 300
The NanoPhotometer
®
P 300 offers a selection of data-output accessories. Please proceed to Folder 5 Utilities, press 3
Printer to set the requested reporting settings:
Data-output to Built-in printer:
Step 1 Select whether Auto-print is on or off using the left and right arrows.
When auto-print is set as “on” the results are automatically printed
after a measurement is taken. When the setting is “off” printing has
to be initiated manually. This can also be set using the Options key
in each application or method. The default is OFF.
Step 2 Select printer module: Built-in Press OK to store the settings and
return to the Utilities folder OR Press Cancel to return to the
Utilities folder without storing the settings.