NanoPhotometer
®
P-Class User Manual
Version 2.1 Page 58 / 70
Direct Data-output to PC:
Connection between NanoPhotometer
®
and PC is possible with a USB or Bluetooth connection:
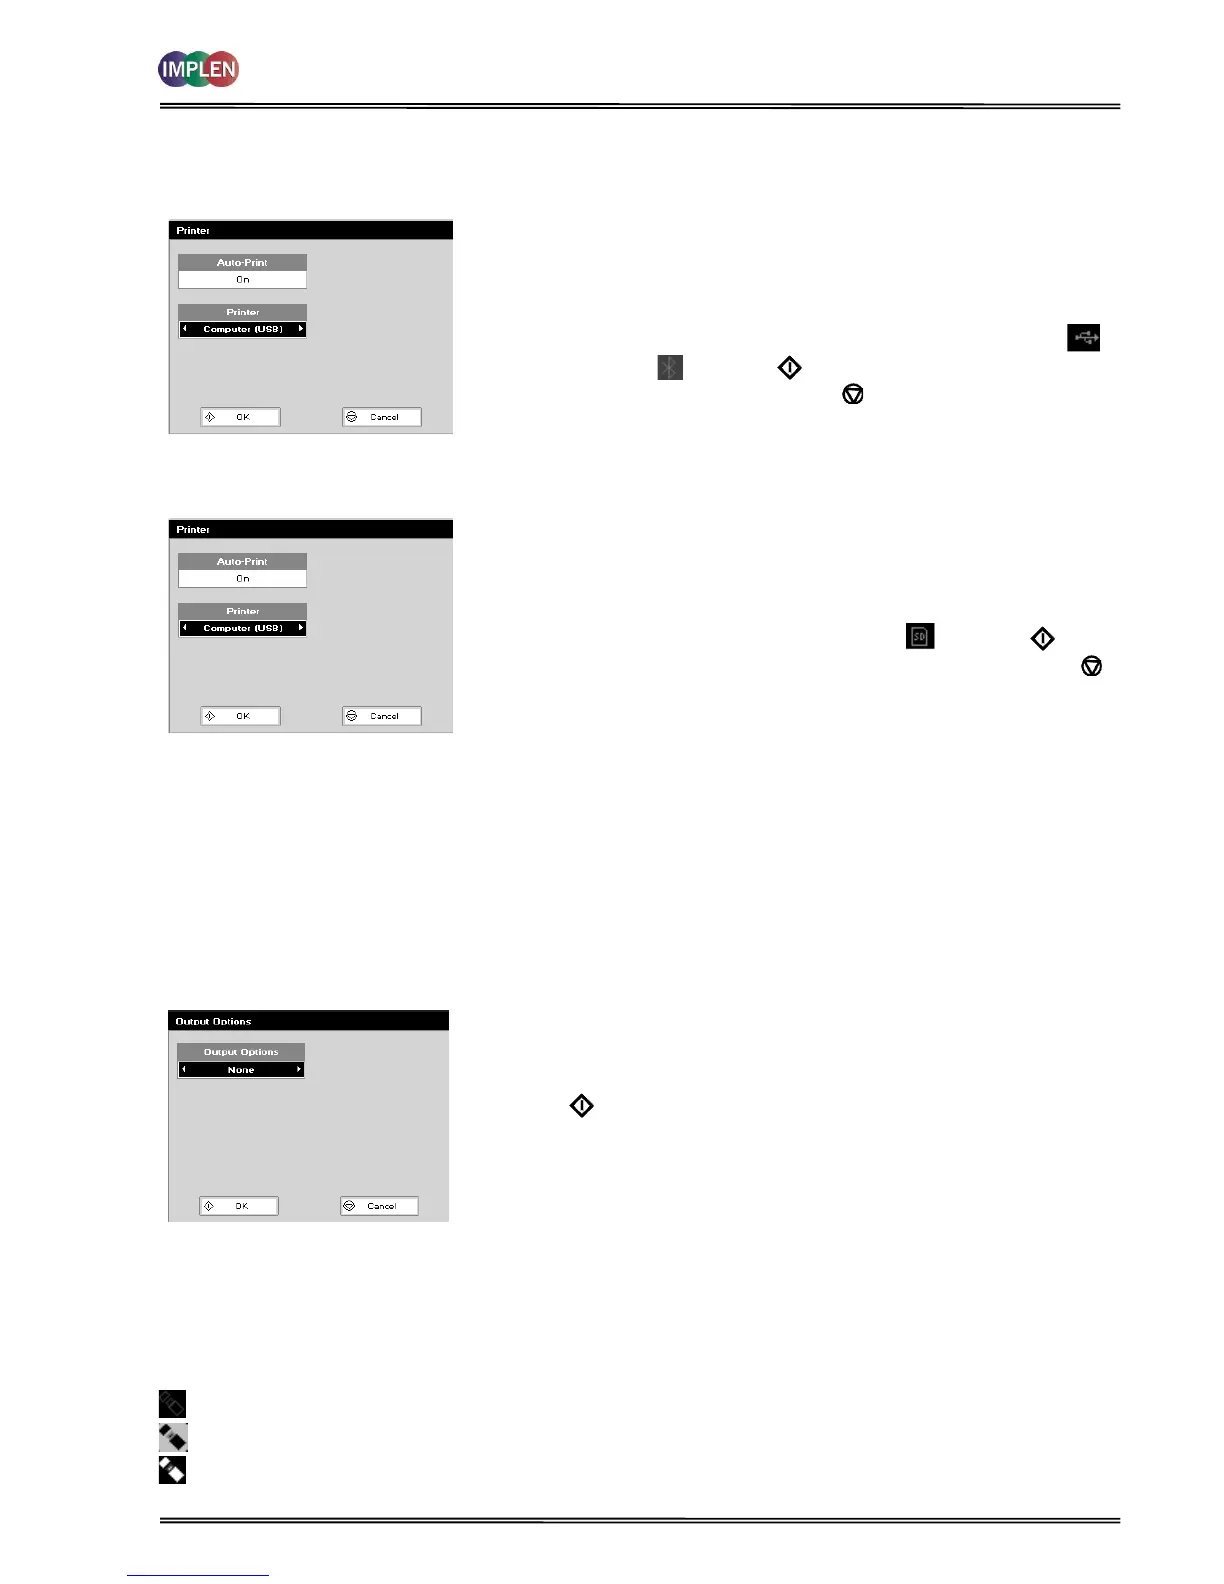
Step 1 Select whether Auto-print is on or off using the left and right arrows.
When auto-print is set as “on” the results are automatically printed
after a measurement is taken. When setting is “off” printing has to
be initiated manually. This can also be set using the Options key in
each application or method. The default is OFF.
Step 2 Select how the data are sent. Options are Computer USB or
Bluetooth . Press OK to store the settings and return to the
Utilities folder OR Press Cancel to return to the Utilities folder
without storing the settings.
Data-output to SD Memory Card:
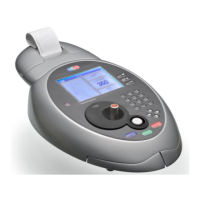
Step 1 Select whether Auto-print is on or off using the left and right arrows.
When auto-print is “on” the results are automatically printed after a
measurement is taken. When it is set to “off”, printing has to be
initiated manually. This can also be set using the Options key in
each application or method. The default is OFF.
Step 2 Select printer module: SD Memory Card . Press OK to store
the settings and return to the Utilities folder OR Press Cancel to
return to the Utilities folder without storing the settings.
7.3.2 NanoPhotometer
®
P 330 /P 360
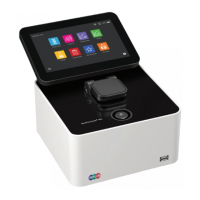
The NanoPhotometer
®
P-Class offers a selection of data-output accessories. Please proceed to Folder 5 Utilities, press
3 Output Options to set the favoured reporting settings:
Data-output to Built-in printer:
Printing on the built-in printer is possible independent from the Output Options setting with the Print key on the keypad.
Pressing the Print key prints the results shown on the result screen on the built-in printer. If no built-in printer is
connected to the NanoPhotometer
®
P-Class the Print key results in a warning message.
If None in the Output Options is selected it is only possible to print with the
built-in printer or save the data on a connected USB flash drive. No data
transfer to a PC is possible. To transfer the data on the result screen to a PC
press 9 for Output Options, change the Output Options to the device of choice.
Press OK to store the settings and return to the result screen. Press Menu
or directly 2 for Data Transfer to transfer the data to the PC. All further
measurements are transferred and saved automatically.
Direct Data-output to USB flash drive:
If a USB flash drive is connected to the USB flash drive port (right side of the NanoPhotometer
®
) all measured data are
automatically saved on the USB flash drive, independent from the Output Options settings. Please exit the method first
before disconnecting the USB flash drive. Otherwise the data can be lost.
On the right corner of the display is the status of the USB flash drive shown:
USB flash drive is connected
Data are written to the USB flash drive
Open file on the USB flash drive. Please exiting the method first, before disconnecting the USB flash drive.