NanoPhotometer
®
P-Class User Manual
Version 2.1 Page 8 / 70
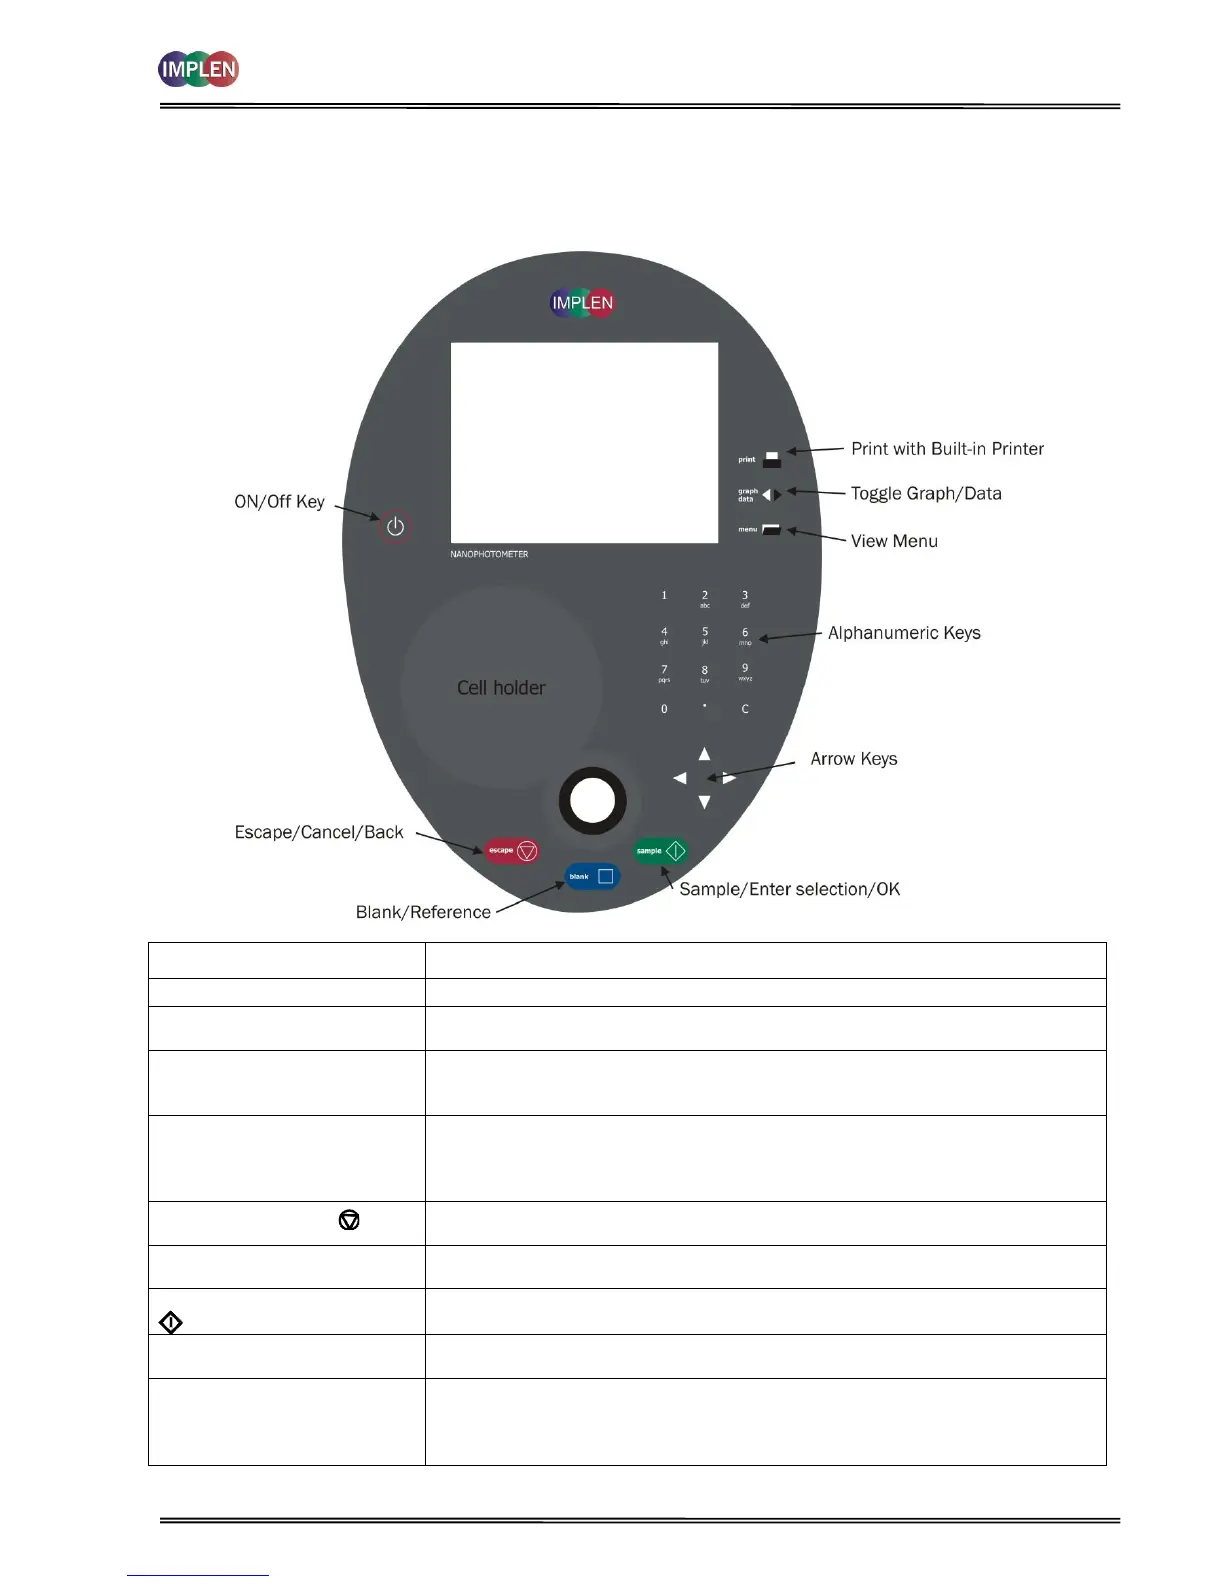
2.4 Keypad and display for NanoPhotometer
®
P 330 /P 360
The back-lit liquid crystal display is very easy to navigate around using the alphanumeric entry and navigation arrow
keys on the hard wearing, spill proof membrane keypad.
Turns the instrument on/off.
Use the four arrow keys to navigate around the display and select the required
setting from the active (highlighted) option.
View menu for that application mode. Some of these are common to all
applications and described on page 8. Menu unique to an application are
described in the relevant section of the NanoPhotometer
®
P-Class User Manual.
Use these to enter parameters and to write text descriptions where appropriate,
or required. Use repeated key presses to cycle through lower case, number and
upper case. Leave for 1 second before entering next character. Use C button to
backspace and 1 to enter a space.
Escape from a selection and return to the previous folder. Cancel a selection. Stop
making measurements.
Set reference to 0.000 A or 100%T on a reference solution at the current
wavelength in the mode selected. When in scan mode, does a reference scan.
Sample/Enter Selection/OK:
Enter, or confirm a selection. Take a measurement.
Print
(P 330 and P 360 only)
Prints the results shown on the screen on the built-in printer, if a built-in printer is
connected to the NanoPhotometer
®
.
Graph/Data
(P 330 and P 360 only)
Toggle graph on/off. The graph shows a wavescan plot across the range 220 nm
to 400 nm (for Dye methods 220 nm to 750 nm) with cursors denoting 230, 260,
280 and 320 nm (Nucleic Acid methods) and 260, 280 and 320 nm (Protein
methods).