Do you have a question about the Impulse IF9325 and is the answer not in the manual?
Guidance on safe assembly procedures and preparation.
Specifies required space for equipment operation and placement.
Lists the necessary tools for assembling the equipment.
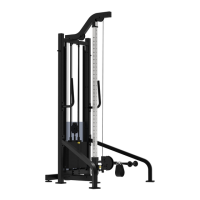
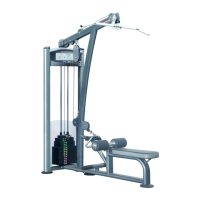
General overview of the equipment's parts list.
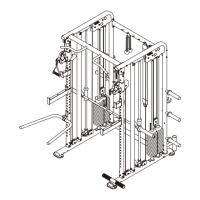
Detailed breakdown of the main frame components.
Detailed breakdown of the bottom cross frame components.
Detailed breakdown of the top cross frame components.
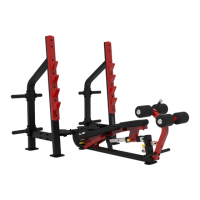
Detailed breakdown of the right front frame components.
Detailed breakdown of the left front frame components.
Detailed breakdown of the pulley frame components.
Detailed breakdown of the adjustment column components.
Detailed breakdown of the handle frame components.
Detailed breakdown of the sliding carriage components.
Detailed breakdown of the double pulley frame components.
Detailed breakdown of the double pulley frame sub-assembly.
Detailed breakdown of the full shroud assembly.
Detailed breakdown of the short shroud assembly.
Attaching bottom cross frame, hanger columns, and spring washers.
Attaching front frames and handle frames to the main frame.
Attaching the top cross frame assembly.
Assembling weight stack for 160LBS configuration.
Assembling weight stack for 200LBS configuration.
Assembling weight stack for 235LBS configuration.
Assembling weight stack for 295LBS configuration.
Attaching adjustment column to cross frame assemblies.
Attaching pulleys and cable assembly to the frame.
Attaching the full shroud components to the main frame.
Attaching the short shroud components to the main frame.
Attaching gear hook, D-strap, and leg extension/curl strap.
Instructions for positioning the sliding carriage correctly.
Instructions for selecting and engaging the weight selector pin.
| Brand | Impulse |
|---|---|
| Model | IF9325 |
| Category | Fitness Equipment |
| Language | English |