InfiRay Outdoor • Geni Series• Operating Manual www.infirayoutdoor.com
All rights reserved and shall not be copied and distributed in any form without written permission
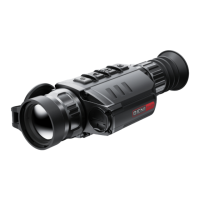
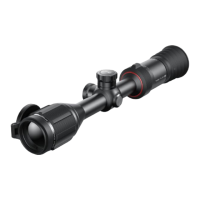
Power On and Image Settings
➢ Open the lens cover (9).
➢ Press and hold down the Power (7) button to turn on the scope.
➢ Rotate eyepiece diopter adjustment ring (2) until images in eyepiece
are clear. After this, there is no need to rotate the eyepiece adjustment
ring (2) for distance or any other conditions.
➢ Rotate the lens focus ring (11) to focus on the object being observed.
➢ To set up display brightness, image contrast, image modes and digital
zoom, please refer to the Quick Menu Function section.
➢ After use, hold down the Power (7) button for about 3 seconds, there
will be prompts of countdown of switch off. Release the button until a
prompt of saving data appears on the screen after counting down from
3 to 0, and the device will switch off after saving data. Please don’t
cut off power supply when saving data, otherwise the data may
not be saved.
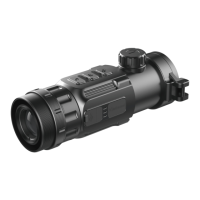
10 Zeroing
Geni series feature to use the “Freeze” zeroing method. Zeroing should be
done at the operation temperatures by following the order of these steps:
➢ Mount Geni on your weapon according to the instructions of section 8
Installation of Rifle Mount.
➢ When using Geni for the first time, press the Up (6) + M (5) + Down (4)
three buttons at the same time for more than 10 seconds to active the
hidden functions about reticle and zeroing functions.
➢ Set a target at a certain distance.
➢ Adjust the riflescope according to the instructions of section 8 Power on
and image settings.
➢ Select the zeroing profile (refer to “Reticle - Zeroing Profile” in Main
Menu).
➢ Press and hold down the M (5) button to enter the Main Menu.
➢ Briefly press the Up (6) / Down (4) button to select the Zeroing item.
Then press M (5) button to enter the submenu.
➢ Base on the preset target distance to select zeroing distance in the
zeroing submenu or add a new distance (refer to Main Menu option