6 7
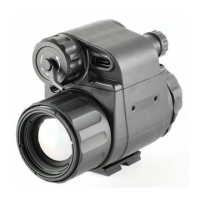
6. QUICK START GUIDE
Step 1: Prepare to Use the MINI MH25V2
1. Compare the box contents to the accessories list and examine each for
any shipping damage. See Accessories on page4.
2. Check the lens to ensure there are no smudges or dirt present. Clean
with the included lens cloth, if necessary.
3. Install the eyeguard (7).
4. Insert the 16340 battery into the battery compartment. See Installing the
Battery on page7.
5. Mount the MH25V2 to a helmet (optional). See Mounting the MINI
MH25V2 to a Helmet on page10.
Step 2: Turn On the MH25V2
1. Open the objective lens cap (1).
2. Long press the Rotary Encoder (5) for 3 seconds to power on the
MH25V2. The InfiRay Outdoor logo will appear.
3. Rotate the diopter adjustment ring (6) of the eyepiece until the interface
icons are clearly visible.
WARNING: Do not point the objective lens toward intense energy
sources, such as the sun. This may render the electronic components
inoperative. The warranty does not cover damage caused by improper
operation.
Step 3: Adjust Image and Device Settings
1. Short press the Rotary Encoder (5) to enter the quick menu to adjust
the following settings (see Using the Quick Menu on page15):
a. Set the color palette to white hot, black hot, red hot, or color.
b. Set the display brightness level, from 1–5.
2. Long press the Rotary Encoder to enter the main menu to adjust the
following settings, as needed:
a. Turn on the motion sensor. See Device Menu > Msensor on
page28.
b. Turn on the PIP window. A 2× zoomed image (2× that of the total
zoom shown in the status bar) will appear at the top of the screen.
See Function Menu > PIP on page30.
c. Set the date and time. See Calibration Menu > Time on
page31.
d. Set the image sharpness level, from 1–4. See Setting Menu >
Sharpness on page33.
e. Set the non-uniformity correction (NUC) mode to automatic or
manual. See Setting Menu > NUC Mode on page33.
3. From the home screen, rotate the Rotary Encoder to zoom in or out,
from 1.0 to 4.0×, in increments of 0.1. The real-time amplification number
appears in the status bar. See Digital Zoom on page24.
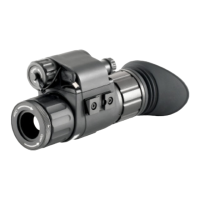
7. INSTALLING THE BATTERY
1. Remove the battery cover (3) by turning it counterclockwise.
2. Insert a 16340 battery (or a 16650 battery plus adapter) into the
battery compartment following the polarity markings on the outside
of the compartment. The positive [ + ] battery terminal faces in and the
negative[ − ] terminal faces out
3. Replace the battery cover.
 Loading...