8
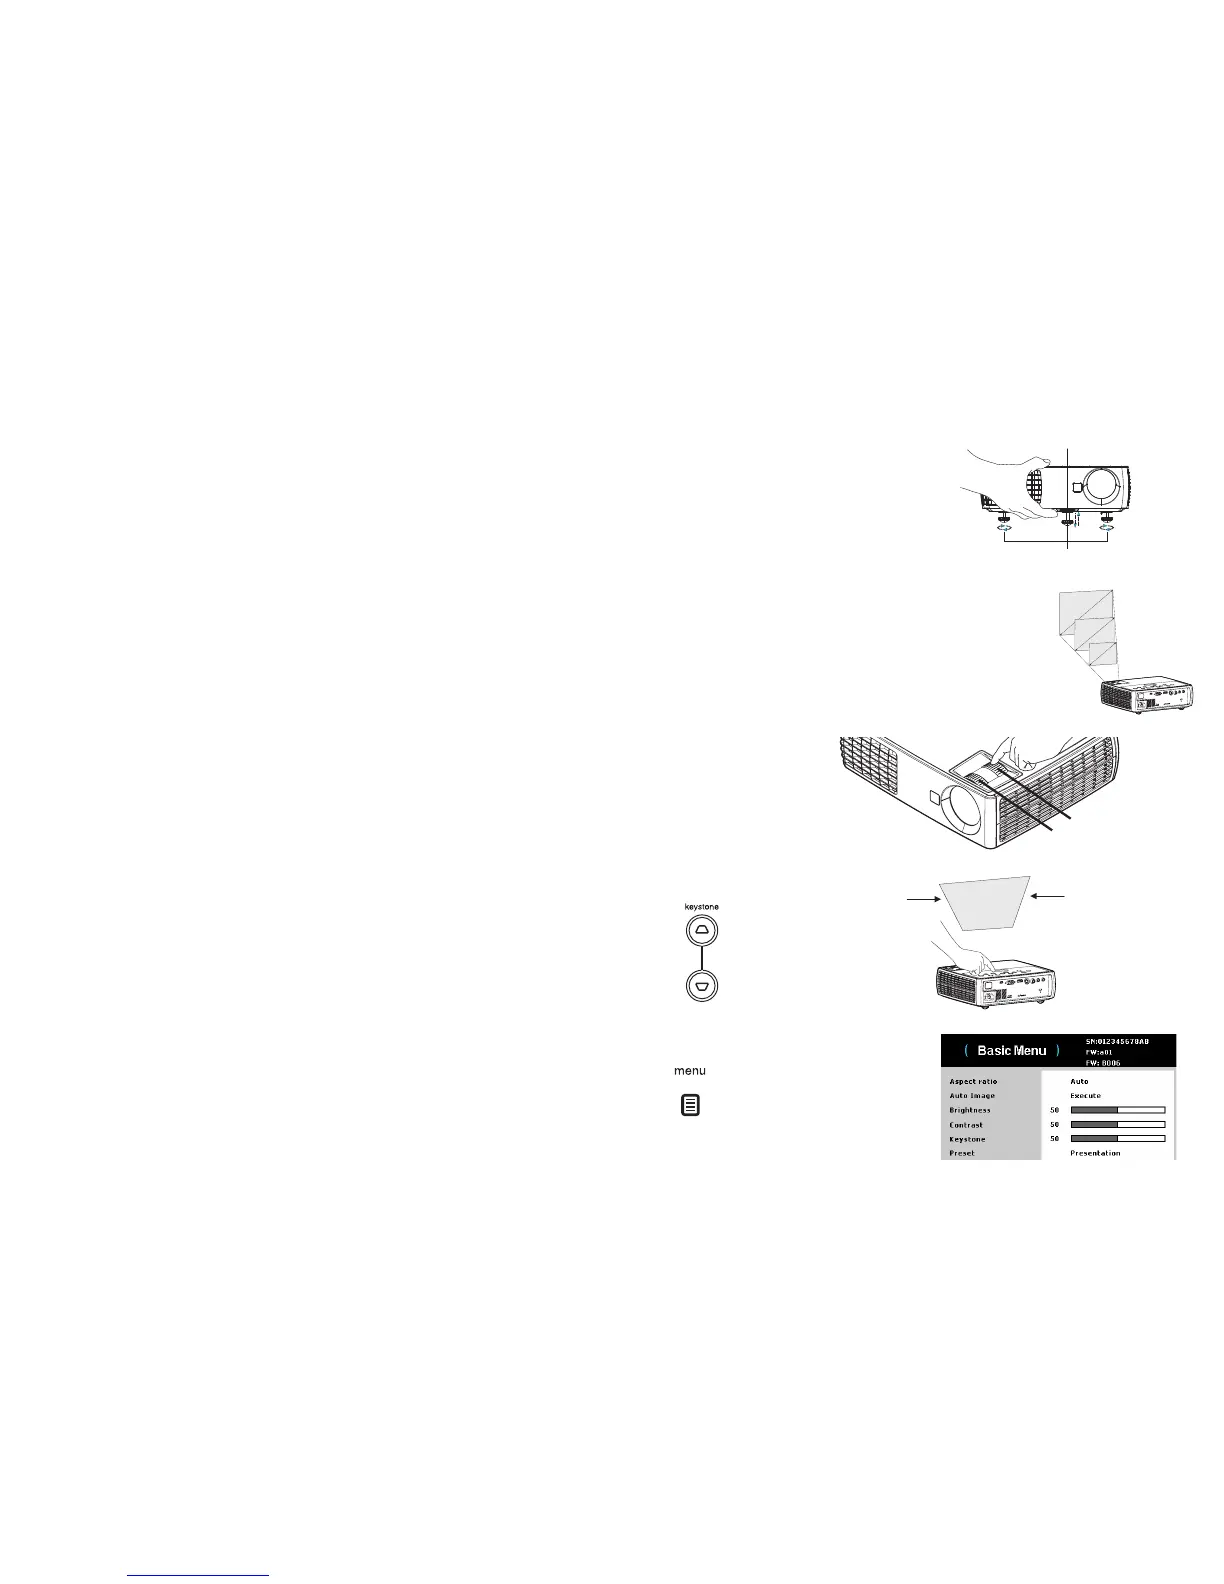
Adjusting the image
If necessary, adjust the height of the projector by pressing the elevator foot release
button to extend the foot.
If necessary, rotate the leveling foot located at the rear of the projector.
Avoid placing your hands near the hot exhaust vent at the side of the projector.
Position the projector the desired distance from the
screen at a 90 degree angle to
the screen.
See page 5 for a table listing screen
sizes and distances.
Adjust the zoom or focus, as needed.
If the image is not square, first make sure tha
t
the projector is perpendicular to the
screen. If the image is larger or smaller on the top or bottom edge of the screen,
press the top Keystone button to reduce the upper part of the image, and press the
bottom Keystone button to reduce the lower part.
If the left or right side of the screen is lar
ger or smaller
the other, you can turn the
projector to the left or to the right a few degrees to square the image.
Adjust the Contrast or Brightness in the Basic menu. See page 24 for help with
these menu adjustments.
For Aspect Ratio, keep in mind that DVD players must be configured for 16:9 in
order to view the highest quality image. For more information regarding Aspect
Ratio, see page 24.