49
Show actual time
8.2.1 Setting the clock program on CH operation
Setting the clock
8.2 Setting and adjusting the clock functions
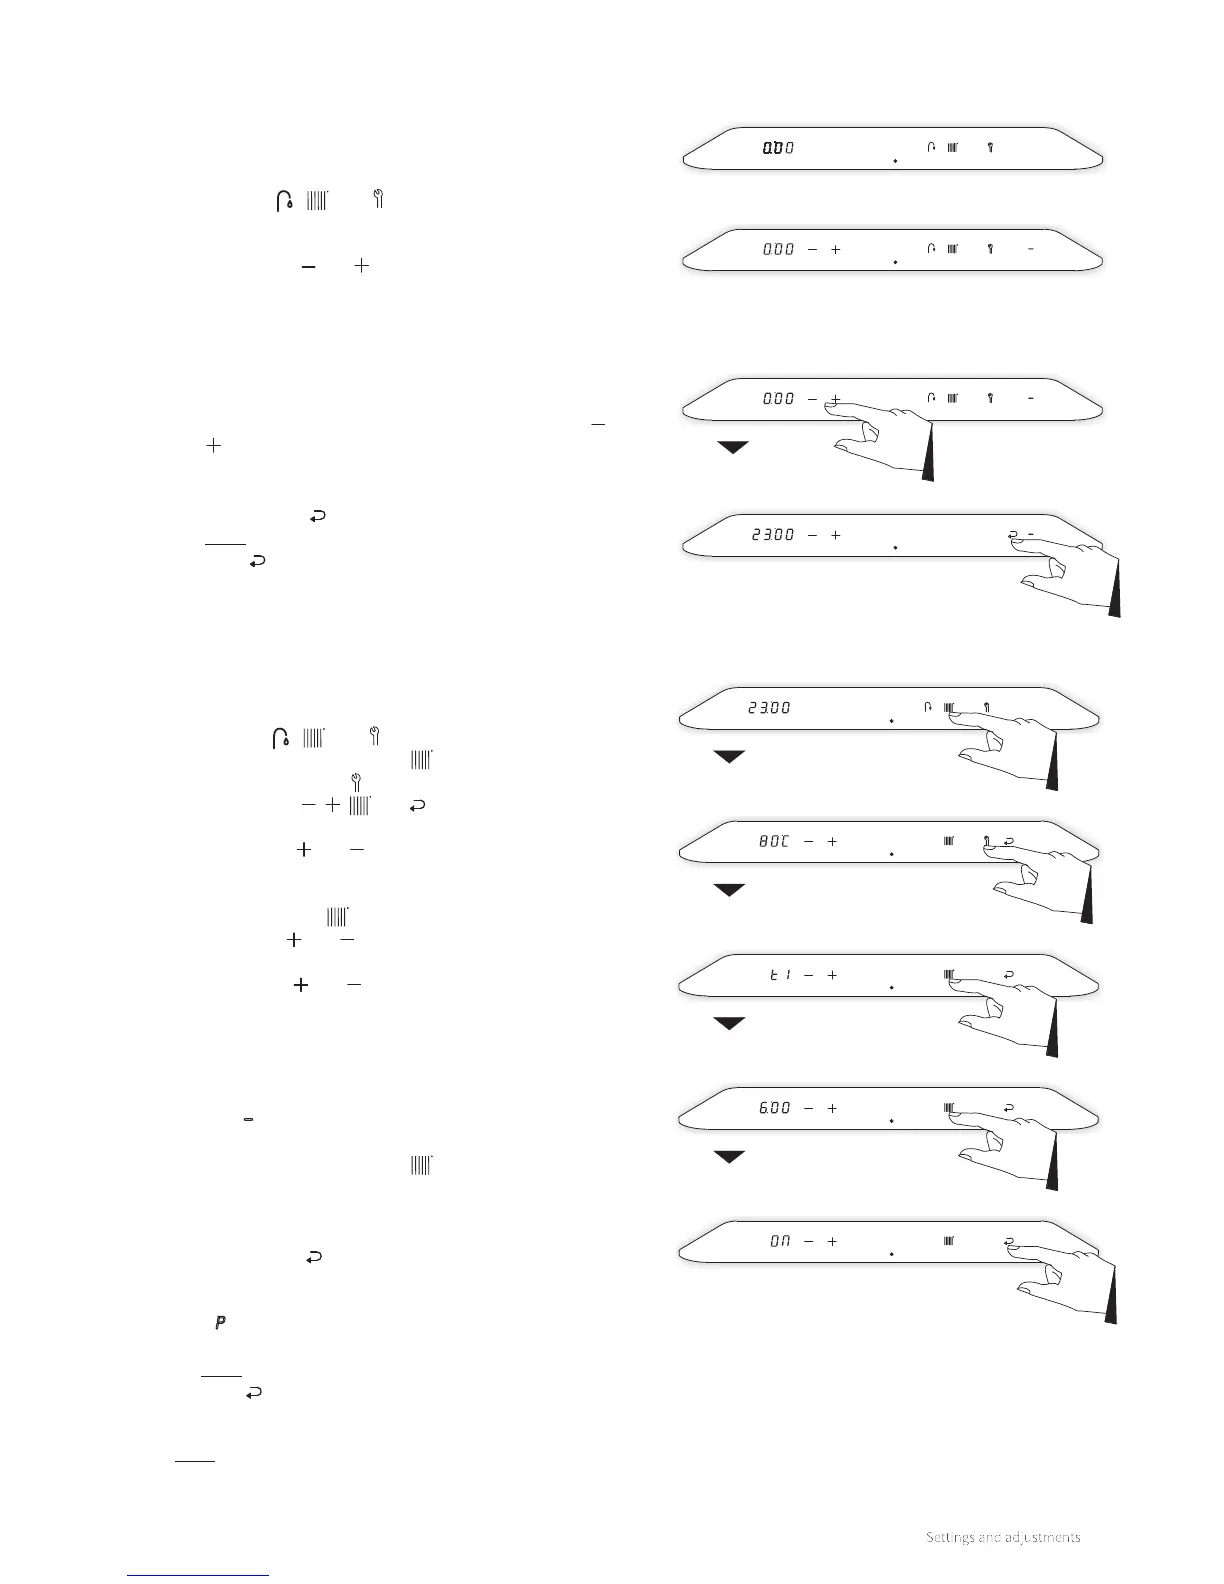
Clock shown (boiler standby)
Clock shown (boiler switched o)
► From a boiler that is in standby or in operational mode tap
just above the power LED to access the main menu (also
see §8.1.1). The actual time is shown in the le display. The
symbols , and also light up.
► If the boiler is switched o when accessing the main menu
the symbols and will light up as well.
► Check if the boiler is switched o or otherwise switch it o
by touching just above the power LED and holding this for 2
seconds.
► Tap just above the power LED to access the main menu.
Adjust the clock to the correct time by pressing the and
buttons.
Note: Holding the button for more than 1 second will make
the clock run fast.
► Tap the Enter button to confirm.
Note: By tapping just above the power LED instead of the
Enter button the display returns to the main menu
without saving any changes.
► From a boiler that is in standby or in operational mode tap
just above the power LED to access the main menu. The
symbols , and light up.
► Tap on the Central Heating button.
► Tap on the Service button.
► The symbols , , and are shown. Also the first
switching period "t1" appears on the le display.
► Tapping the and buttons will change between the 6
dierent on/o switching periods.
► Choose a switching period (for instance "t1") and tap on the
Central Heating button.
► Tap on the and buttons to set the time and tap the
Central Heating button again to set the desired action by
tapping the and buttons.
The actions to be set are as follows:
► On: Start of period CH on. From this switching point
requests for heat demands will be answered.
► O: End of period CH o. From this switching point
requests for heat demands will not be answered.
► – : No action. This switching point will have no eect
on requests for heat demands.
► Tap on the Central Heating button to select the
next switching period. Set the switching time and the
corresponding action and repeat this, if needed, for all 6
switching periods.
► Tap the Enter button to confirm. The switching times and
actions will be saved in the boiler controller. Aer 2 minutes
of inactivity changes made will also be saved.
A P appears in the right display and the display returns to
the Central Heating menu.
Note: By tapping just above the power LED instead of the
Enter button the display returns to the Central Heating
menu without storing any changes.
Confirm
Switch moment 1
Switch point t1
Action moment t1
Main menu
Main menu
Central heating menu
Note
► Switching points and actions may be set in random order.
There is no need to set times and actions chronologically.