Chapter 8: Operating instructions
TruVision DVR 12 User Manual 55
Menu overview
The DVR has an icon-driven menu structure that allows you to configure the
unit’s parameters. Each command icon displays a window that lets you edit a
group of settings. Most menus are available only to system administrators.
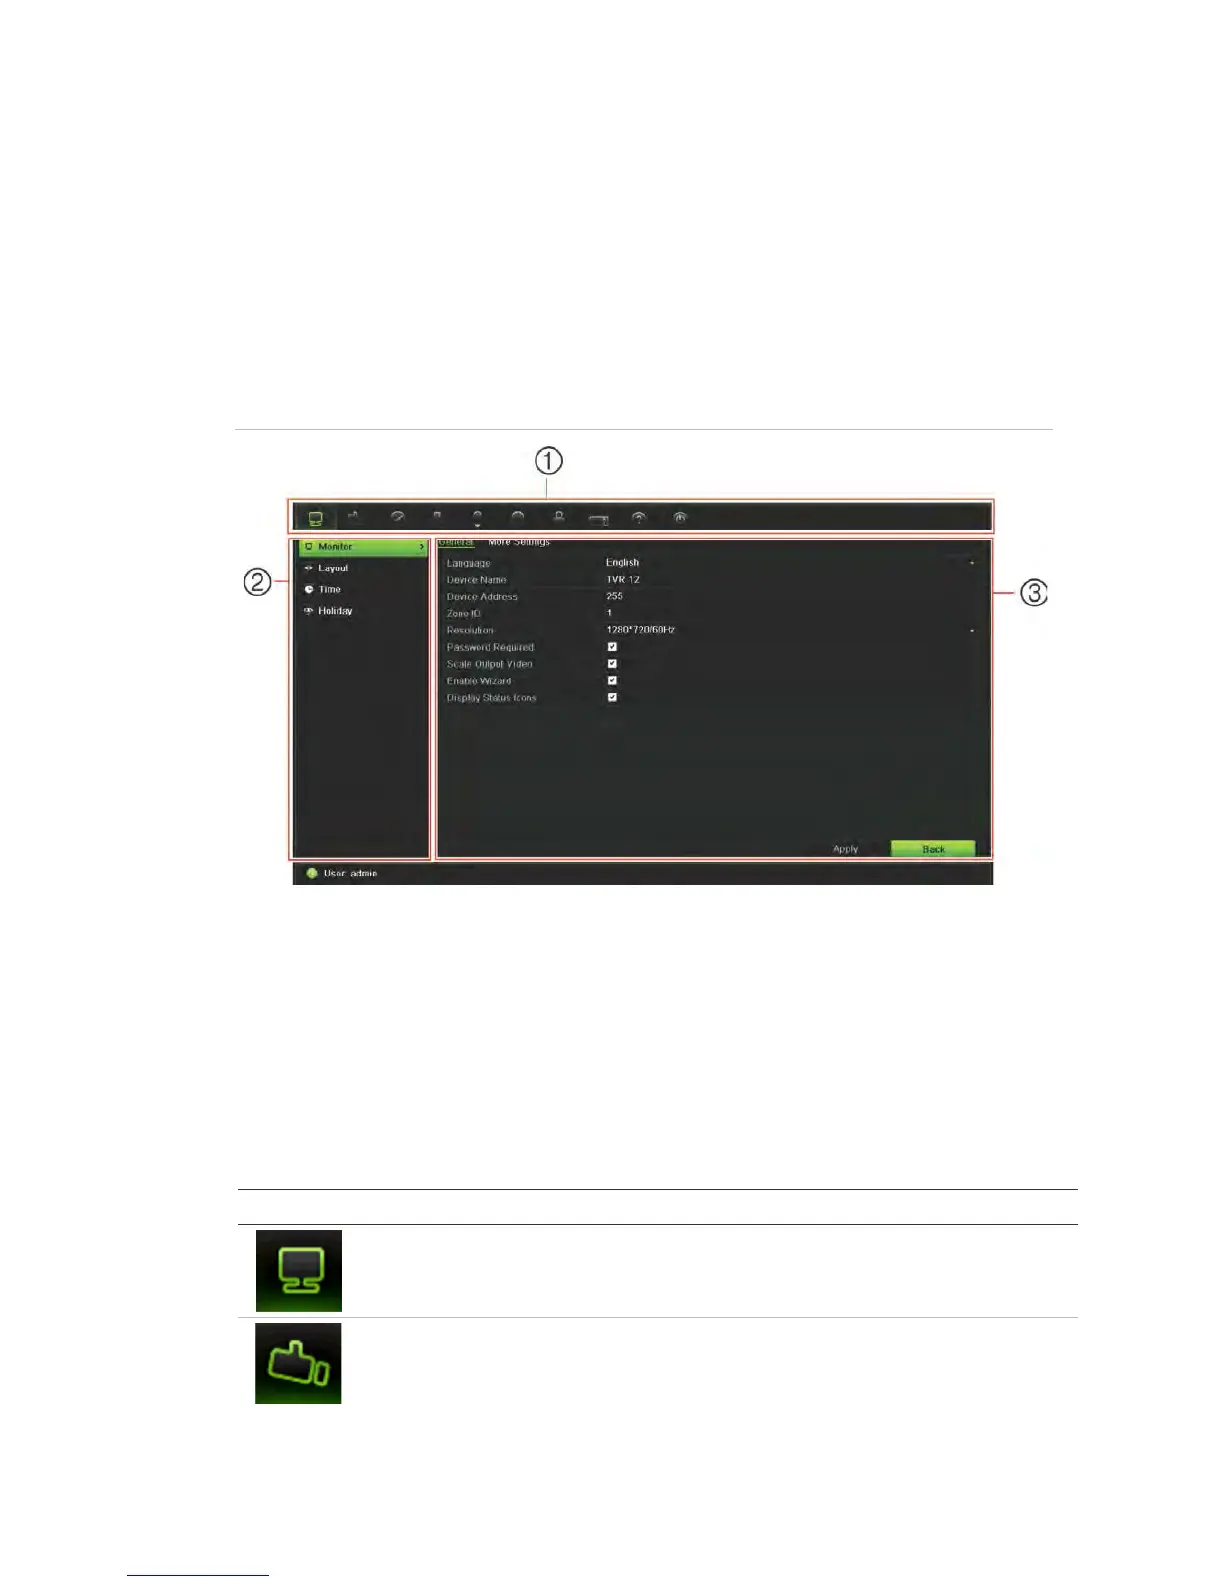
The window is divided into three sections. The currently selected command icon
and submenu item are highlighted in green. See Figure 12 below.
You must be in live view mode to access the main menu.
Figure 12: Menu structure
1. Menu toolbar: Setup options available for the selected menu function. Move the mouse over
a command icon and click to select it. See Table 7 below for a description of the icons.
2. Submenu panel: Submenus for the selected menu function are displayed. Click an item to
select it.
3. Setup menu: All the details for the selected submenu are displayed. Click a field to make
changes.
Note: See Figure 9 on page 50 for the description on how to access the menu
options using the front panel.
Table 6: Description of the menu toolbar icons
Icon Name Description
mode settings Configures display settings including dwell time, schedule,
language and display formats. See “Configuring live view”
on page 65 and “Holiday schedules” on page 22.