16
Version 2.0 (11/2013) en
Translation of the original instructions
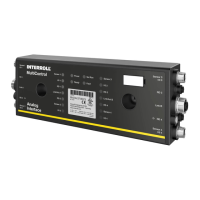
DriveControl DC-20/DC-54
Assembly
Installing the DriveControl 20/54 in a conveyor system
Locate a flat surface for mounting the DriveControl.
Use the DriveControl as a template and mark the centre of both mounting
holes. For the distance between the holes, see "Dimensions", page 13.
Drill two ø 5.6 - 6 mm (0.22 - 0.24 in) mounting holes at the marked spots.
Fasten the DriveControl.
Ensure that the housing is not distorted.
Electrical installation
DriveControl 20 Required conductors:
Prepare wire ends according to the recommendations of the contact
manufacturer.
Insert the input/output wires into the mating plug with the yellow spare tool
(see "Inputs and outputs", page 18).
Insert the power supply wires into the mating plug with the black spare tool.
Insert the mating plug into the DriveControl.
If necessary, set the DIP switches according to requirements (see
"Operation", page 24).
Insert the plug of the RollerDrive so that with the DriveControl the "RD"
labeling can be read and the "EC310" labeling is to the rear, i.e. cannot be
read.
Hint
The DriveControl is equipped with an internal, non-replaceable fuse intended
exclusively for device protection. Protection of the supply cables must be ensured
by the operator.
Connection Conductor cross-section
Inputs/Output
s
fine-strand: 0.08 to 0.5 mm
2
(AWG 28 to 21)
fine-strand with end-splice: 0.25 to 0.34 mm
2
(AWG 24 to 22)
Stripped length: 5 to 6 mm (0.2 to 0.24 in)
Power supply fine-strand, H05(07) V-K: 1.5 mm
2
(AWG 16)
(optionally with end-splice according to DIN 46228/1)
Stripped length: 6 to 7 mm (0.24 to 0.27 in)