24
OPERATION AND SET-UP ON THE CONTROLLER
inVENTer Connect controller platform | Operating instructions
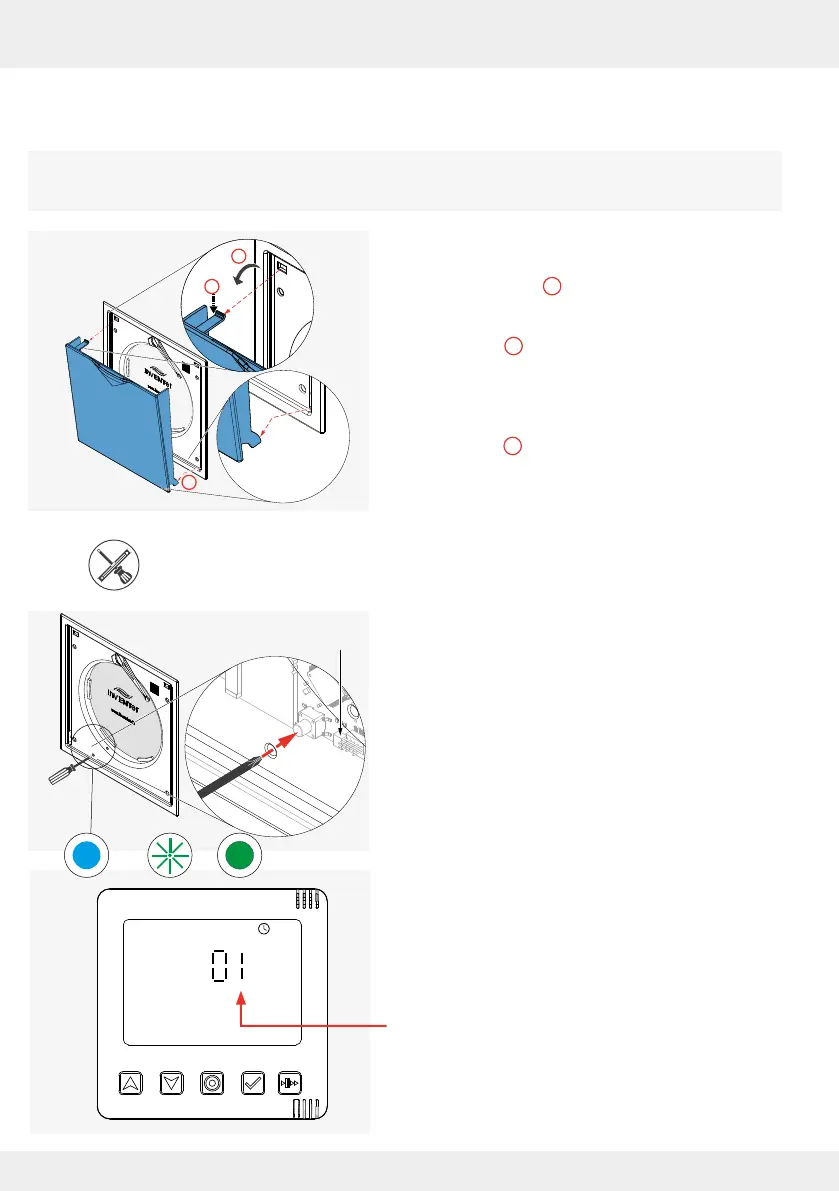
Pairing the Connect inner cover
Before pairing the ventilation units (via the Connect inner cover), remove the Connect
inner cover's closing ap.
► Pull the closing ap forward, away from the
electronics cover ( ).
► Press the spring clip at the top slightly
downwards ( ) so that it slides out of the
opening provided when the electronics cover is
pulled forwards.
► Lift the lower lugs out of the guide and remove the
closing ap ( ).
The electronics cover becomes visible and
accessible.
Tool (pin Ø 2 mm / 50 mm long), e.g. screwdriver
Requirements:
• The Connect inner cover is connected to the power
supply.
► Push a tool (e.g. a small screwdriver) through the
hole as shown to operate the button behind it.
► Press the button to activate the Connect inner
cover.
The LED lights up TURQUOISE (1).
► Press and hold the button again until the LED lights
up GREEN (approx. 3 s).
The Connect inner cover is ready for pairing with
the controller. The LED on the Connect inner
cover ashes GREEN during component pairing
and lights up solid GREEN when pairing has been
completed.
On the controller's display screen, after successful
pairing, the displayed number increases by the
paired component to "01".
1
2
3
2
3
1
LED