Basics of the P2V Software
12
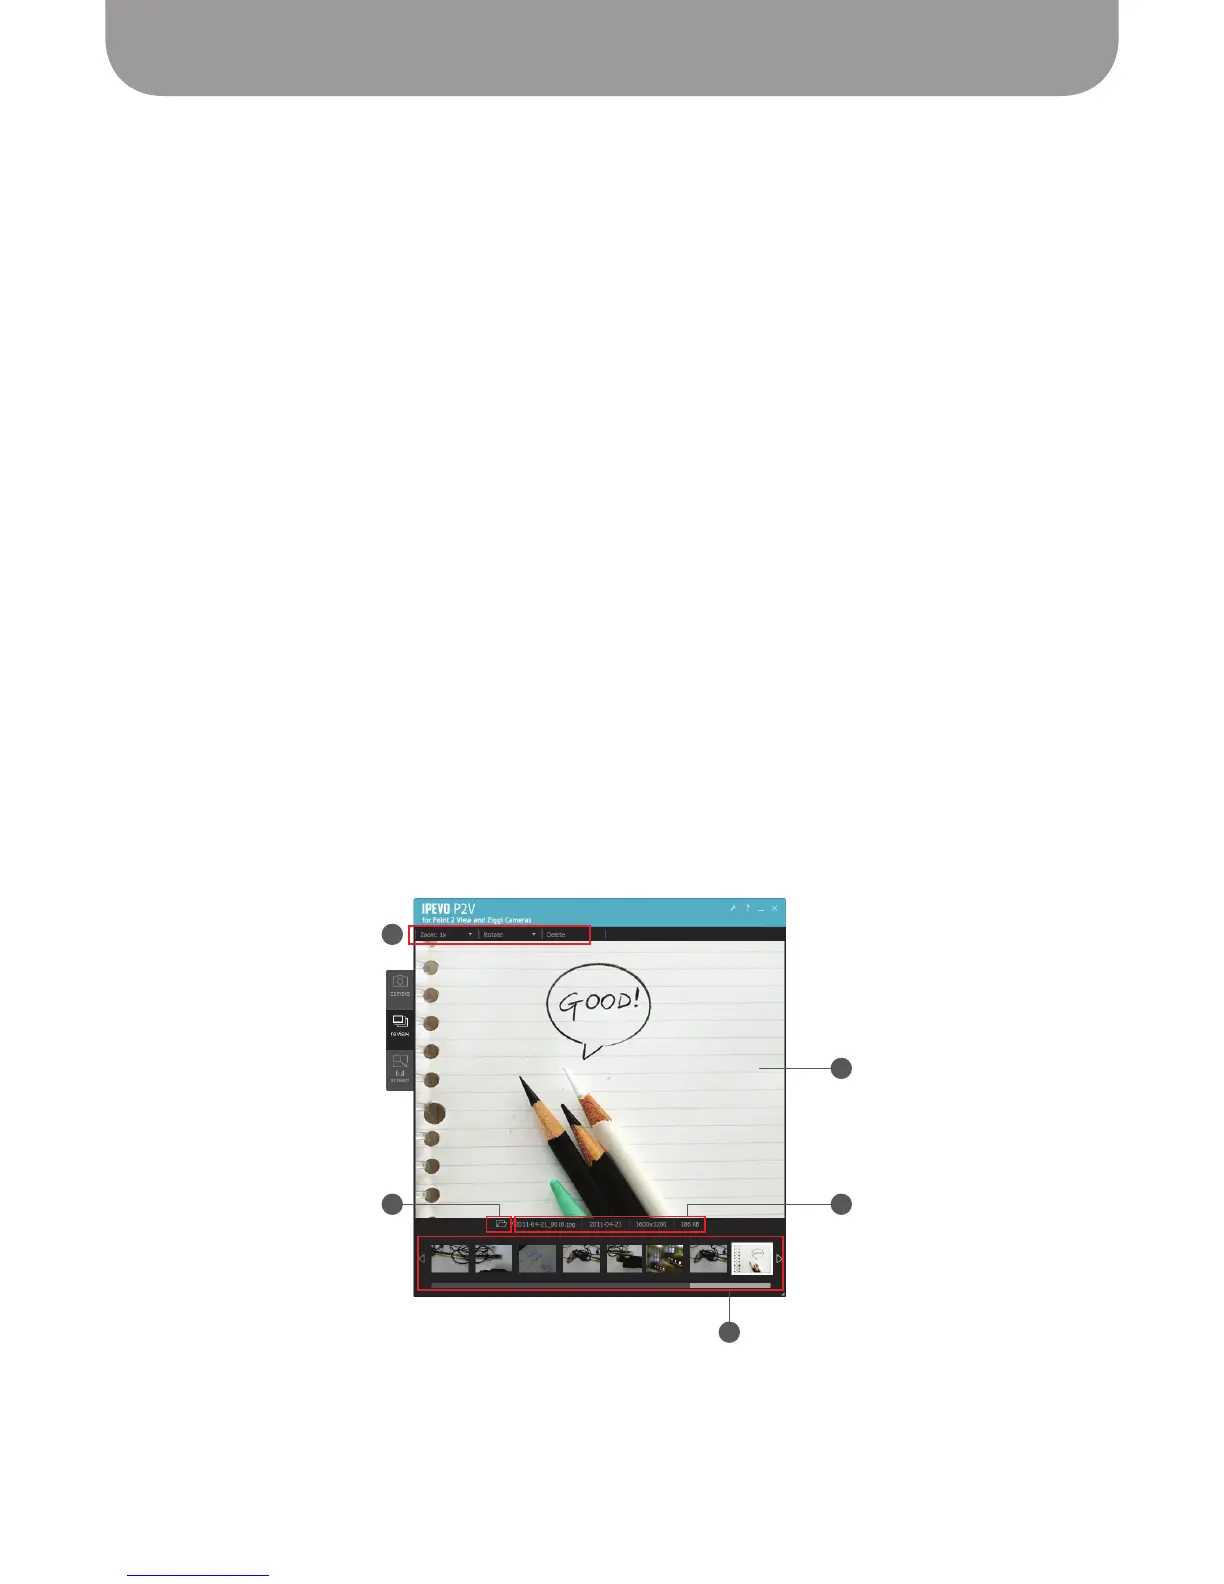
To review snapshots you’ve taken (see Page 20), enter Review mode by clicking on the “review” tab on
the left-hand side of the software.
A – Image Pane
This shows the currently selected snapshot.
B – Menu
This gives you some basic tools to manipulate the selected snapshot.
Zoom – Digitally zoom the image from 1x (normal, or no zoom) to 3x zoom.
Rotate – Rotate the image left or right.
Delete – Delete the selected image from your hard drive. The system will prompt you to ensure
you want to delete the image.
C – Folder Icon
Clicking on the folder icon will take you to the location on your computer where your snapshots are
stored.
D – Image Information
Provides information about the image, including file name, date taken, resolution taken at, and file
size (in kilobytes).
E – Thumbnail Timeline
The snapshots you’ve taken are presented in a horizontal timeline of thumbnails. You can click on a
thumbnail to select that snapshot, or you can use the arrow buttons to cycle through the snapshots.
By right-clicking on a thumbnail, you can choose to Copy or Delete that snapshot, or open the folder
it is contained in.
Review mode
A
B
E
C D