MIG-185CMT
9
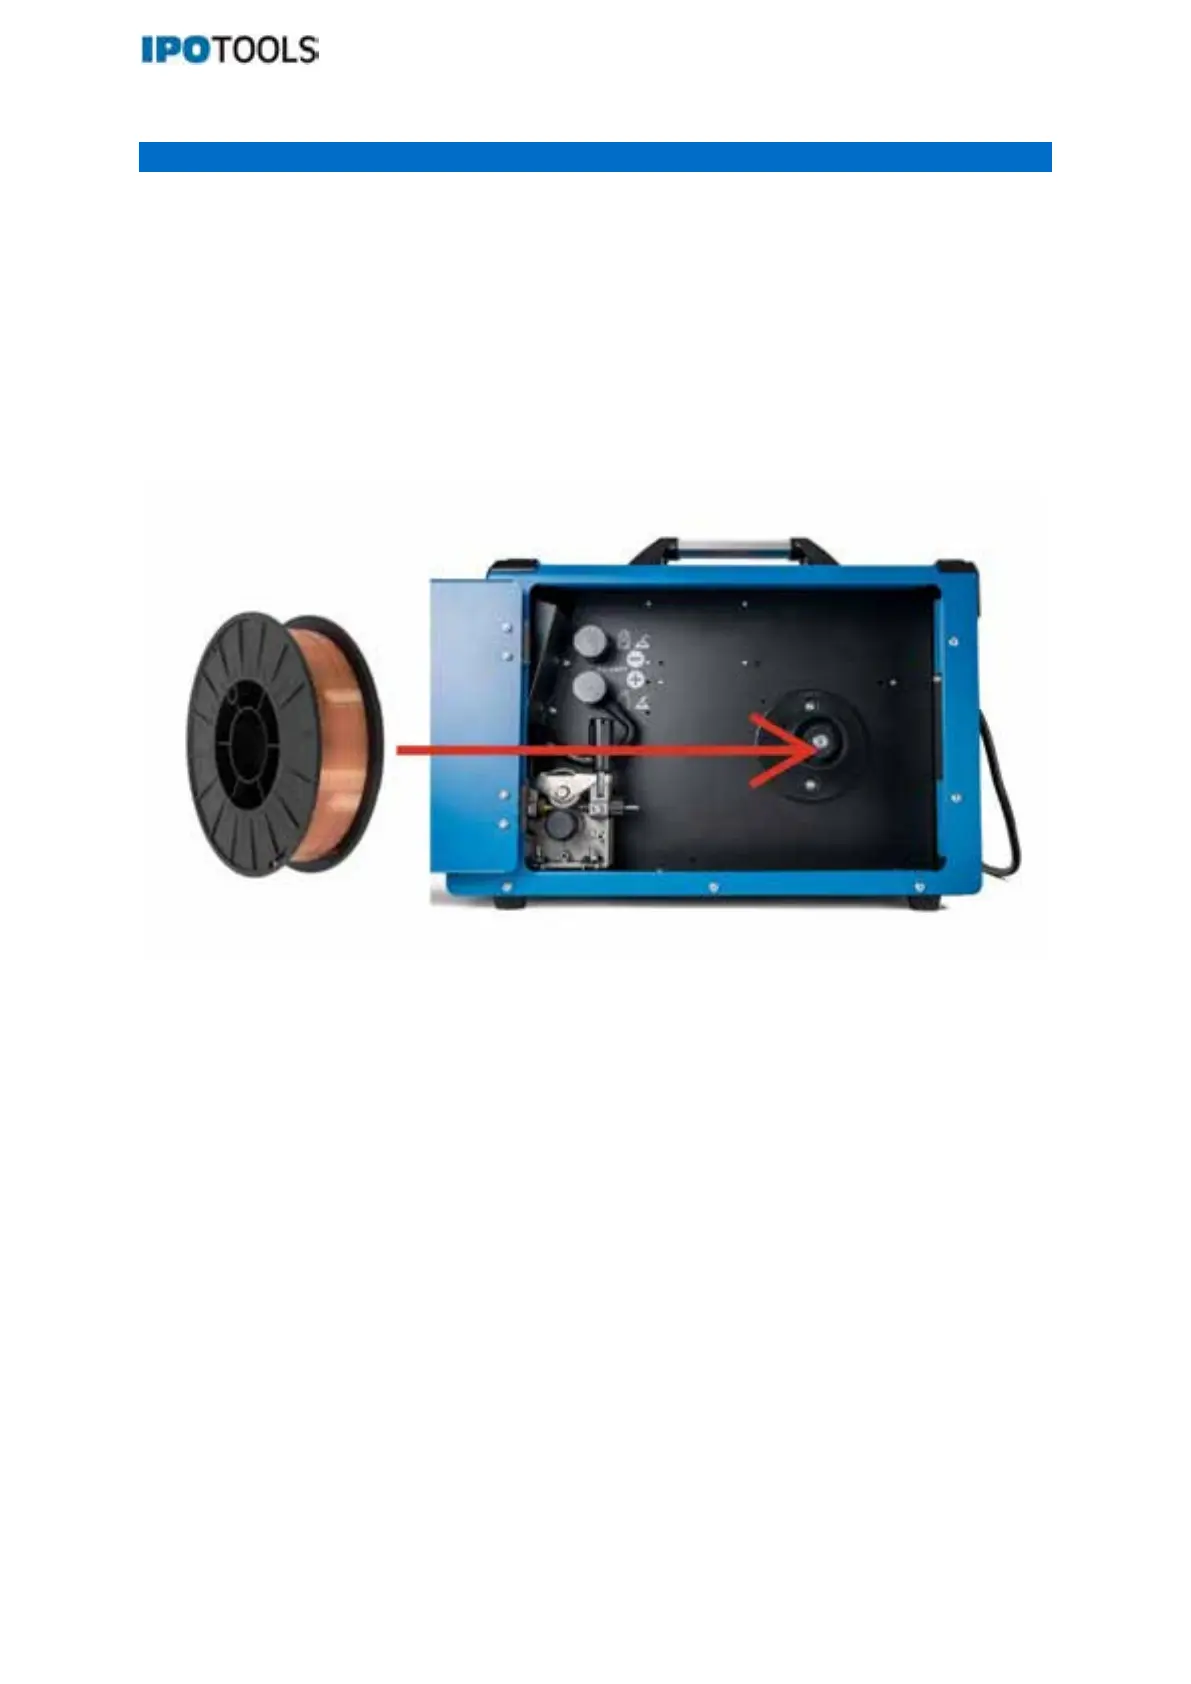
WELDING WIRE INSTALATION
- Open the door on the side of the device, move the star knob (16) towards you and lift the lid of the
clamping system.
- Make sure that, depending on the welding wire diameter, the appropriate wire feed (0,6mm / 0,8mm /
0,9mm / 1,0mm / 1,2mm), is in the wire feed system (the wire feed roller side with the correct mm
specification must point towards the wire feed).
- Unscrew the screw of the wire locating pin (17), place the corresponding welding wire on the wire
locating pin (17) and retighten the screw (The welding wire must be positioned so that it enters the wire
feeder from its lower part).
- Guide the welding wire into the left opening of the wire feeder, over the wire feed roller into the right
opening of the wire feeder.
- Close the cover of the clamping system and move the star grip (16) away from you so that the cover
is locked. Adjust the tensioner with the star grip (16).
- The next step is to turn on the unit, make sure the torch cord is straight and remove the nozzle and
nozzle assembly from the gun.
- You can then pull the wire to the torch nozzle either with the button on the torch or with the “Fast Wire
Drive” button. After the wire comes out of the gun, reattach the nozzle and nozzle assembly to the gun.
- Selection of the fast wire feeding function (5) (the function is only available for MAN (manual MIG) and
SYN MIG).