MIG-185CMT
13
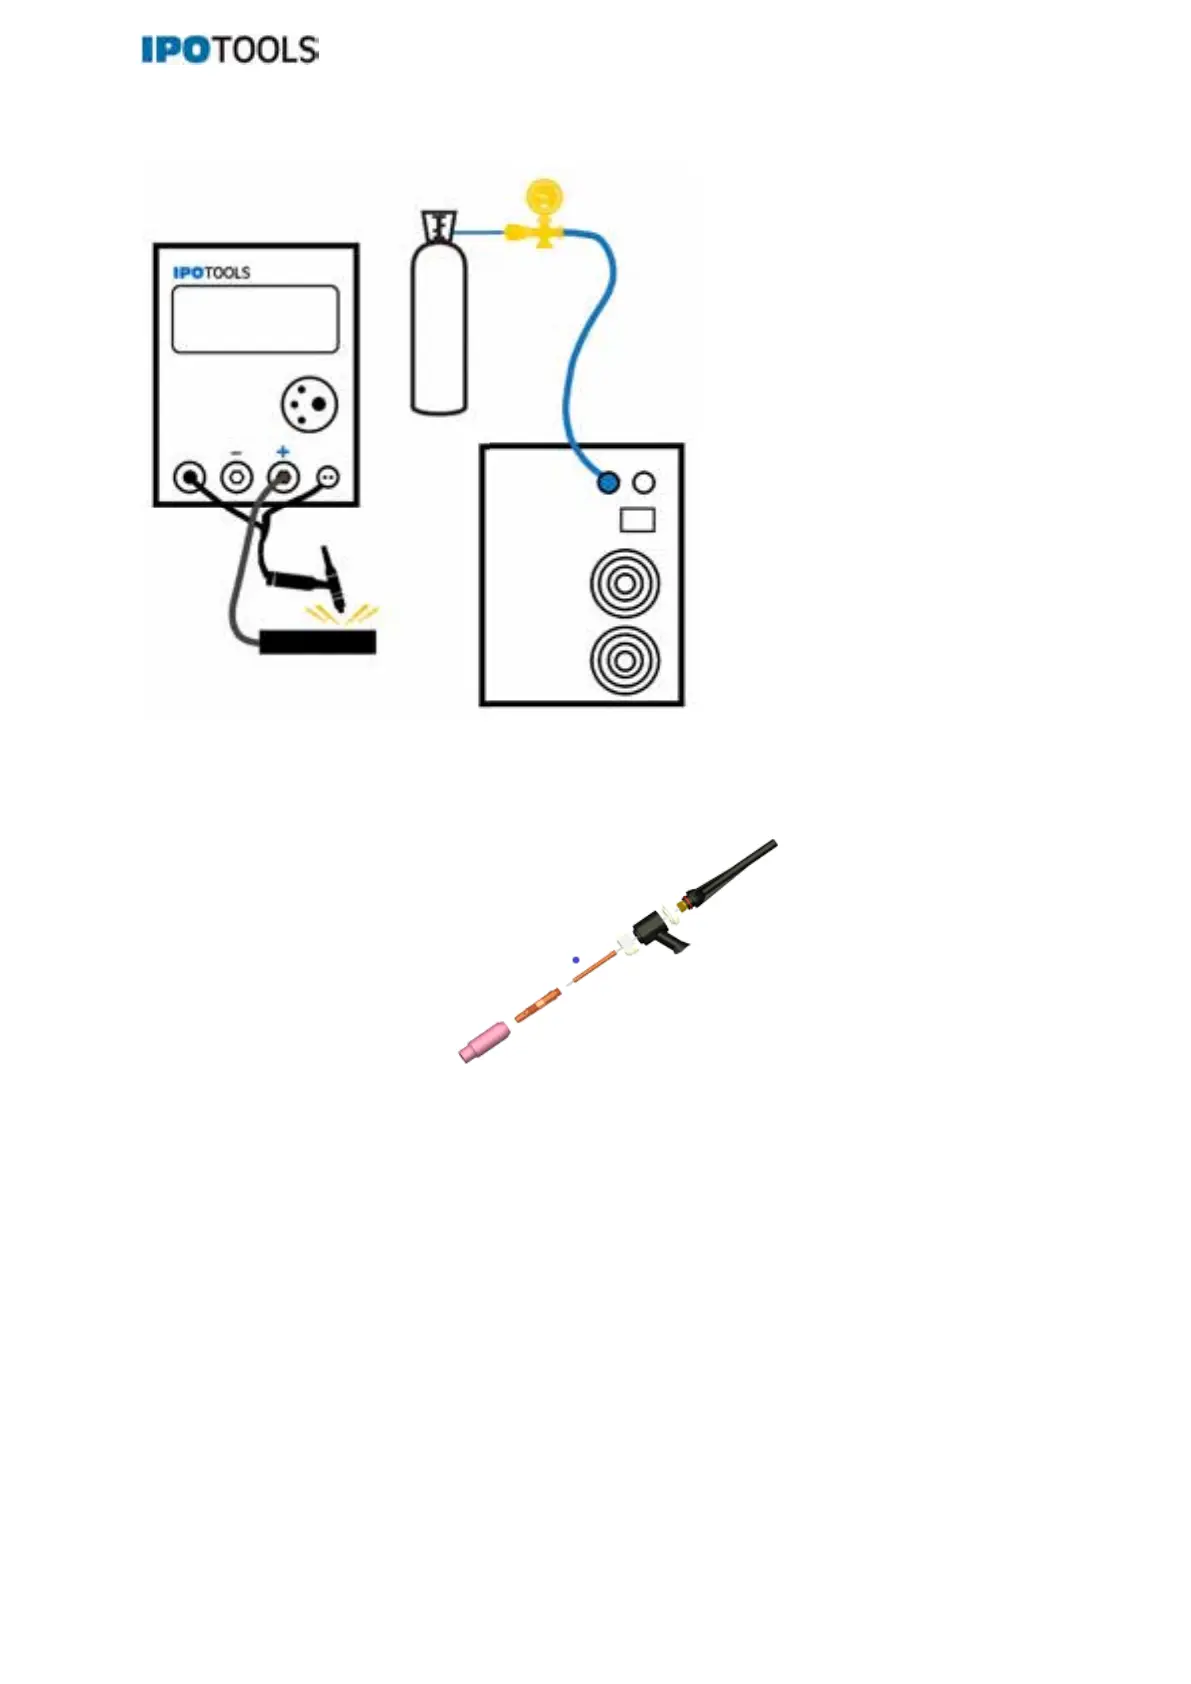
HF TIG welding
1. Connect the shielding gas supply line to the connection (13) on the rear of the welding
machine and use the supplied clamps.
2. Connect the TIG torch to connections (18), (19) and (10) on the front of the welding machine
and assemble the torch as shown below.
1. Gas test: Switch on the device with the switch (11), open the bottle screw of the argon bottle
and set the corresponding gas flow on the pressure reducer. When the button on the torch is
pressed, the solenoid valve in the device must open and the gas must run out of the burner
nozzle.
2. Set the switch to "HF TIG" mode.
3. Set the corresponding welding parameters - welding current and gas post-flow time.
4. The tip of the tungsten electrode should normally be extended 5 mm and 2-3 mm from the
workpiece. To start welding, press the button on the torch.
5. At the end of the welding process, release the button on the torch and the arc will extinguish.
At the end of the welding time, hold the torch over the weld seam, the shielding gas prevents
air from penetrating into the weld seam and thus there is no oxidation of the weld seam.
6. When the welding process is complete, close the argon bottle and switch off the welding
machine.
In addition, you can set pre-gas, post-gas.