3. Then the items of the IP address can be activated for entry by a mouse-click.
The following entries are possible:
IP address: 10.0.0.x with x = 11 – 249
The first 10 IP addresses are mostly reserved for other services. Please do not use them.
We are using x = 55 for our example (see Figure 1 on the right).
4. For our example please enter:
"IP address:" | 10 | 0 | 0 | 55 |
"Subnetwork mask:" | 255 | 0 | 0 | 0 |
Please do not make any entries for the "Standard gateway" or DNS server.
4.2 Setting as a second IP address
If the setting "Obtain an IP address automatically" has been activated (see Figure 2 on the
right), the IP address for the sensors can also be used as a second IP setting:
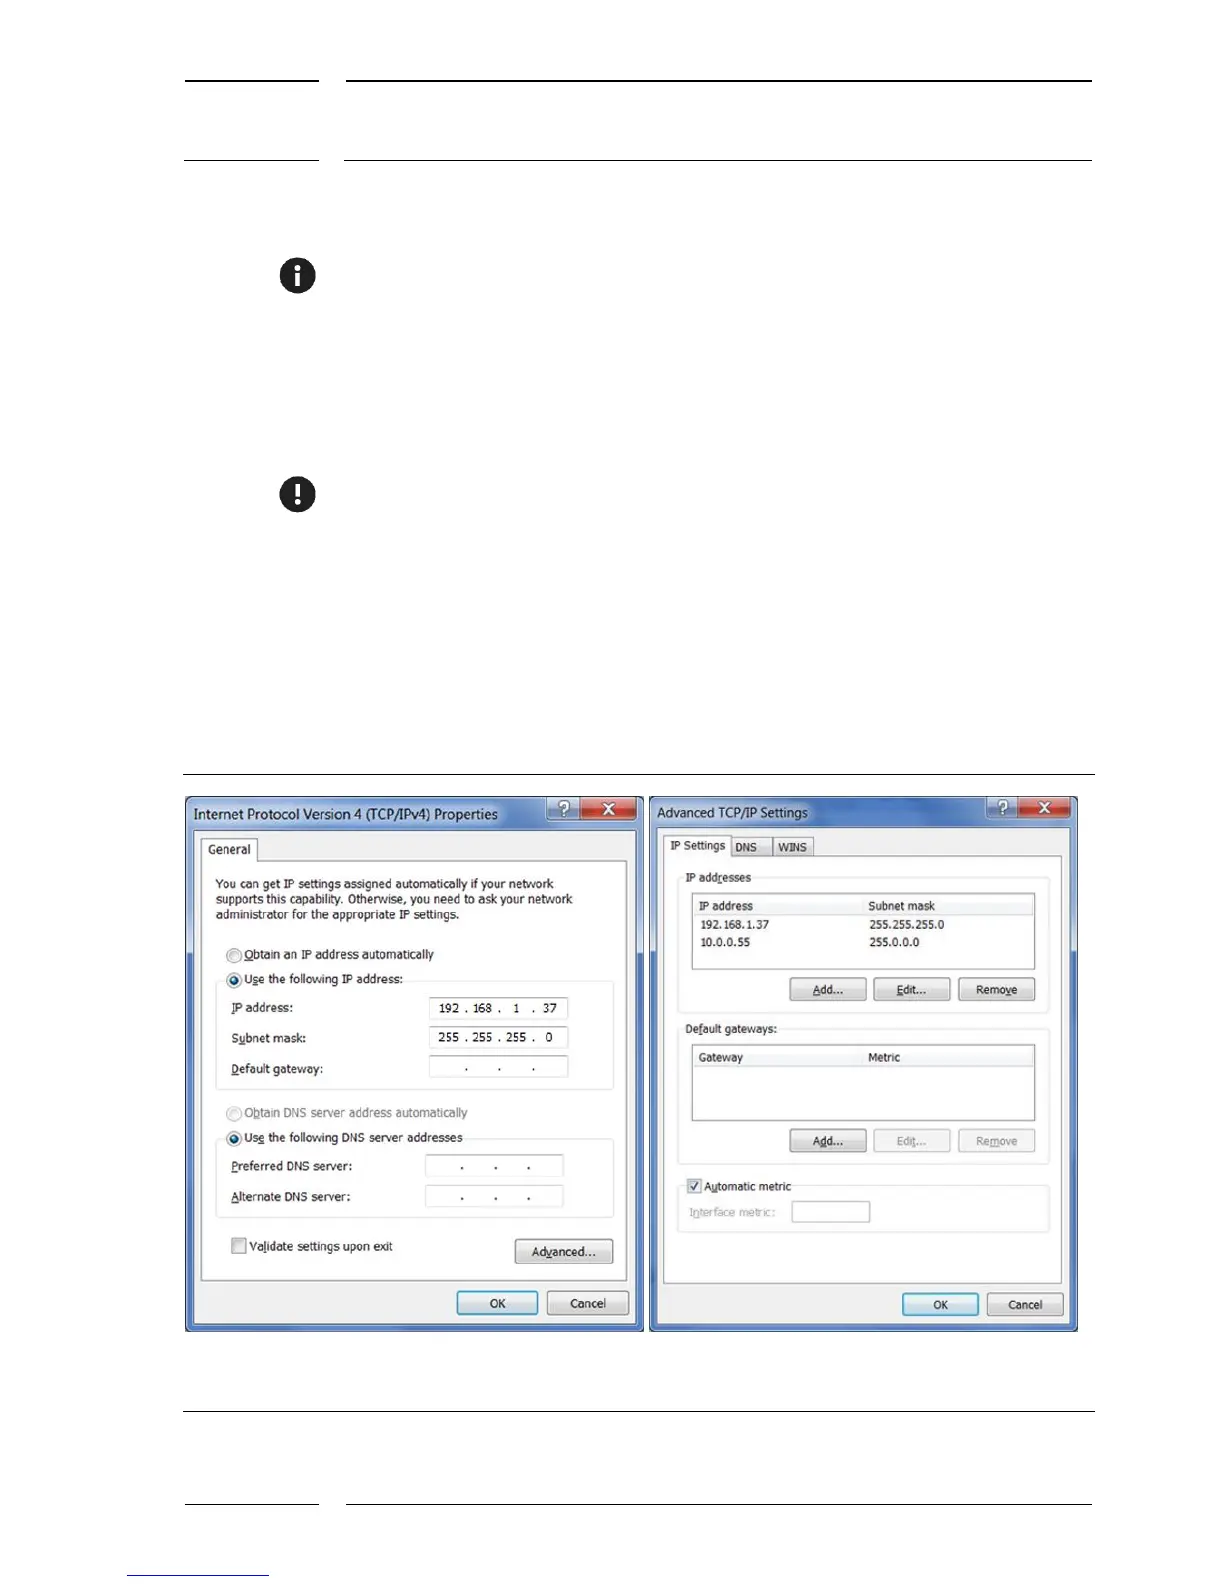
• For this purpose press the "Advanced..." button. (see Figure 2 on the left), the "Advanced
TCP/IP Settings" button opens (see Figure 2 on the right).
Figure 2: How to enter the extended PCP/IP settings