17
IBVAssemblyInstructions(cont.)
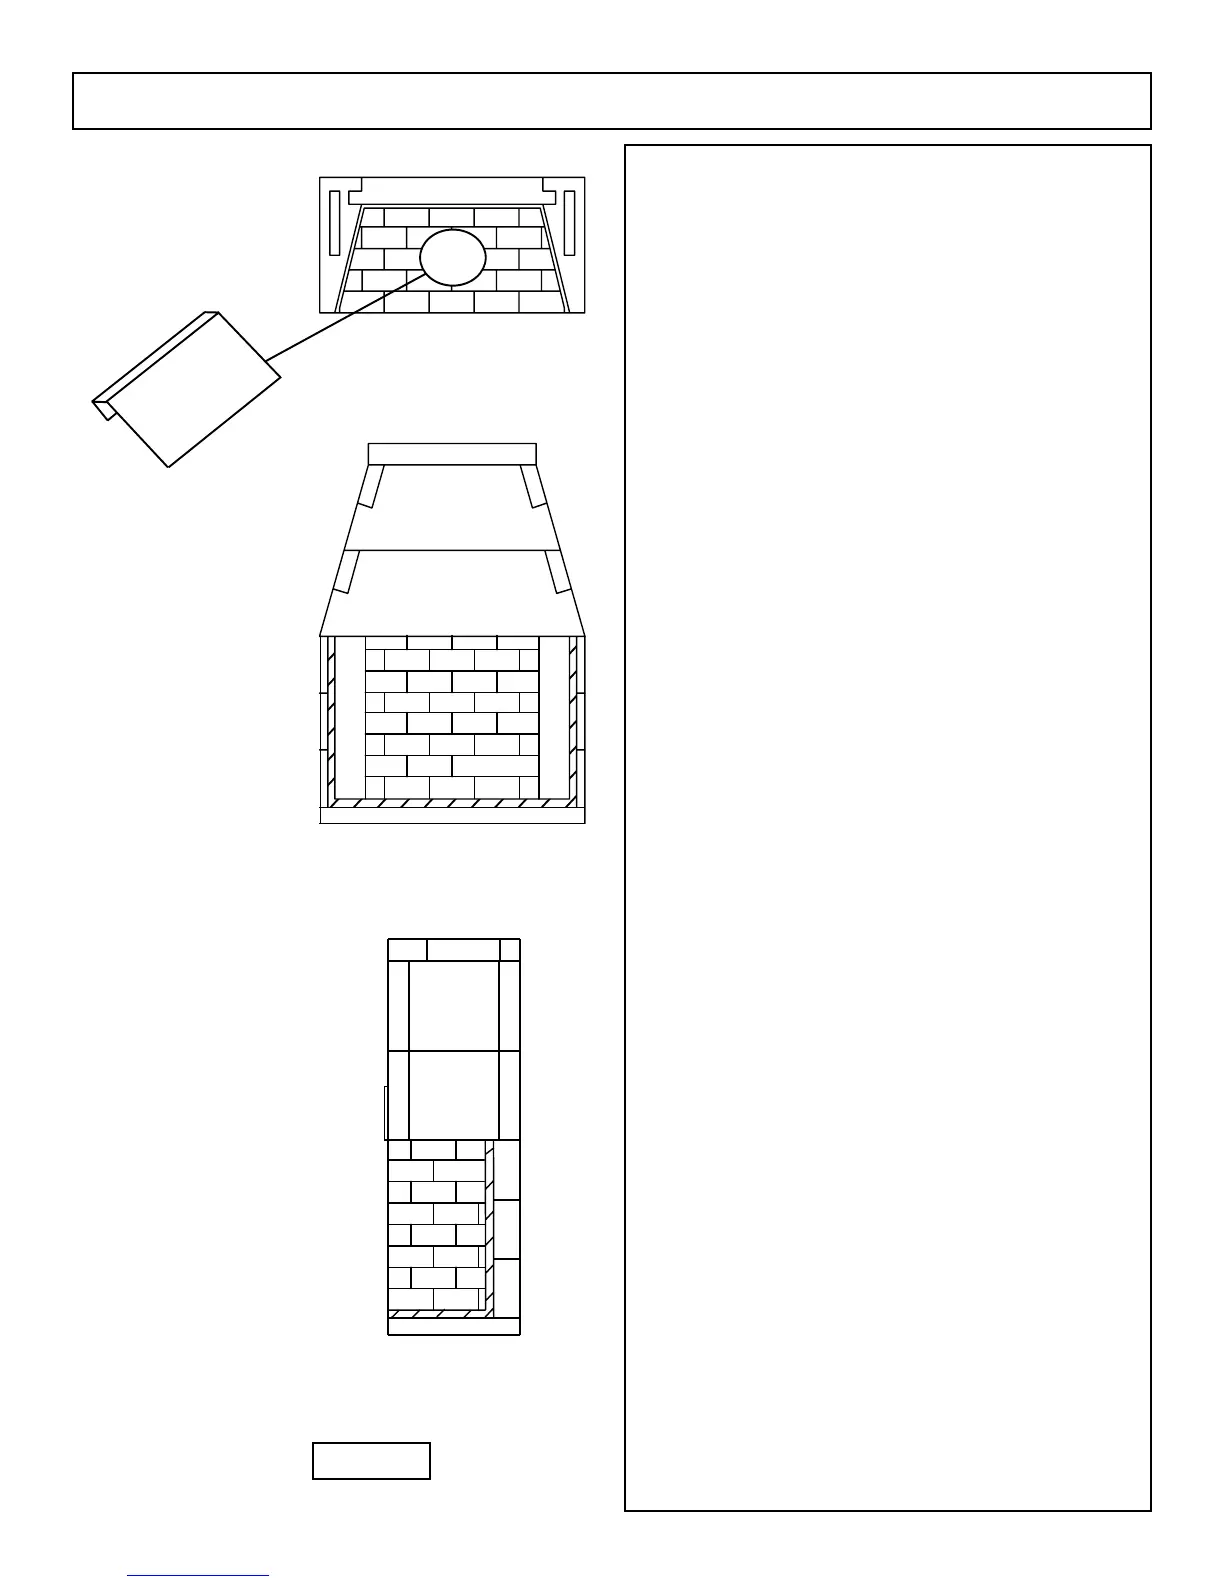
Fire Brick Installation:
ThemanufacturerrequiresthattheIBVreboxbelinedwitha
minimumoneandoneeighth(11/8”)thickratedrebrick.
Thepatternfortherebrickliningisanowneroption.Standard
N or S Type brick mortar is a suitable re brick mortar for
the IBV. Add a small portion of Earthcore mortar to make it a
sticky consistency with a 1/4” notch trowel bed joint. Because
of different climates, the use of good masonry practices for
your area should also be considered.
All required through-wall accesses (gas and electrical
line feeds and combustion air supply access holes) should be
drilledbeforetherequiredrebrickliningisinstalled.
Ittakesatotalofaboutvegallonsofmortarmix(dry
measure)torebricklineanIBV.
Face joints of one quarter inch (1/4”) to three-eights
inch(3/8”)giveagoodappearancetothenishedbrickwork.
However, larger face joint dimensions are also acceptable.
Step 1. Wet mop the inside of the IBV with a damp sponge
to remove dust and loose particles from the interior before
installingrebrick.
Note: It is a good practice to dip each brick in water before
installing.
Step 2.Starttherebrickatthefrontedgeoftheoorofthe
Isokernrebox,proceedinginwardtowardtheback.
Step 3: ApplyCclampwarninglabeltocenteroorbrickprior
to mortar, ensuring verbiage is legible from front of rebox.
(Figure 16)
Step 4. Next,applyrebricktothebackwalloftheunitstarting
at the bottom of the back wall and working upward to the top
of the back wall.
Step 5.Finally,setthesidewallrebrickbystartingatthefront
edge of the unit’s side wall and working inward toward the back
wallrebrick.
Important: Be sure to bring the two high temperature wires
through the lower lefthand sidewall nished re brick.The
two high temperature wires need to be accessible for later
connection to the high temperature limit switch wires.
WARNING
WA
RNING
:
Do Not Build a
Wo
od
Fire
Gas F
uel Onl
y
Fo
r use with Isoflame
Ga
s
Lo
gs
See Instru
c
tions
Do Not Remo
ve
Th
i
s Labe
l
Figure 16
 Loading...