#10
iStorage datAshur
®
BT ADMIN MANUAL v 1.7
www.istorage-uk.com
ADMIN MANUAL
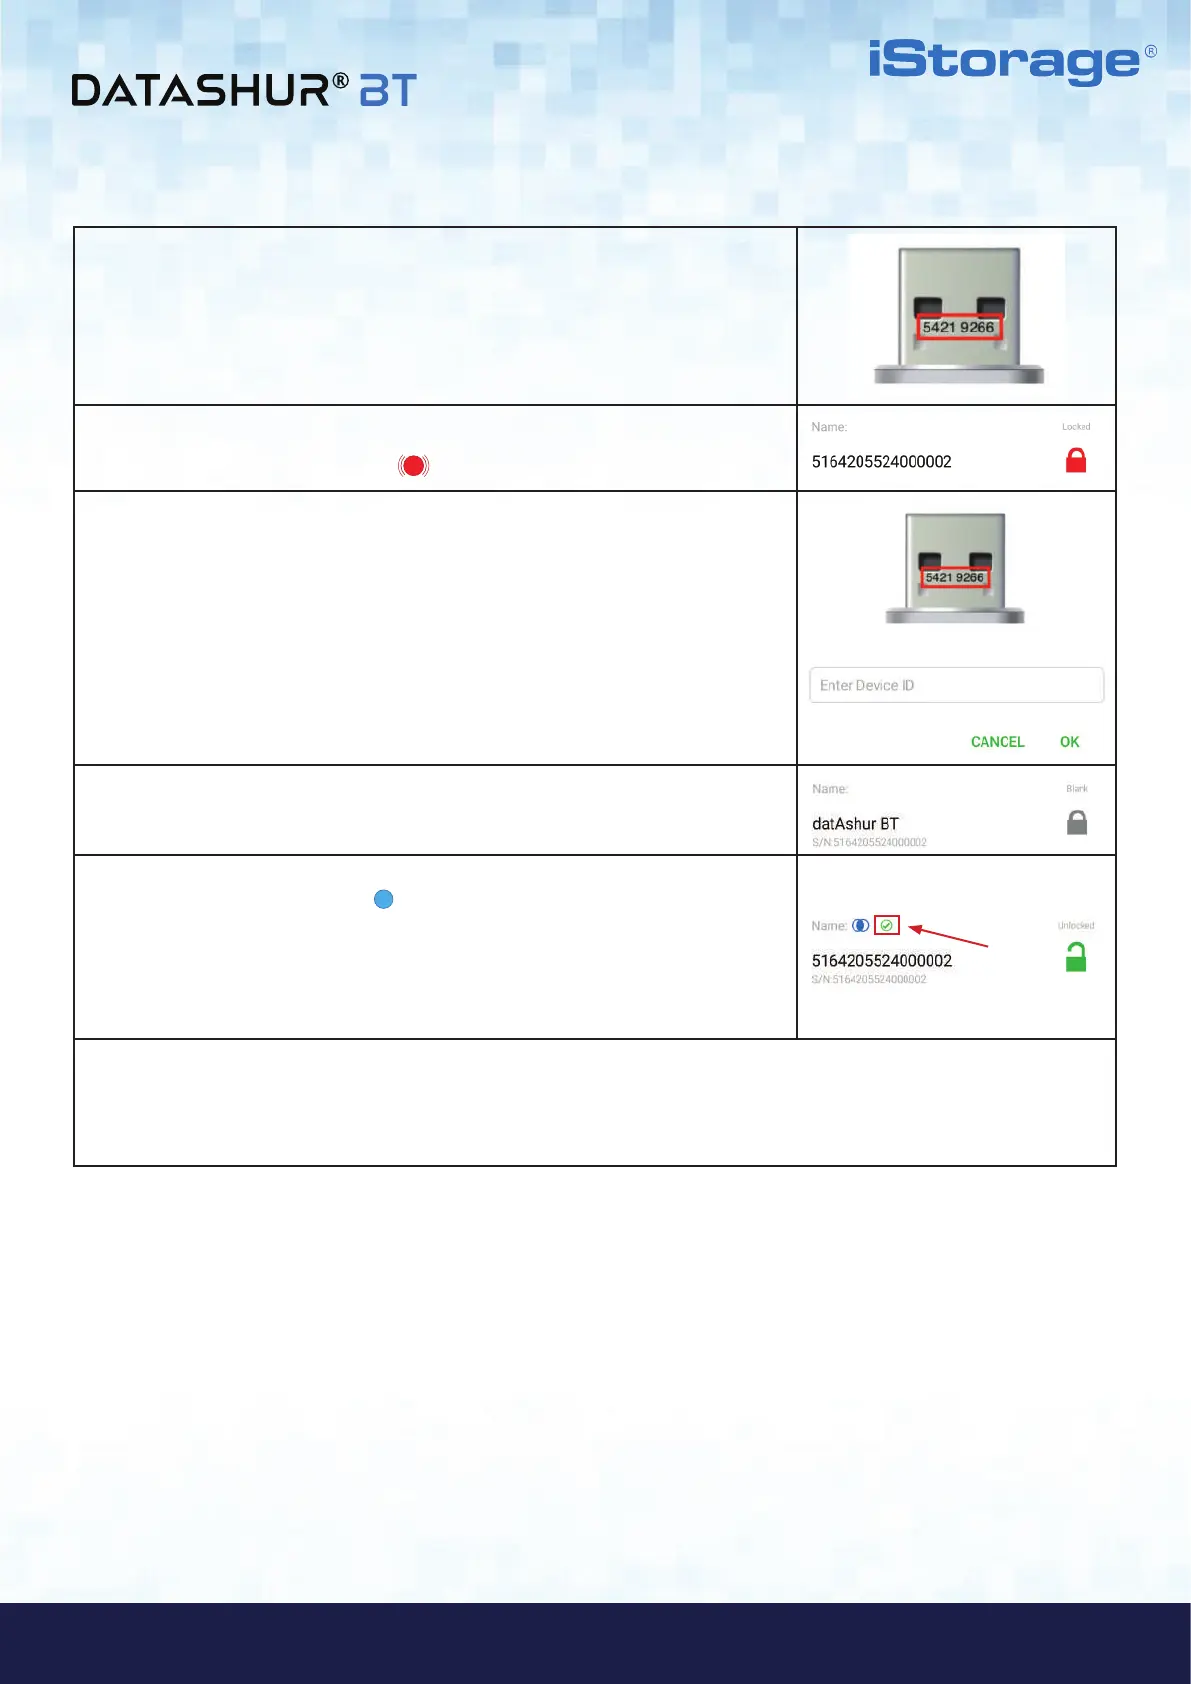
5. Make a note of the Device ID number printed on the USB connector and
connect the datAshur BT Managed Drive to a powered USB port.
6. Tap on the RED padlock.
Note: The Drive LED will be blinking RED.
7. Enter the Device ID number and then tap OK.
8. Tap on the GREY (Blank) padlock to finish provisioning.
9. Once provisioning is complete, the App will display a GREEN checkmark
and the Drive LED will be solid Blue, indicating that the datAshur BT
Managed Drive has been provisioned and will be automatically detected by your
Remote Management Console and ready to be assigned to a user.
Note: If provisioning multiple Drives that are connected to a multi-port USB hub,
repeat steps 6-9 for each and every Drive, one Drive at a time.
10. You will now be prompted by your computer to format all provisioned datAshur BT Managed Drives. Refer to
section 12 ‘Formatting the datAshur BT for Windows’ or section 13 ‘Formatting the datAshur BT for mac OS’.
Note: Once formatted, Admin is able to access the Drive and add data if necessary.
 Loading...