6.2.4 Disassembly for Metal-Lined
The disassembly steps for Metal-lined and Rubber-lined dif
fer. This section, beginning with Typical disas-
sembly and ending with Remove the shaft sleeve, pertains to Metal-lined pumps.
For Rubber-lined pumps, refer to the sub-section, 6.2.8 Disassembly for Rubber-Lined on page 94.
6.2.5 Typical disassembly - Metal-Lined
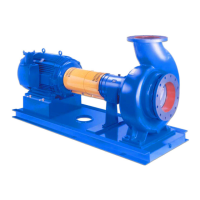
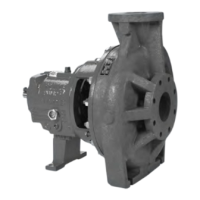
The XHD slurry pump is available in two models: the basic version, referred to as XHD and the XHD Val-
ue Option. The method of disassembly and assembly can vary between these models. The XHD is a
front pull out design. Typical disassembly steps can be followed for both the XHD and XHD Value Option.
The suction half casing and attached components can be removed for further disassembly and replace-
ment of the suction side liner (562) and adjustable seal ring (822, XHD only) as necessary. After remov-
ing the impeller (101) by disengaging the knock-off ring (149), the gland half casing (100D) can remain
mounted to the pedestal (131) and the casing volute liner (561) removed for replacement. Other compo-
nents such as the gland, packing, seal cover etc. can also be removed in a methodical fashion as need-
ed for inspection and replacement. In addition to traditional sequential disassembly methods, the entire
wet end can be completely removed from the pedestal and bearing frame on the XHD model, as outlined
in the following section: XHD Complete Wet End Disconnection.
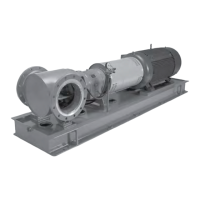
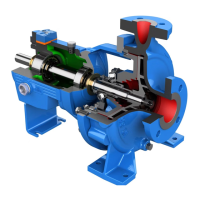
6.2.6 Complete wet end disconnection - XHD only
The XHD model features a "quick disconnect" wet end option. Removal of the entire wet end from the
bearing frame and pedestal can be performed as follows:
1. Loosen the two forward adjusting nuts rod nuts (415A) on both sides of the power frame by turning
them clockwise.
2. Loosen the hold-down bolts (352G) that clamp the adjustment plates (234F) to the bearing cartridge
housing (228) but do NOT remove. Bolts should remain finger-tightened to keep the bearing frame
constrained to the pedestal while allowing it to slide along the pedestal rails.
3. Turn the two rearward adjusting nuts (415A) on both sides of the power frame sequentially clock-
wise, 1/3 turn of each nut at a time, to draw the bearing frame and impeller (101) toward the casing
volute liner (561). Stop when the impeller is firmly seated against the volute liner.
4. Loosen the three adjustable seal ring jam nuts (357A) by turning them clockwise.
5. Turn the seal ring square head adjusting bolts (356F) sequentially, counterclockwise 1/3 of a turn at
a time, to move the adjustable seal ring forward in the casing until it is firmly seated against the im-
peller.
6. Lock the seal ring adjusting bolts (356F) in place by re-tightening the jam nuts (357A) against the
suction half casing (100A).
7. Remove the 2 piece Knockoff ring and bolts (149) to remove the tension on the impeller threads,
then turn the shaft (122) counterclockwise to disengage the shaft threads from the impeller. This will
cause the bearing frame to move rearward on the pedestal until the shaft disengages from the im-
peller (101) held captive in the casing by the adjustable seal ring. NOTE: This should take 4 - 5
complete shaft turns.
8. Attach hoist hook to the gland half casing (100D) lifting lug and tension to support.
Do not over-tension the hoist. Over-tensioning and lifting up on the wet end assembly with the hoist
could cause shaft and bearing frame component damage.
9. Remove the tapered alignment stud hex nuts (427L) that attach the gland half casing (100D) to the
pedestal (131).
10. Remove the hex head cap screws (370Y) that attach the gland half casing (100D) to the pedestal
(131).
11. Remove the entire wet end from the pedestal and power end. The wet end will need to be moved
forward horizontally enough to clear the end of the shaft before the wet end is lifted or lowered us-
ing the hoist. While moving the wet end forward, keep the entire assembly level and concentric with
the shaft.
6.2 Disassembly
84 XHD Installation, Operation, and Maintenance Manual
 Loading...