-20-
9-10.
sl~~a{Jjc~
I Installing the lapper
hJSiu
ffii
~
5 I
~
t!Hfil
A
:ililHl
iH11HflHlll'i
Im
J~
ti
i:r,
it~~*~~ffi~m~~~
.
~*ffl~n•~r
~lle~t.\A,
f~*ill~H-l'ir~lle~t.\B
o
.:fc
S,
!lffitr~"®~H
o
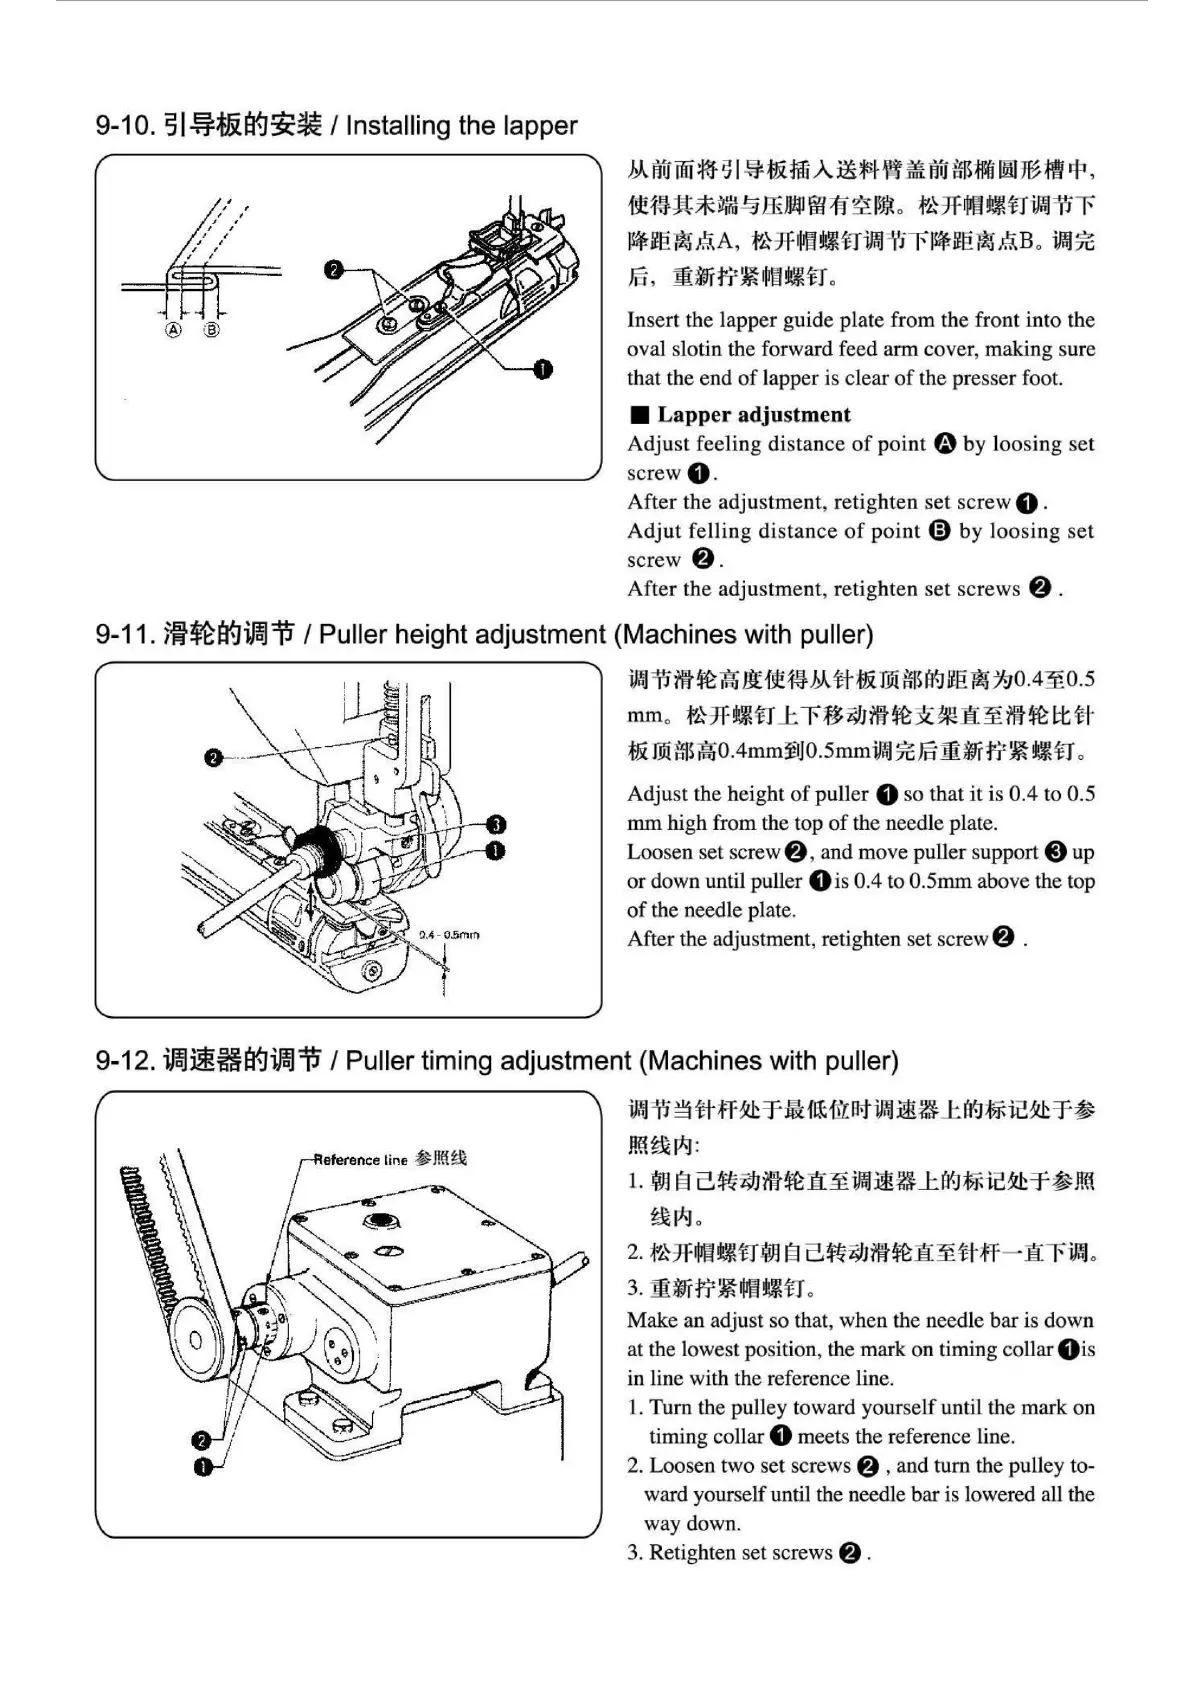
Insert the lapper guide plate from the front into the
oval slotin the forward feed arm cover, making sure
that the end
of
lapper is clear
of
the presser foot.
■
Lapper adjustment
Adjust
feeling distance
of
po
i
nt
O by
loo
si
ng
set
sc
rew
0-
After
the
adjustment
, retighten
se
t screw
O.
Ad
jut
felling
distance
of
point
@)
by
loosing
set
screw
8.
After
the
adjustment, retighten
set
screws 8 .
9-11.
Wf
~a{Jifaj iJ / Puller height adjustment (Machines with puller)
•
il
tilt~
ifli
ll
it~
.M
ttt&
TIJi
"ii!H19
lle
~
:1/90
.4 :¥
O.
5
mmo
~*~HLr~~ffl~x~H
¥
ffl~~tt
t&
IDHflVil
o
.4
mmff
J
o.
s
mm
ili~
:fc
'5
ffi:
ffitr
~
~
n .
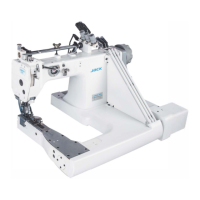
Adjust the height
of
puller O so that
it
is
0.4
to 0.5
mm high from the top
of
the needle plate.
Loosen set screw
8 , and move puller support 8
up
or
down until puller O is 0.4 to 0.5mm above the top
of
the needle plate.
After the adjustment, retighten
set
screw@ .
9-12.
ifaJimBa9ifaJi!i
/ Puller timing adjustment (Machines with puller)
•il
~tt
ff~rti~m~•••L~52~r•
J!«~pg:
1.
~ §
2.~~iilt~
1r:¥
iffiJ•WL~52~r•J!«
~P-J
o
2.
r~*ll~n~
§
2.~~m~1r:¥
ttff
-
1tr
iffi1
o
3.
liirtr~ffltl:H
o
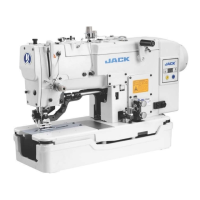
Make an adjust
so
that, when the needle bar is down
at the lowest position, the mark
on
timing collar
Oi
s
in line with the referen
ce
line.
I. Turn the pulley toward yourself until t
he
mark
on
timing collar O meets the reference line.
2. Loosen two set screws
8 , and turn the pulley to-
ward yourself until the needle bar is lowered all the
way down.
3. Retig
ht
en set screws 8 .
From the library of Superior Sewing Machine & Supply LLC - www.supsew.com