Page 32
service technician perform the following steps:
1. Turn off the main gas supply valve to the heater,
outside the heater jacket.
2. Remove heater door.
3. Shut down the heater following the shutdown
instructions found on the inside of the heater.
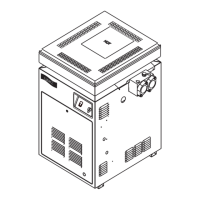
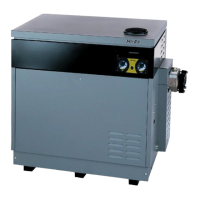
4. Remove the drain plug from the return header
(see Figure 22), loosen the drain plug from the
inlet/outlet header, and completely drain the
heater before the first frost.
5. After all water has drained from the heater,
remove the drain plug from the inlet/outlet side.
Check for mineral buildup in the openings.
6. Use compressed air to blow out any standing
water remaining in the heat exchanger.
7. Grease the threads on the drain plugs and
reinstall plugs, but do not tighten.
8. Disconnect the pressure switch from the siphon
tube (copper tubing) (see Figure 23).
8.2.3 Spring Start-up
To restart the heater in the Spring, have a
professional service technician reassemble the heater
as follows:
1. Attach the copper tubing to the pressure switch
(see Figure 23).
2. Tighten the drain plugs.
3. Make sure that power is supplied to the heater
controller and the pump. Turn on the filter pump
by pressing the PUMP key and circulate water
through the heater for 5 minutes. Check for leaks
while circulating.
4. Turn on the main gas supply valve to the heater,
outside the heater jacket.
5. Turn on the heater following the lighting instruc-
tions found on the inside of the heater, or page 25
of this manual.
8.3 Inspection and Service
Jandy Pool Products, Inc. designs and constructs
the Lite2 heater to provide long performance life when
installed and operated properly under normal condi-
tions. Periodic inspections, especially at Spring start-
up, are important to keep your heater running safely
and efficiently through the years. Improper mainte-
nance can result in conditions where nausea or
asphyxiation from carbon monoxide or flue gases could
cause severe injury, property damage or death.
WARNING
Improper installation or maintenance can cause
nausea or asphyxiation from carbon monoxide
in flue gases which could result in severe injury,
or death.
Figure 22. Heater drain locations
Figure 23. Pressure switch copper tubing