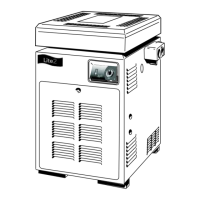
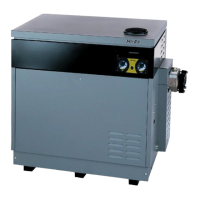
Page 20
6.4 Pump Power Connection
Electrical wiring must be in accordance with the
latest edition of the National Electric Code (NEC),
ANSI/National Fire Protection Association (NFPA)
70, unless local code requirements indicate otherwise.
To connect the pump to the LJ controller internal
time clock, perform the following steps.
1. Turn off all power to the heater at the circuit
breaker panel.
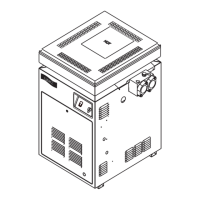
2. Remove the door of the heater.
3. Remove the screws that hold the cover to the
power connection box located in the upper right
corner of the heater. Remove the cover.
4. Install the relay (Jandy part number R0658100) in
the mounting holes provided in the power con-
nection box (See Figure 17). The relay must be
installed so that it is protected by the power
connection box cover when it is replaced.
5. Install the wire harness (assembled to the relay,
Jandy part number R0658100). Check that the
black wire connects to terminal "0" of the relay
and the red wire connects to terminal "1". Plug
the other end of the harness into the power
circuit board at the connection labeled "Pump
Relay".
6. Remove the button plug from the hole on the
right side of the heater located just below the
entry hole for the power.
7. Feed the pump wires through the jacket and
connect them to the "Power In" terminals (on the
power circuit board) and the relay terminals as
indicated on the wiring diagram on page 18.
Remember to use the alternate wiring scheme
(see Figure 16) when connecting power to a 115
volt source.
8. Attach the ground wire to one of the green
ground screws located on the back panel of the
power connection box.
9. Replace the cover of the power connection box
and replace the screws to hold it in place. Be
sure that the power wires and pump wires are
completely enclosed by the cover. Be sure that
the wires are not pinched by the cover.
SECTION 7.
Operating Instructions
7.1 Start-Up
Be sure that there is water in the pool and that
the surface level is above the skimmer or other inlet of
the pool's filter system.
With any new pool or spa installation, operate the
filter pump with the heater off long enough to com-
pletely clean the water. This will remove any installa-
tion residue from the water. Clean the filter at the end
of this operation before starting the heater. When
raising the temperature of a cold pool, program the
time clock to turn the pump off 23 hours and 58
minutes after the start time ( e.g., If start time is 2:00
PM then set stop time at 1:58 PM.) This lets the filter
system and heater operate continuously until the water
reaches the temperature setting on the temperature
control. When that happens, the heater will automati-
cally shut off, but the filter pump will keep running.
IMPORTANT: The temperature controls
cannot be calibrated in the field. If the control is faulty,
shut down the heater by following the procedures in
Section 7.3 and have a qualified service technician
replace the control. DO NOT use the thermostat
switch to completely shut down the heater.
CAUTION
Do not use this heater if any part has been
under water. Immediately call a qualified
service technician to inspect the heater and
replace any part of the control system and any
gas control which has been under water.
ATTENTION
N'utilisez pas cet appareil s'il a été plongé dans
l'eau, même partiellement. Faites inspecter
l'appareil par un technicien qualifié et
remplacez toute partie du système de contrôle
et toute commande qui ont été plongés dans
l'eau.
CAUTION
Should overheating occur or the gas supply fail
to shut off, turn off the manual gas control valve
to the heater.
ATTENTION
En cas de surchauffe ou si l'alimentation en
gaz ne s'arrête pas, fermez manuellement le
robinet d'arrêt de l'admission de gaz.
CAUTION
Do not attempt repairs on the gas controls or
appliance. Tampering is dangerous and voids
all warranties.