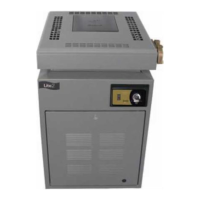
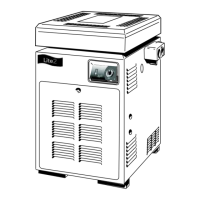
Model LJ Pool and Spa Heater
Page 33
AVERTISSEMENT
Une installation ou un entretien inadéquat peut
causer la nausée ou l’asphyxie en raison du
monoxyde de carbone présent dans les gaz de
combustion et même entraîner des blessures
graves ou la mort.
8.3.1 Owner Inspection
Jandy Pool Products, Inc. recommends that you
inspect the heater on a continual basis and especially
after abnormal weather conditions. The following basic
guidelines are suggested for your inspection:
1. Keep the top and surrounding area of the heater
clear of all debris.
2. Keep the area around and beneath the heater
clean and free of all combustible materials such
as paper, leaves, etc.
3. Do not store or use gasoline or other flammable
vapors, liquids or chemicals in the vicinity of this
or any other appliance.
Ne pas entreposer ni utiliser d'essence ni d'autres
vapeurs ou liquides inflammables à proximité de
cet appareil ou de tout autre appareil.
4. Do not use the heater if any part has been under
water. Immediately call a qualified professional
technician to inspect the heater and replace any
part of the control system which has been
submerged.
N'utilisez pas cet appareil s'il a été plongé dans
l'eau, même partiellement. Faites inspecter
l'appareil par un technicien qualifié et remplacez
toute partie du système de contrôle et toute
commande qui ont été plongés dans l'eau.
5. If the heater is equipped with a pressure relief
valve, check for corrosion in and around the
valve. Twice a year, with the filter pump on, lift
the release lever on the top of the valve to make
sure that water runs freely through it. If corro-
sion is found, replace the pressure relief valve.
When replacing the valve, be sure that the pump
is off. Install the valve so that the discharge is
directed away from any area that may be
damaged by water.
6. Be sure all combustion air and ventilation open-
ings are not blocked. Check for spider webs and
other debris inside the heater, in the vents on all
sides of the heater jacket and in the exhaust
outlet– especially after a long period of nonuse.
8.3.2 Professional Inspection
Inspections performed at least once a year by a
qualified technician are required to maintain your
heater's safe and efficient operation. The following
basic safety checks must be performed.
1. Inspect the venting system for blockage, leakage,
and corrosion.
2. Check for spider webs in or other obstructions in
the main burner orifices – especially at Spring
start-up. Clean with wire brush if necessary.
3. Check for loose or broken wires and terminal
connections.
4. Inspect the electrical controls, specifically the
following:
a. High limit controls.
b. Water pressure switch.
c. Temperature control.
d. Ignition control.
e. Automatic gas valve.
f. Fusible link.
g. Igniter fuses.
h. Control circuit fuse (Power Board).
i. Power distribution board.
5. Inspect the external surfaces of the heat ex-
changer tubes for black carbon soot buildup by
placing a mirror between and under the burners
when the heater is firing. Remove any soot that
has collected on the tubes, and correct the cause.
NOTE: After installation and first start-up,
check the heat exchanger for black carbon soot
buildup after the following periods of operation:
24 hours, 7 days, 30 days, 90 days, and once
every 6 months thereafter.
6. If the heater is equipped with a pressure relief
valve, check for corrosion in and around the
valve. With the filter pump on, lift the release
lever on the top of the valve to make sure that
water runs freely through it. If corrosion is found,
replace the pressure relief valve. When replacing
the valve, be sure that the pump is off. Install the
valve so that the discharge is directed away from
any area that may be damaged by water.
7. Verify pressure switch operation. Press the
SELECT key to turn the heater 'OFF'. Turn off
the power to the heater at the breaker. Unplug
the pump relay from the power circuit board.
Restore power to the heater. Press the SELECT
key to set the heater to 'POOL'. The heater
must not come on. If the heater does start the
firing sequence, immediately press the SELECT