Page 1 0
C artridge Pool Filters - C L and C V S eries Filters
3.5 Clamp Installation
1. Be certain the o-ring is in position in the lower
sandwiching the o-ring between the two halves.
clamp in the proper orientation (See Fig. 9).
clamp ring halves touch each other, or are within
but do not overtighten as the
clamp can break. If unable to tighten as indicated,
call a service
technician immediately.
and retighten if necessary.
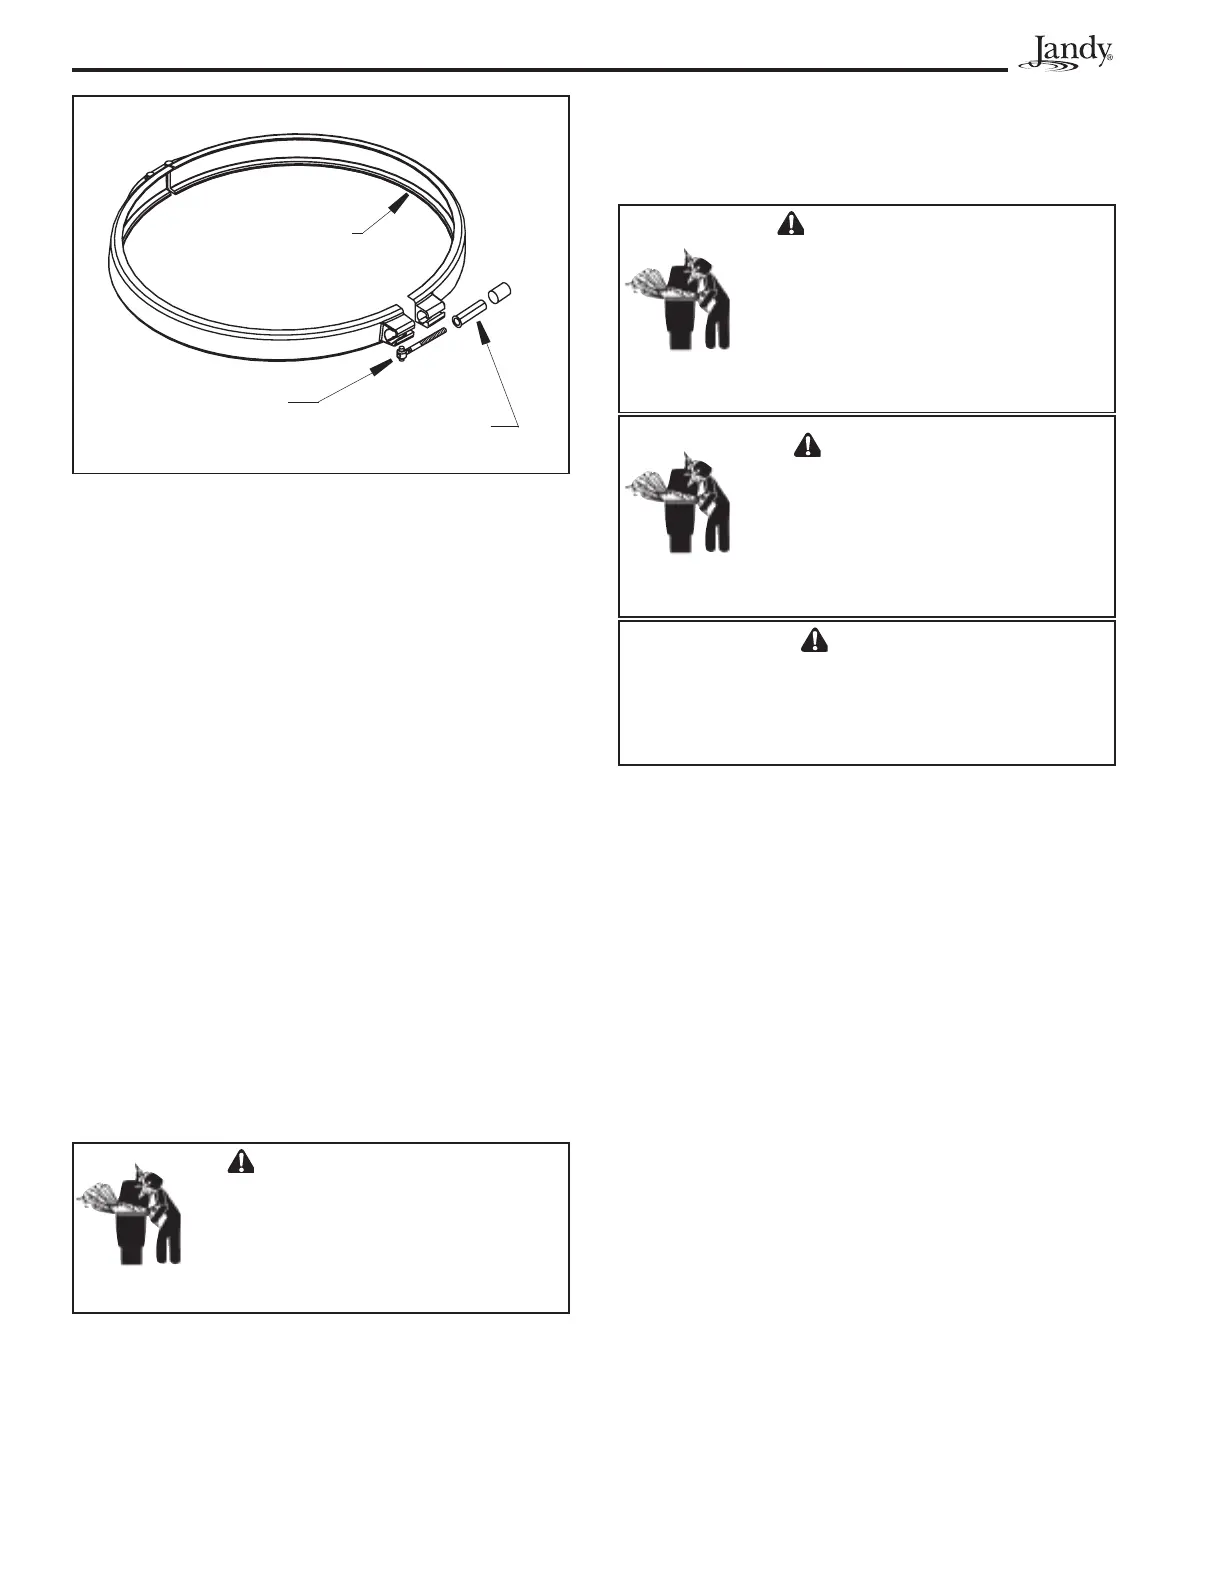
Figure 9 . Filter C lamp Ring
Cl a m p R i n g
" T " N u t a n d
T h r e a d e d R o d
T i g h t e n i n g N u t
w / S h o u l d e r
3. Check that the tank clamp is correctly seated and
tight (See Figs. 9 and 10).
basket with water to prime the system. Replace the
lid. (You may have to do this several times on new
and seasonal start-ups.)
5. Completely open the air release valve on the
the back of the assembly fully counterclockwise
(do not remove the knob).
were installed in the system.
7. Stand clear of the lter and start the pump to
circulate water through the system. When a steady
stream of water starts to come out of the air release
valve, close the valve.
8. Watch the pressure gauge to be sure that the
pressure does not exceed 50 psi (with clean
cartridges). If the pressure approaches 50 psi,
immediately turn the pump off and clean the
troubleshooting guide in Section 8 for possible
causes and solutions.
W A RN I N G
F o l l o w t h e se i n st r u ct i o n s ca r e f u l l y .
I m p r o p e r cl a m p i n st a l l a t i o n ca n ca u se
t h e f i l t e r l i d t o b e b l o w n o f f , w h i ch c a n
r e su l t i n d e a t h , se r i o u s p e r so n a l i n j u r y ,
o r p r o p e r t y d a m a g e .
C A U T I O N
DO N O T o p e r a t e f i l t e r a t w a t e r t e m p e r a t u r e s a b o ve
105°F(40.6°C).Watertemperaturesabovethe
m a n u f a ct u r e r ' s r e co m m e n d a t i o n s w i l l sh o r t e n t h e
l i f e sp a n o f t h e f i l t e r a n d vo i d t h e w a r r a n t y .
W A RN I N G
N E V E R st a r t p u m p w h i l e st a n d i n g
withinfive(5)feetofthefilter.Starting
t h e p u m p w h i l e t h e r e i s p r e ssu r i ze d a i r
i n t h e syst e m ca n ca u se t h e f i l t e r l i d t o
b e b l o w n o f f , w h i ch ca n ca u se d e a t h ,
se r i o u s p e r so n a l i n j u r y o r p r o p e r t y
d a m a g e .
W A RN I N G
N E V E R o p e r a t e t h e f i l t e r syst e m a t
morethan50psiofpressure.Operating
thefiltersysteminexcessof50psican
ca u se t h e f i l t e r l i d t o b e b l o w n o f f , w h i ch
ca n ca u se d e a t h , se r i o u s p e r so n a l i n j u r y
o r p r o p e r t y d a m a g e .
Section 4. Start-Up and Operation
N O T E T h i s se ct i o n a p p l i e s t o b o t h n e w p o o l a n d
se a so n a l st a r t - u p .
1. Turn off the pump. Switch off the circuit breaker
to the pump motor.