Page 20
Quilt Maker Pro 18 User Manual
201704
The Janome Quilt Maker Pro 18 has touch-screen
displays on the front and rear handlebars. Settings may
be changed at either of these locations.
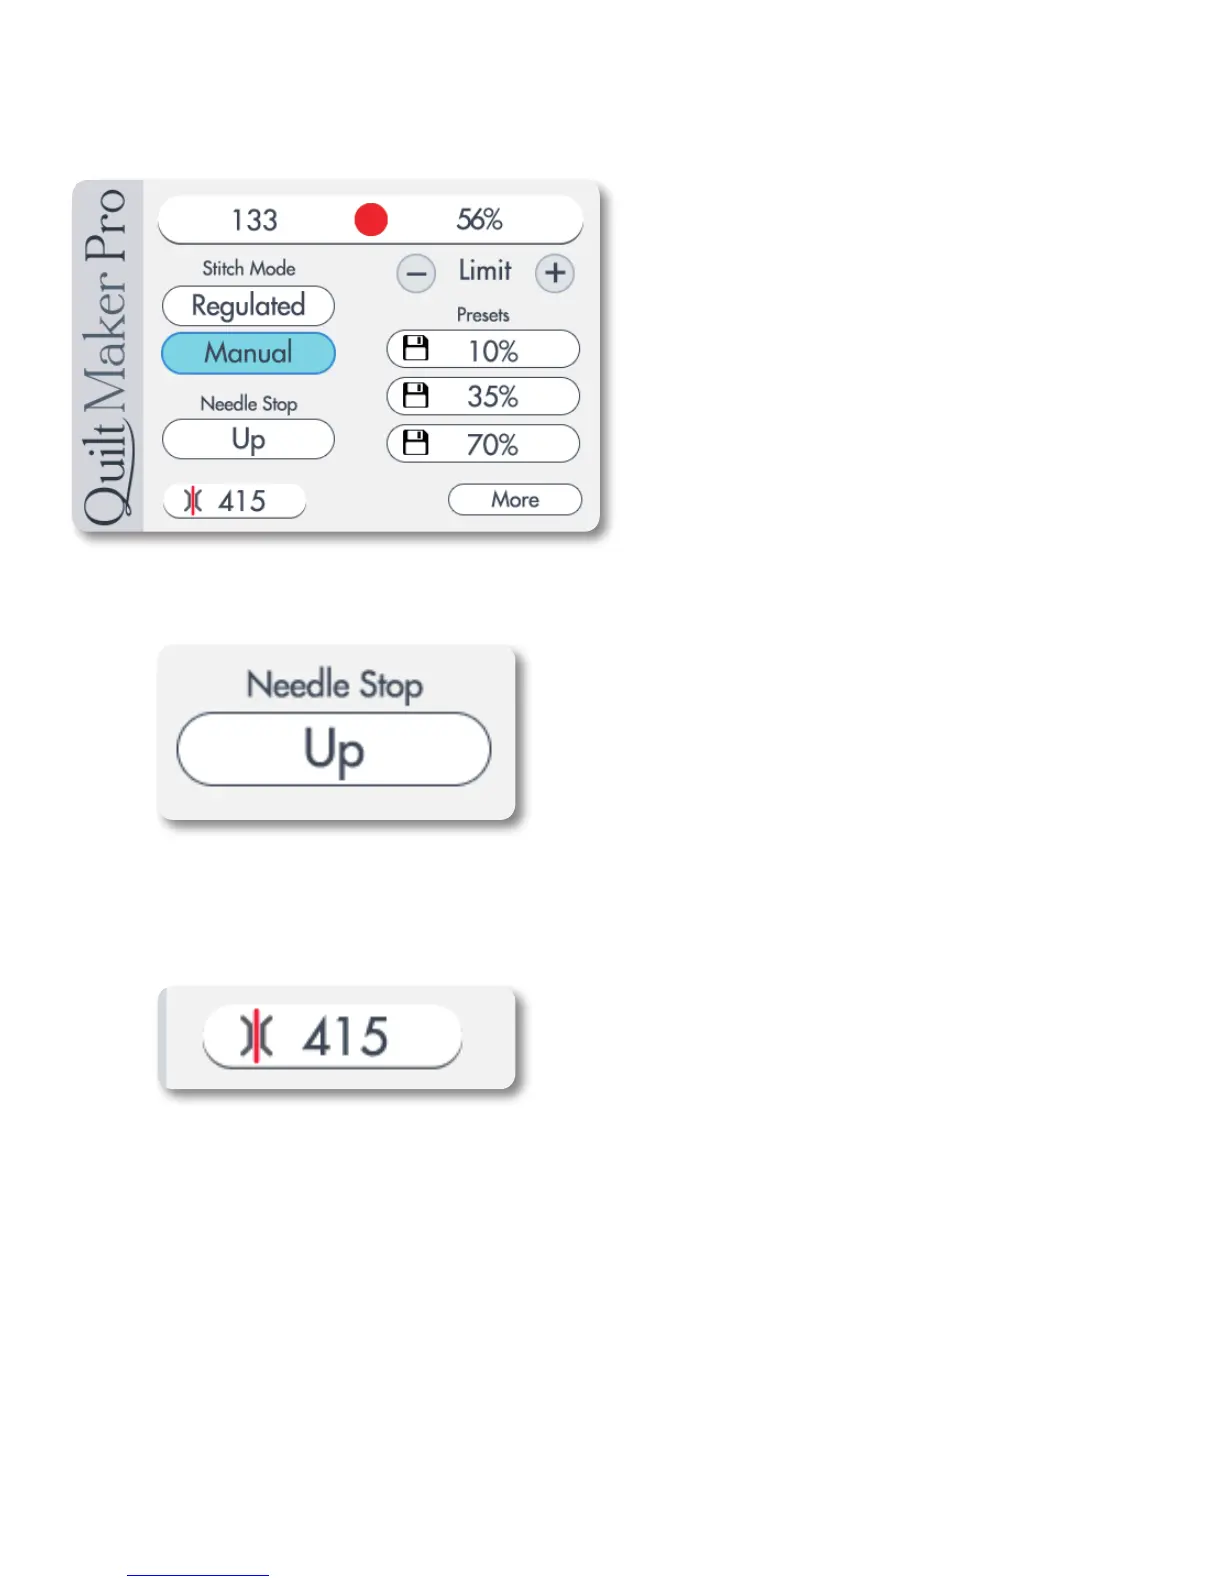
Main Screen
Manual Mode Screen
Button Functions:
Pressing the “Regulated” button while in the Manual
Mode Screen will toggle to the Regulated Mode Screen.
The current stitching mode is highlighted in blue when
activated. Different options are available depending
upon which mode the system is in. (Figure 23)
Needle Stop
The Needle Stop setting enables you to specify whether
you want the needle to end in the up or down position
when you stop quilting (Figure 24). If you select Down,
when you press the stop button on the right handlebar,
the needle ends in the down position. If you select Up,
the needle ends in the up position when you press the
stop button on the right handlebar. Switch between
the up and down position by pressing the Needle Stop
button.
Easy-Set Tension
The tension box (Figure 25) on the Main Screen shows
the current tension setting as a numeric value. As you
turn the tension dial clockwise to tighten the top tension,
the number increases in increments of five. As you turn
the tension dial counterclockwise to loosen the top
tension, the number decreases in increments of five. The
faster you turn the dial, the faster the numbers increase
or decrease.
After setting the bobbin tension, test the top tension
by stitching on a fabric scrap on the edge of the quilt
batting and backing. Increase or decrease as needed
until you have achieved balanced tension. Make a note
of the type of thread (weight, brand, color) you’re using
and the tension value. You will be able to quickly and
easily set the tension when you use this same thread
again in the future.
Using the Touch Screen Displays on the Handlebars
Machine and Handlebar Menus
Figure 23
Figure 24
Figure 25