Page 48
Quilt Maker Pro 18 User Manual
201704
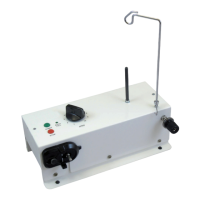
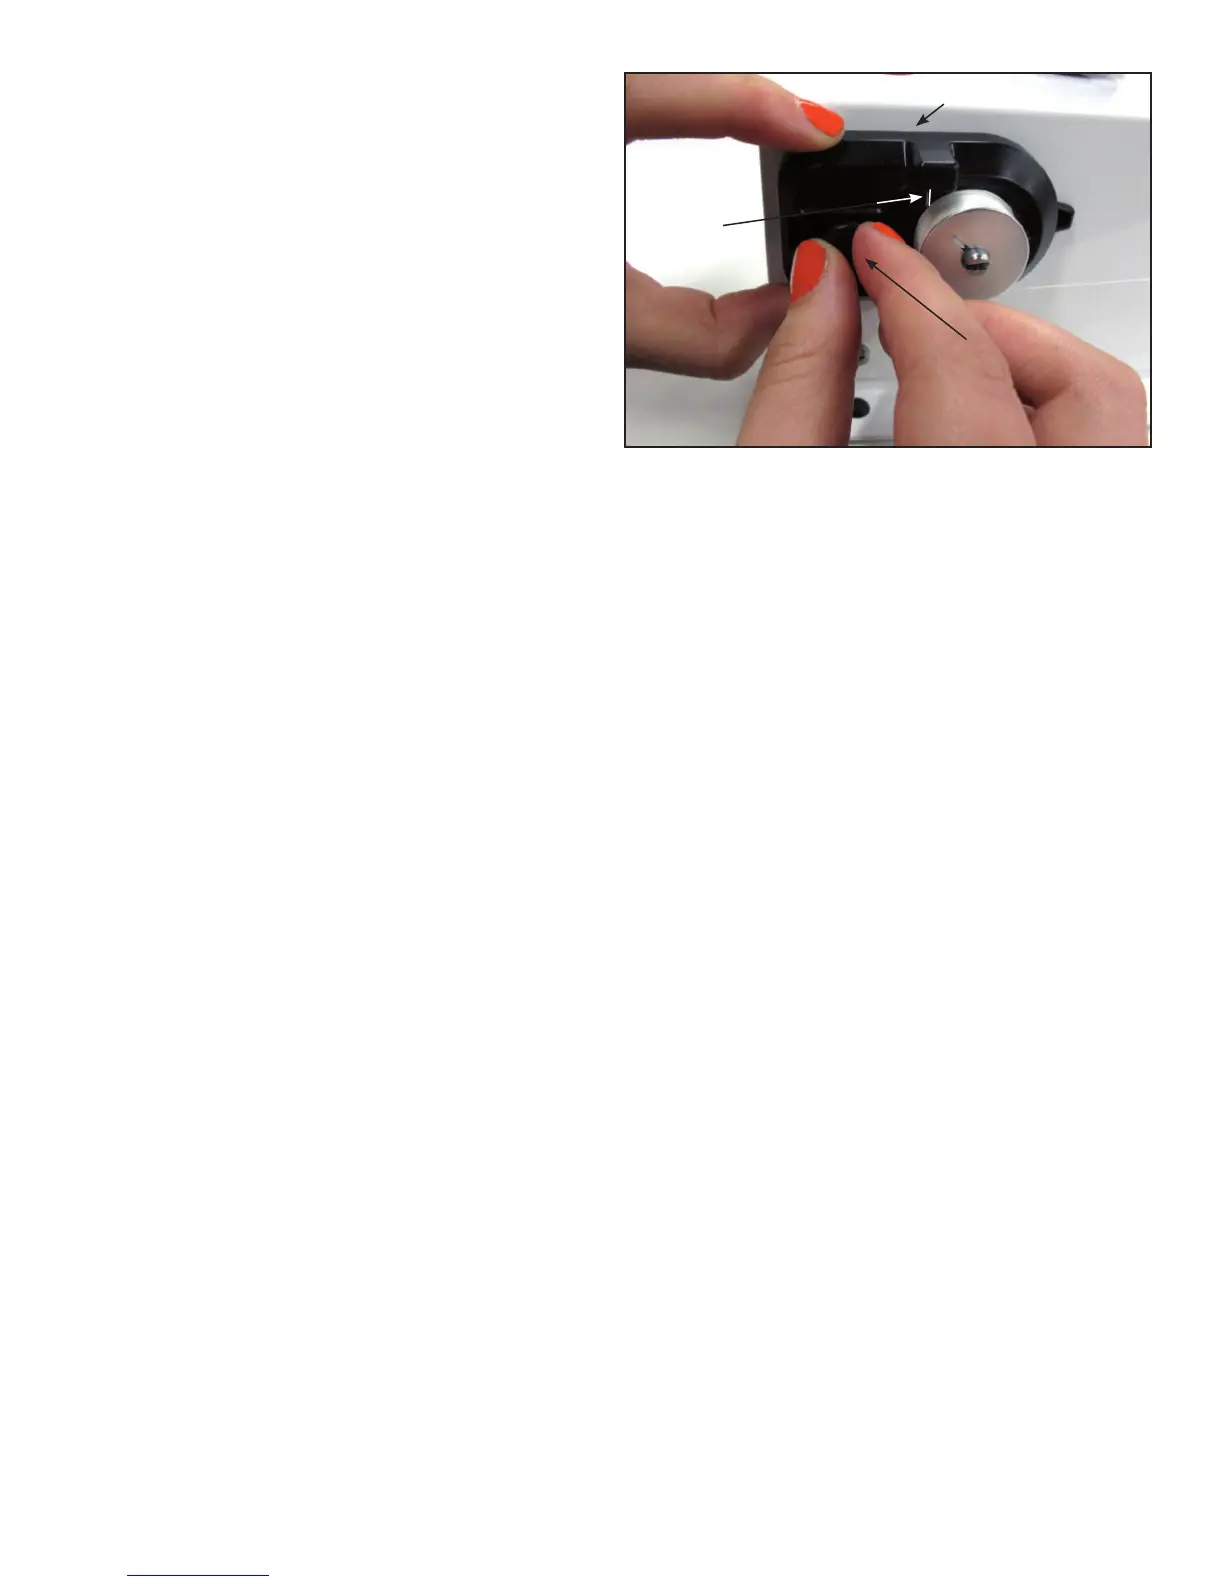
Adjusting the Bobbin Sensor
Assembly
The Stop Sensor is adjusted at the factory for an M-class
bobbin with bobbin weight (fine) thread. If you prefer
more or less thread on your bobbin, the sensor can be
changed with a simple procedure.
1. Fill a sample bobbin with your chosen thread, allowing
the bobbin winder to stop automatically.
2. If the bobbin was wound with too much thread, loosen
the bobbin stop sensor’s adjustment screw enough to
be able to move the sensor assembly (Figure 10).
Move the sensor assembly toward the bobbin, until the
embossed line on the assembly reaches to a position
just before where you want the bobbin to stop filling.
Retighten the adjustment screw.
3. Place an empty bobbin on the bobbin post, thread the
Bobbin Winder and press the start (green) button to
start the winder. When the sensor stops the winder,
press the green button until the bobbin is as full as
you want.
4. Re-adjust the sensor by loosening the adjustment
screw enough to be able to move the sensor assembly.
Move the assembly until the LED indicator turns on,
then move the assembly back slightly and tighten the
screw.
Bobbins will now fill with thread to your chosen
amount of fullness, as long as you are filling the same
size bobbin.
5. You have the flexibility of resetting the sensor for
different bobbins and thread types by following Steps
1-4 above.
Sensor Assembly
Adjustment Screw
Figure 10
Embossed
Line