11
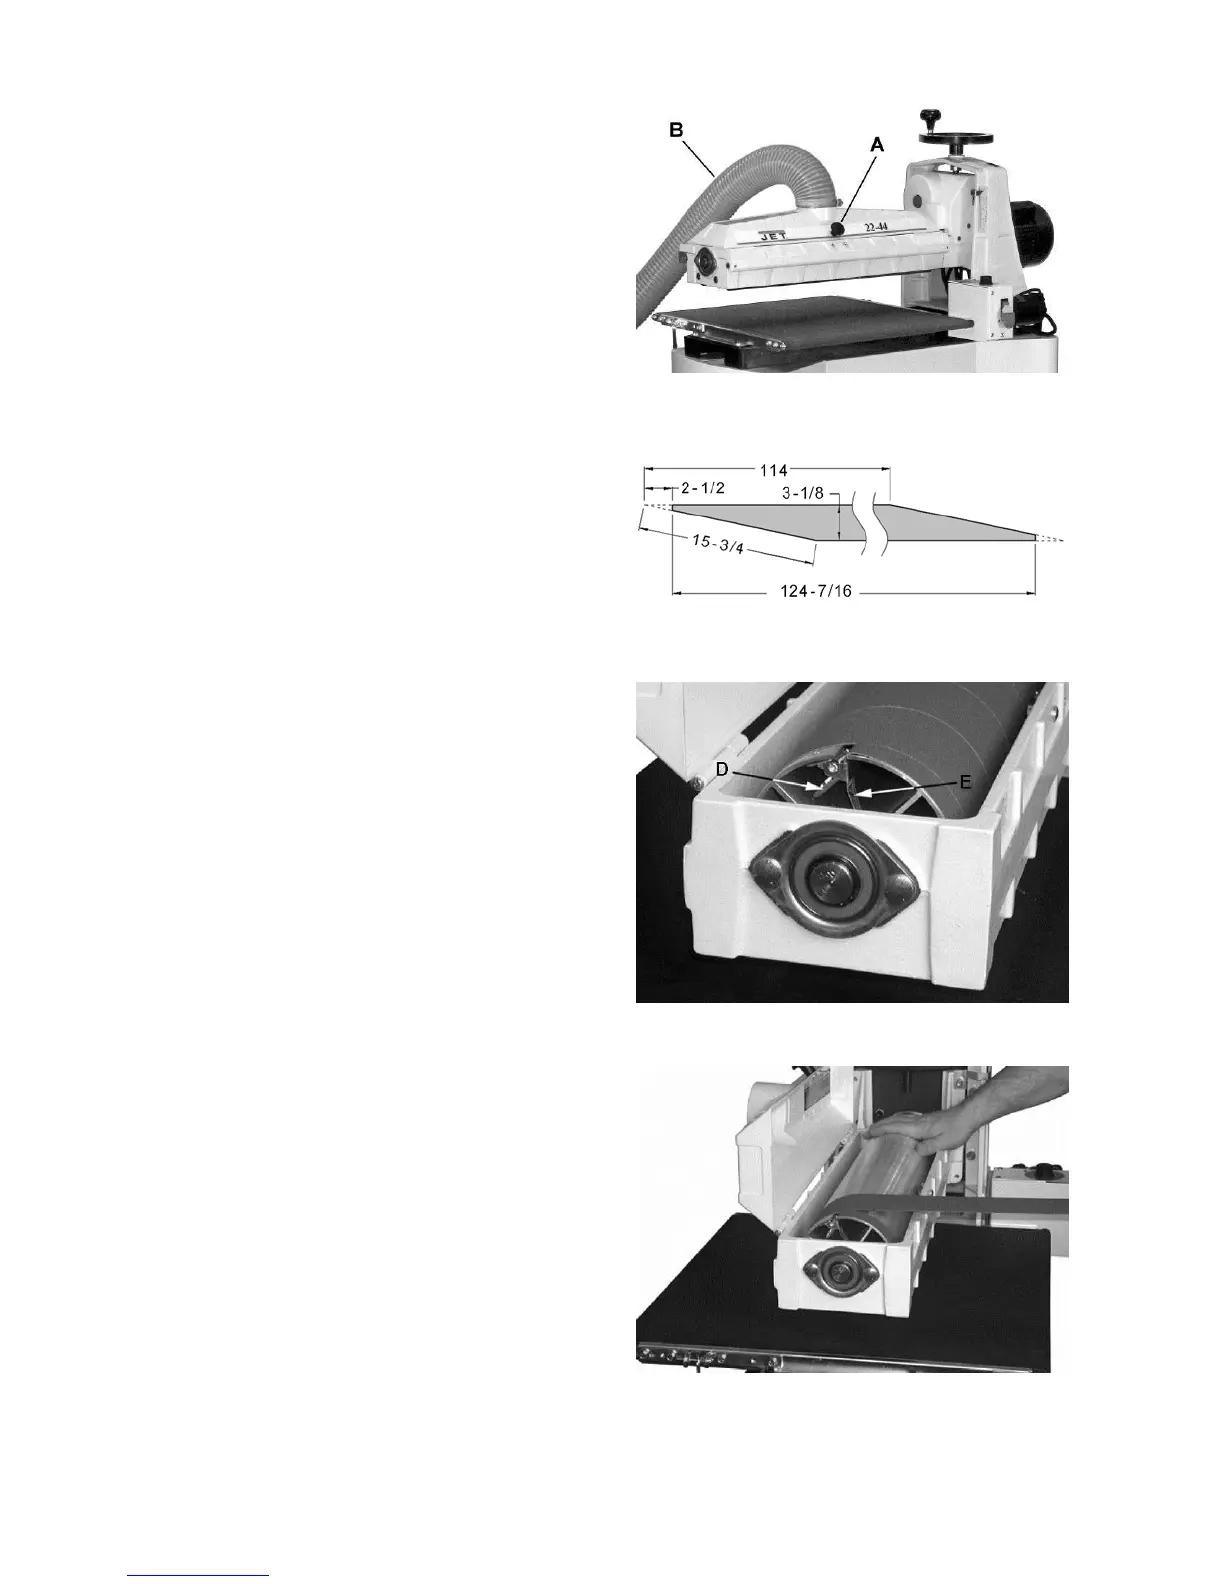
Dust Cover
To open the dust cover, push in on the knob
(A, Fig. 7) and lift. The latch can be adjusted using
the screw behind it.
Dust Collection
Dust collection is mandatory for a safe work
environment and extended abrasive life. The
22-44OSC is equipped with a 4” dust collection port
at the top of the dust cover. It is designed to be
used with standard 4” dust collection hose
(B, Fig. 7) connected to a high volume dust
collector (minimum 500 CFM) as shown.
JET offers a variety of Dust Collectors and Air
Filtration Units. Contact your local distributor for
more information.
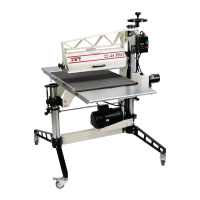
Installing Abrasives
An 80-grit, 3-1/8” wide abrasive strip is already
installed on the drum of your sander.
Proper attachment of the abrasive strip to the drum
is critical to achieving top performance from your
drum sander. Abrasive strips do not have to be pre-
measured. The end of the roll is first tapered and
attached to the left (outboard) side of the drum.
Then the strip is wrapped around the drum, and the
second taper is made for attachment to the right
(inboard) side of the drum.
Note: You can use the original abrasive strip
mounted to the drum as a template for cutting your
own strips.
1. Mark and cut a taper at one end of the roll as
shown in Figure 8. Because the tapered end
should use all of the left (outboard) slot width,
its end must be trimmed back as shown.
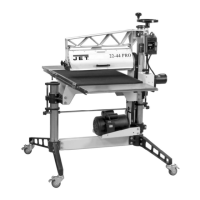
2. Raise the fastener lever (D, Fig. 9) on the
outboard end of drum, and insert the tapered
end of the abrasive (E, Fig. 9) so that it uses
most of the width of the slot. Release the
fastener lever to securely hold the strip end to
the fastener.
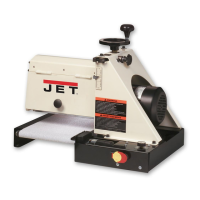
3. Begin wrapping the strip around the drum. The
tapered edge of the strip end should follow the
edge of the drum.
4. Continue to wrap the abrasive in a spiral
fashion by rotating the drum with one hand and
guiding the strip with the other (Figure 10).
Successive windings of the strip should be
flush with previous windings without any
overlap.
Figure 7
Figure 8
Figure 9
Figure 10