SECTION 3 - CHASSIS, PLATFORM & SCISSOR ARMS
3121325 – JLG Lift – 3-13
3.7 ENGINE COMPARTMENT
Hood Assembly
NOTE: Removing the hoods will allow for easier access to
the components inside the engine compartment and
valve compartment.
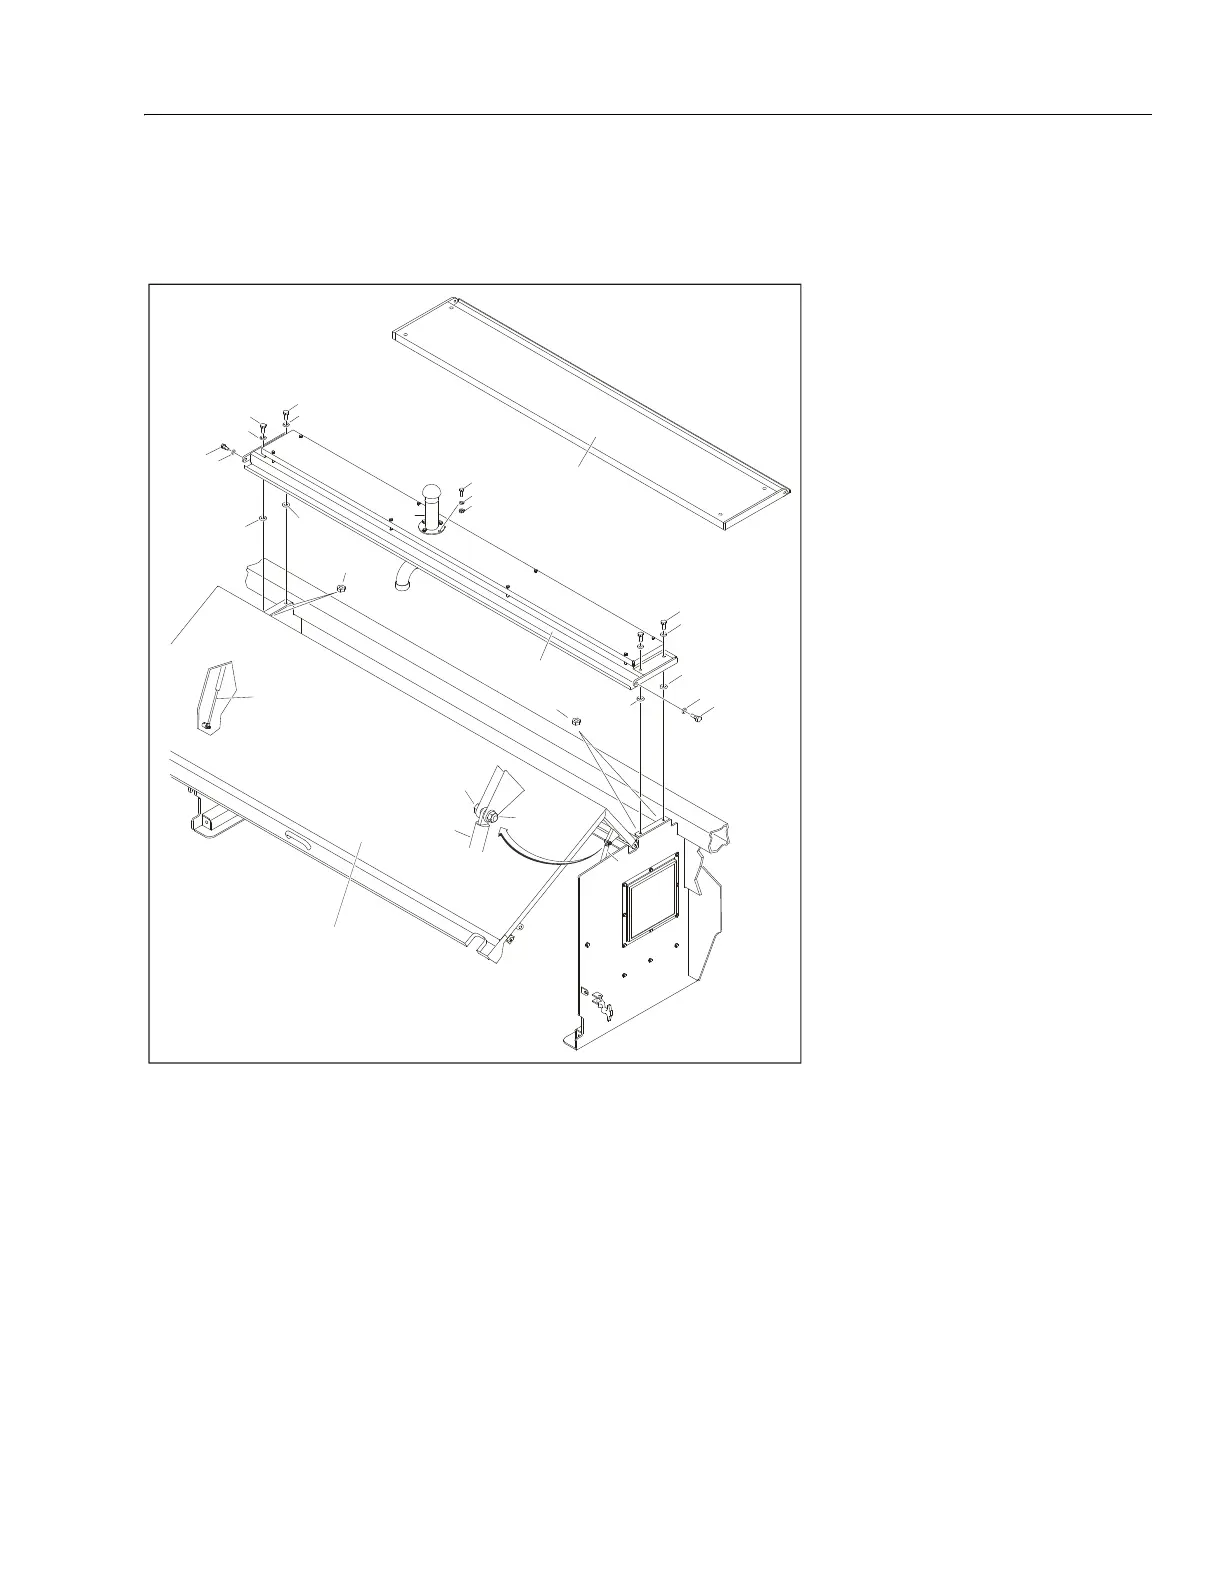
1. Open and secure Hood (1).
2. Remove Bolt (3) and Nut (4) on both Gas Springs
(2). Return Hood to closed position.
3. Remove both Bolts (7) and Flatwashers (8) connect-
ing hoods to the Cabinet Top Panel (5 & 6).
NOTE: Step 4 applies only to the Engine Side Compart-
ment.
4. Remove the Air Intake Pipe (9) by removing the four
Bolts (10), Flatwashers (11), and Locknuts (12).
5. Remove the Cabinet Top Panel (5 & 6) by removing
the 4 Bolts (13), eight Flatwashers (14), and four
Nuts (16).
NOTE: Follow the steps in reverse order to re-attach the
hood and top panel.
ENGINE SIDE
VALVE SIDE
1
2
2
2
3
4
8
7
15
5
10
11
12
9
15
15
16
13
14
7
8
13
14
6
16
1. Hood
2. Gas Spring
3. Bolt, M8 x 30mm
4. Nut, M8
5. Cabinet Top Panel (Left)
6. Cabinet Panel (Right)
7. Special Bolt
8. Flatwasher, M12
9. Air Intake Pipe
10. Bolt, M8 x 25mm
11. Flatwasher, M8
12. Locknut, M8
13. Bolt, M10 x 30mm
14. Nut, M10
15. Flatwasher, M10
16. Nut, M10
Figure 3-10. Hood Assembly



 To Next Page