5,000 μm. Because vacuum pumps have the capacity to overcome the boiling rate of the trapped
moisture, do not go below this pressure at this point.
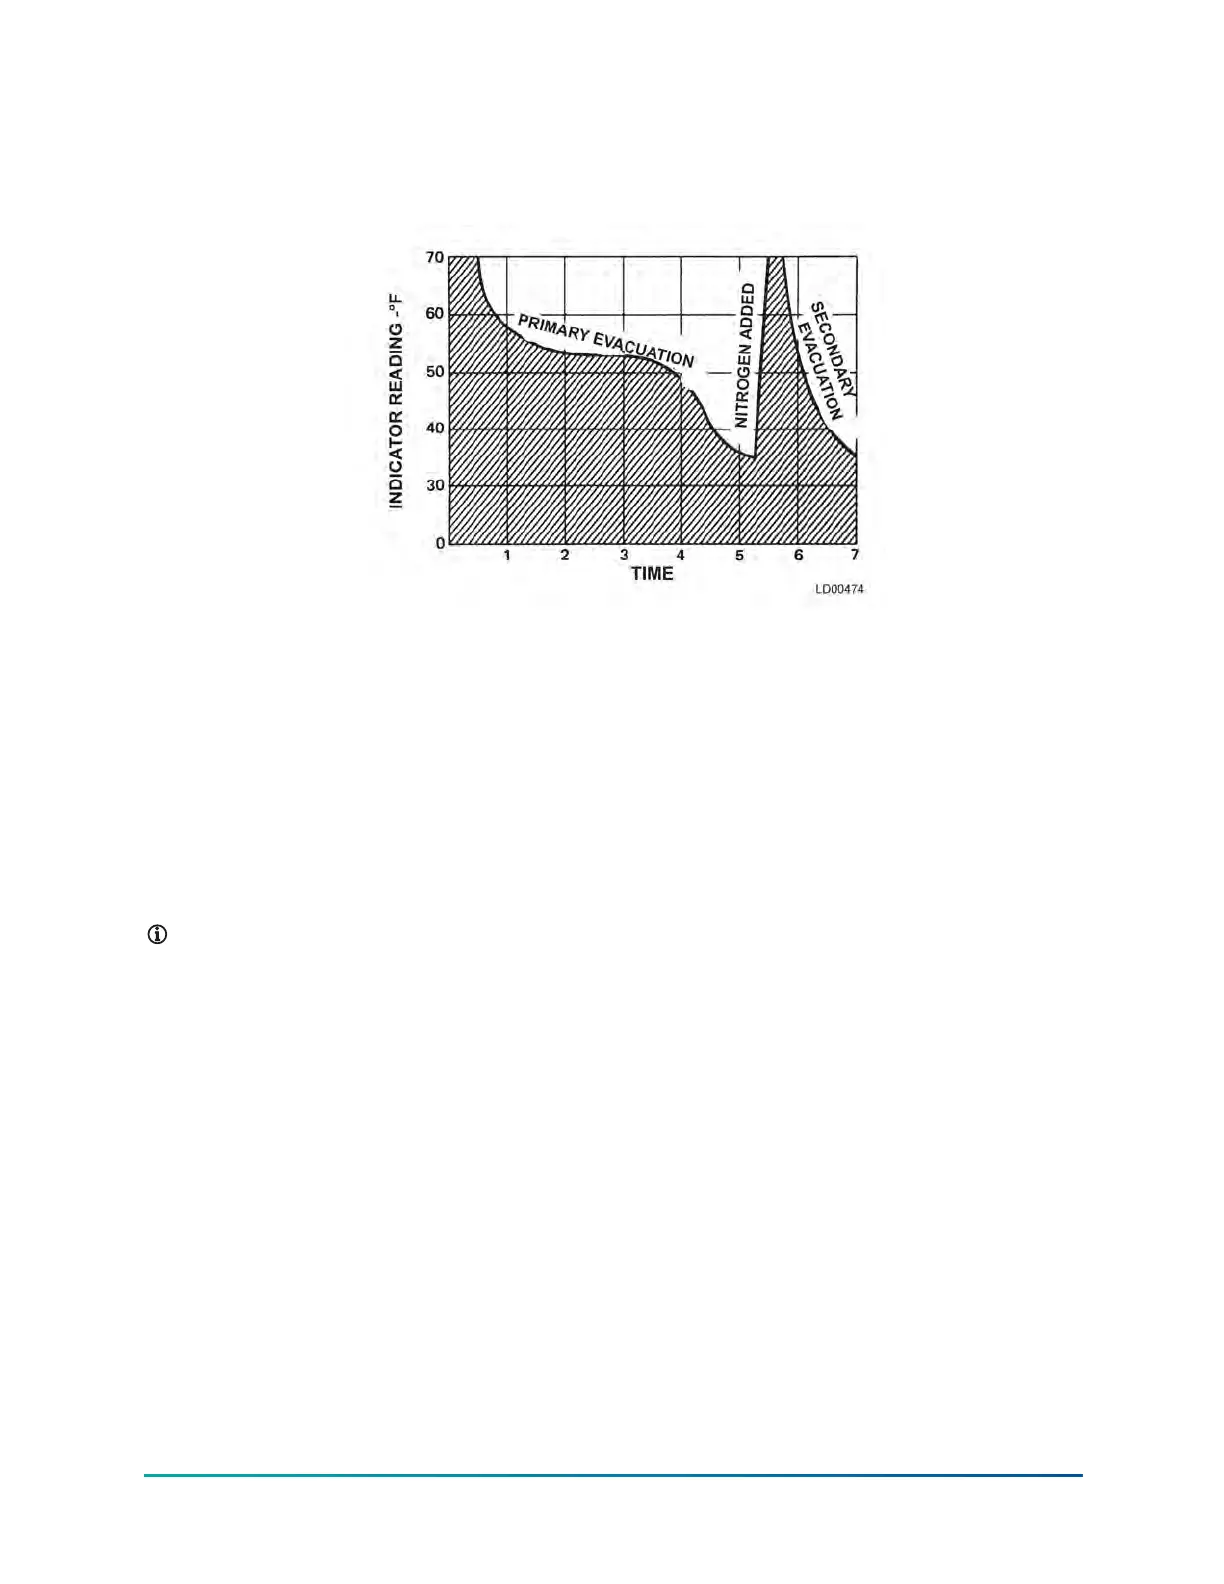
Figure 75: Saturation curve
When this point is reached, practically all of the air has been evacuated from the system, but there
is still a small amount of moisture left. To provide a medium for carrying this residual moisture to
the vacuum pump, nitrogen introduce into the system to bring it to atmospheric pressure and the
indicator temperature returns to approximately ambient temperature. Close off the system again,
and start the second evacuation. The relatively small amount of moisture left is carried out through
the vacuum pump and the temperature or pressure shown by the indicator drops uniformly until it
reaches a temperature of 35°F (1.6°C) or a pressure of 5000 μm.
When the vacuum indicator registers this temperature or pressure, it is a positive sign that the
system is dehydrated to the recommended limit. If this level cannot be reached, it is evident that
there is a leak somewhere in the system. Before you can evacuate the system to 35°F (1.6°C) or
5,000 μm, correct any leaks.
Note: During the primary or dehydration evacuation, keep a careful watch on the vacuum
level, and do not let it fall below 5,000 μm which is equivalent to 35°F (1.6°C).
If the pressure temperature relationship is allowed to fall to 32°F (0°C), the water in the system
freezes, and the result is a faulty pressure reading. Use the following steps as a guide to the steps
for dehydration:
1. Connect a high capacity vacuum pump, with indicator, to the system using the vapor
connections as shown in Figure 75 and start the pump.
2. Open wide all system valves. Make sure that all valves to the atmosphere are closed with flare
caps in place if applicable.
3. Operate the vacuum pump until a pressure of 5,000 μm is reached. See Table 102 for
corresponding pressure and temperature values to avoid freezing any trapped moisture in the
system.
4. Close the system charging valve connection to the vacuum pump to start the 8-hour vacuum
hold test. Note the time and pressure.
5. Hold the vacuum obtained in Step 4 in the system for 8 hours. Even a slight rise in pressure can
indicate a leak , the presence of moisture, or both. It is important to check for pressure change
with the chiller at the same temperature. Pressure changes proportional to temperature and
can affect results.
YMC
2
Mod B with OptiView Control Center
152
 Loading...